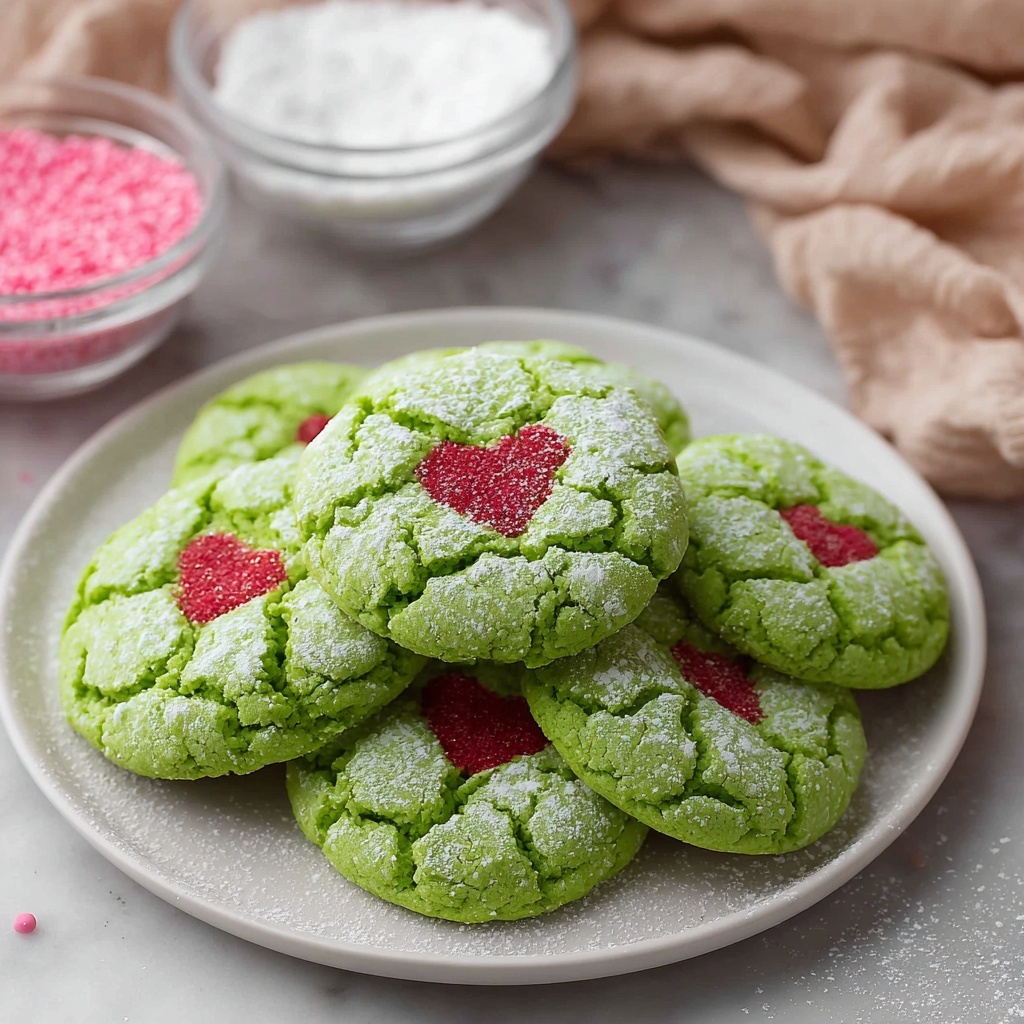
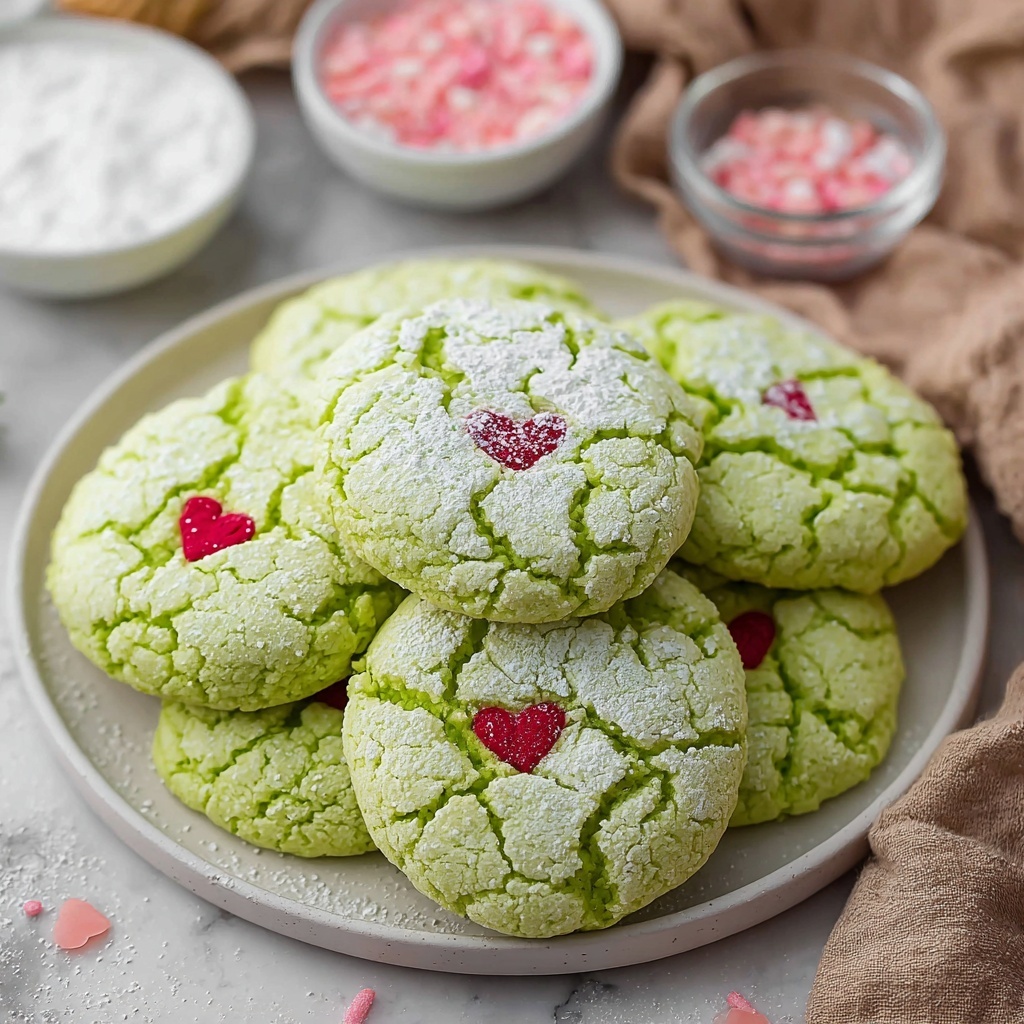
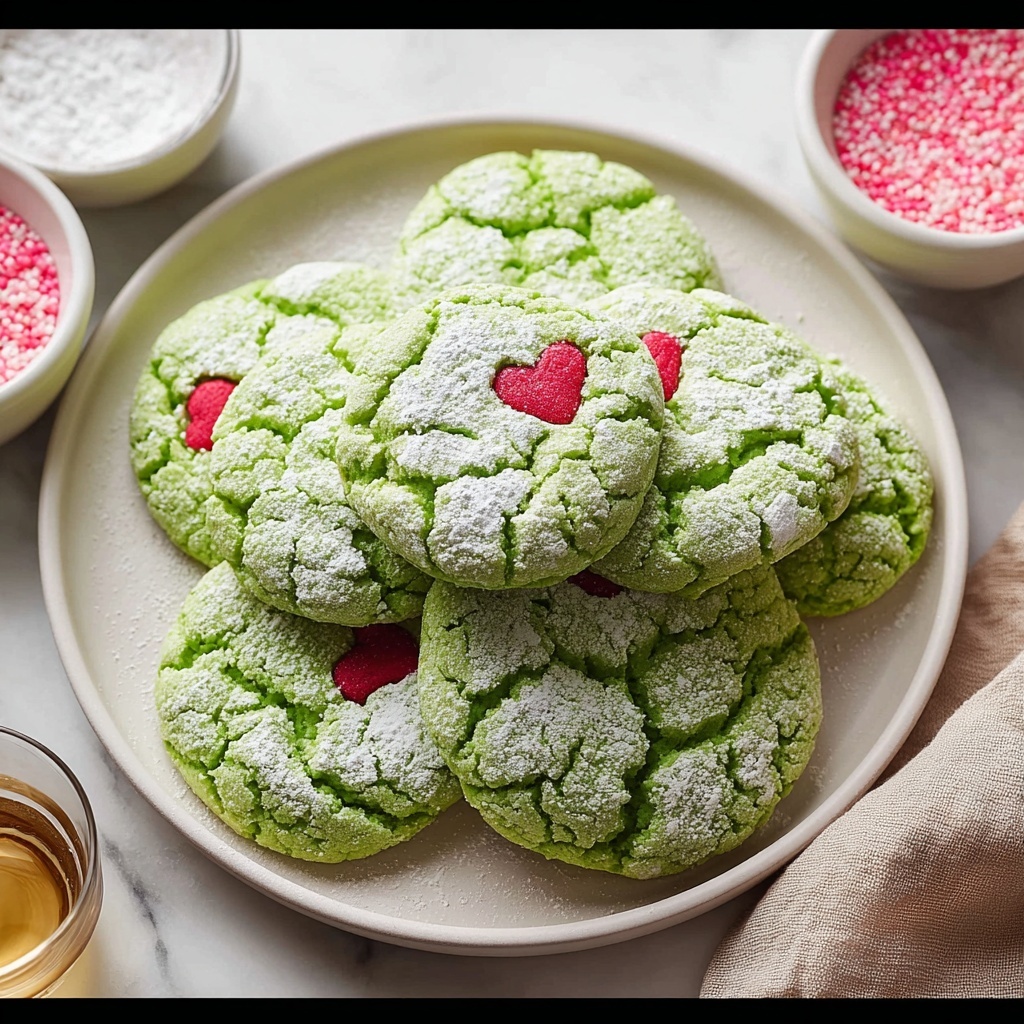
If you’re looking for a festive and fun treat to brighten up the holiday season, the Grinch Cookies Recipe is exactly what you need. These vibrant green, soft, and chewy cookies are irresistibly delicious, with a sugary coating and a sweet candy heart centerpiece that perfectly captures the playful spirit of everyone’s favorite holiday mischief-maker. Easy to make and guaranteed to bring smiles, this Grinch Cookies Recipe turns baking into a joyful celebration with its bright colors and delightful flavors.
Ingredients You’ll Need
These ingredients are wonderfully simple yet essential in creating the perfect texture, color, and flavor for your Grinch Cookies Recipe. Each component plays its part in making these cookies soft, sweet, and beautifully green.
- White cake mix: The base that keeps these cookies soft and tender with a light crumb.
- Eggs (room temperature): Bind the ingredients together and add richness.
- Vegetable oil: Keeps the cookies moist and gives them a lovely soft bite.
- Vanilla extract: Adds a warm, comforting flavor that complements the sweetness perfectly.
- Green gel food coloring: Gives those Grinch-y green tones that make these cookies festive and fun.
- Powdered sugar: For coating, adding a delicate sweetness and a snow-like finish.
- Cornstarch: Mixed with powdered sugar to keep the dough from sticking and give the cookies a tender texture.
- Candy heart sprinkles: The charming little pop of red or pink that creates the perfect Grinch-inspired contrast and festive detail.
How to Make Grinch Cookies Recipe
Step 1: Mix Your Batter
Start by combining the white cake mix, eggs, vegetable oil, and vanilla in a large mixing bowl. Use your mixer on medium-low speed until everything is perfectly blended into a smooth dough. This creates the soft foundation for your delicious Grinch Cookies Recipe.
Step 2: Add the Signature Green Color
Add green gel food coloring a bit at a time, mixing until the dough turns a vibrant and festive shade of green. This step is the fun part—watch as your cookie dough transforms into delightful Grinch-green perfection!
Step 3: Chill the Dough
Cover the dough and pop it into the fridge for at least 20 minutes. Chilling makes the dough easier to handle and helps the cookies keep their shape while baking, so you get that perfect soft-yet-structured bite.
Step 4: Preheat Your Oven
Set your oven to 350°F (175°C) so it reaches the right temperature while your dough rests. A steady heat ensures these cookies bake evenly and develop their trademark slightly golden edges.
Step 5: Prep Your Baking Sheet
Grab a baking sheet and line it with parchment paper. This non-stick surface prevents your Grinch Cookies Recipe from sticking and helps them bake evenly.
Step 6: Prepare the Sugar-Cornstarch Mix
In a small bowl, stir together the powdered sugar and cornstarch. This sweet, tenderizing coating is key in giving your cookies that delightful, slightly crackled exterior.
Step 7: Form the Cookie Dough Balls
Using about 1.5 tablespoons of dough per cookie, roll the dough into smooth balls that are about 1½ inches in diameter. This uniform size helps ensure your cookies bake evenly and look beautifully consistent.
Step 8: Coat the Dough Balls
Roll each dough ball in the powdered sugar and cornstarch mixture. This extra layer of sweetness and soft texture really makes these Grinch Cookies Recipe stand out both visually and taste-wise.
Step 9: Flatten Slightly
Place the coated dough balls on your baking sheet about 2 inches apart, then gently press the top of each with your hand, a glass, or the bottom of a spatula. This creates the perfect flat surface for the next festive step!
Step 10: Add the Candy Heart
Press a candy heart into the center of each cookie with a little gentle pressure. These little hearts bring just the right bit of contrast and fun, making each cookie look like a playful Grinch holiday treat.
Step 11: Bake to Perfection
Bake your cookies for 8 to 10 minutes, keeping an eye out for slightly golden edges and dry tops. This timing ensures they are soft inside and pleasantly chewy throughout.
Step 12: Cool and Enjoy
Let the cookies cool on the baking sheet for three minutes, then transfer them to a wire rack. Cooling is essential so the cookies set perfectly, ready for you to enjoy that melt-in-your-mouth good holiday feeling.
How to Serve Grinch Cookies Recipe
Garnishes
For an extra festive look, sprinkle a little edible glitter or white sanding sugar over the candy hearts once the cookies are cool. It adds sparkle, like fresh snow on a Grinchy Christmas morning.
Side Dishes
Pair these cookies with a warm cup of hot cocoa or a glass of cold milk to balance the sweetness and provide the perfect cozy holiday snack experience.
Creative Ways to Present
Place your Grinch Cookies on a red or white decorative plate to really make that green pop. For gift-giving, stack a few in a clear cellophane bag tied with a playful red ribbon—it’s a charming and thoughtful holiday gift that friends and family will adore.
Make Ahead and Storage
Storing Leftovers
Keep leftover Grinch Cookies in an airtight container at room temperature for up to 5 days. This keeps them soft, fresh, and ready to enjoy whenever the Grinch cravings strike.
Freezing
You can freeze unbaked dough balls by placing them on a baking sheet until firm, then transferring to a freezer-safe bag. When ready to bake, thaw overnight in the fridge and continue with the recipe as usual.
Reheating
If your cookies have lost a bit of their softness, warm them in a low oven (about 300°F) for 3-5 minutes or microwave for 10 seconds to restore that fresh-baked sensation.
FAQs
Can I use a different cake mix flavor for this Grinch Cookies Recipe?
Absolutely! While white cake mix gives a neutral, sweet base perfect for bright colors, you can experiment with yellow or even lemon cake mix for a fun twist. Just keep in mind this will slightly change the flavor profile.
Why do I need to chill the dough?
Chilling firms the dough, making it easier to handle and preventing spread during baking. This ensures your cookies keep a nice thick shape and remain soft and chewy.
What if I don’t have green gel food coloring?
Gel coloring provides vibrant color without changing dough consistency, but if you only have liquid food coloring, use it sparingly to avoid making the dough too wet or sticky.
Can I substitute the candy hearts with something else?
Yes! Mini chocolate chips, red M&Ms, or small red candies also work wonderfully to create that festive pop and fit perfectly with the Grinch theme.
How do I make sure my cookies stay soft?
Use the correct amount of oil and avoid overbaking. Removing the cookies as soon as the edges turn lightly golden ensures a soft, tender cookie every time.
Final Thoughts
This Grinch Cookies Recipe is such a joyful way to celebrate the holidays while satisfying your sweet tooth with a pop of color and cheer. Whether baking for family, friends, or your own festive treat stash, these cookies bring fun and flavor together in perfect harmony. Give them a try and watch the smiles grow as everyone enjoys these irresistibly charming bites!
Print
Grinch Cookies Recipe
- Prep Time: 10 minutes
- Cook Time: 10 minutes
- Total Time: 30 minutes
- Yield: 15 cookies
- Category: Dessert
- Method: Baking
- Cuisine: American
Description
Delight in these festive Grinch Cookies that are soft, chewy, and bursting with vibrant green color. Made with a simple white cake mix base, these cookies are rolled in a powdered sugar and cornstarch mixture and topped with candy heart sprinkles for a fun, holiday-inspired treat perfect for any Christmas celebration.
Ingredients
Cookie Dough
- 15.25 ounces white cake mix
- 2 eggs (room temperature)
- 1/3 cup vegetable oil
- 1 teaspoon vanilla extract
- Green gel food coloring (as needed for desired shade)
Coating
- ¾ cup powdered sugar
- ¼ cup cornstarch
Decoration
- Candy heart sprinkles
Instructions
- Combine Wet and Dry Ingredients: Add the white cake mix, eggs, vegetable oil, and vanilla extract to a large mixing bowl. Mix on medium-low speed until the ingredients are fully combined and a smooth dough forms.
- Add Food Coloring: Gradually add green gel food coloring to the dough, mixing thoroughly after each addition until you achieve the desired vibrant green shade.
- Chill the Dough: Cover the dough with plastic wrap or a bowl and chill in the refrigerator for at least 20 minutes to firm up, making it easier to handle and shape.
- Preheat Oven: Once chilled, preheat your oven to 350°F (175°C) to prepare for baking the cookies.
- Prepare Baking Sheet: Line a baking sheet with parchment paper to prevent sticking and ease cleanup.
- Mix Coating: In a small bowl, combine the powdered sugar and cornstarch thoroughly; set this mixture aside for rolling the dough balls.
- Shape Dough Balls: Scoop approximately 1.5 tablespoons of dough per cookie and roll each portion between your palms to create smooth spheres about 1½ inches in diameter.
- Coat Dough Balls: Roll each dough ball in the powdered sugar and cornstarch mixture until fully coated. This will give the cookies a crackly, snowy look after baking.
- Arrange on Baking Sheet: Place the coated dough balls onto the prepared baking sheet, spacing them about 2 inches apart to allow for spreading.
- Flatten and Add Decoration: Gently press down each dough ball using your hand, a glass, or the bottom of a spatula to slightly flatten it. Press a candy heart sprinkle into the center of each cookie using gentle pressure to adhere.
- Bake: Bake the cookies in the preheated oven for 8 to 10 minutes, or until the edges just start to turn a light golden color and the tops appear dry.
- Cool: Remove the baking sheet from the oven and let the cookies rest on the sheet for 3 minutes. Then transfer the cookies to a wire rack to cool completely before serving.
Notes
- For best results, ensure eggs are at room temperature before mixing to create a smooth dough.
- Chilling the dough is key to handling and shaping the cookies easily and preventing excessive spreading.
- Use gel-based food coloring for a more vibrant green without affecting dough consistency.
- Store cookies in an airtight container at room temperature for up to 4 days.
- These cookies can be frozen before baking; just thaw and bake as directed.