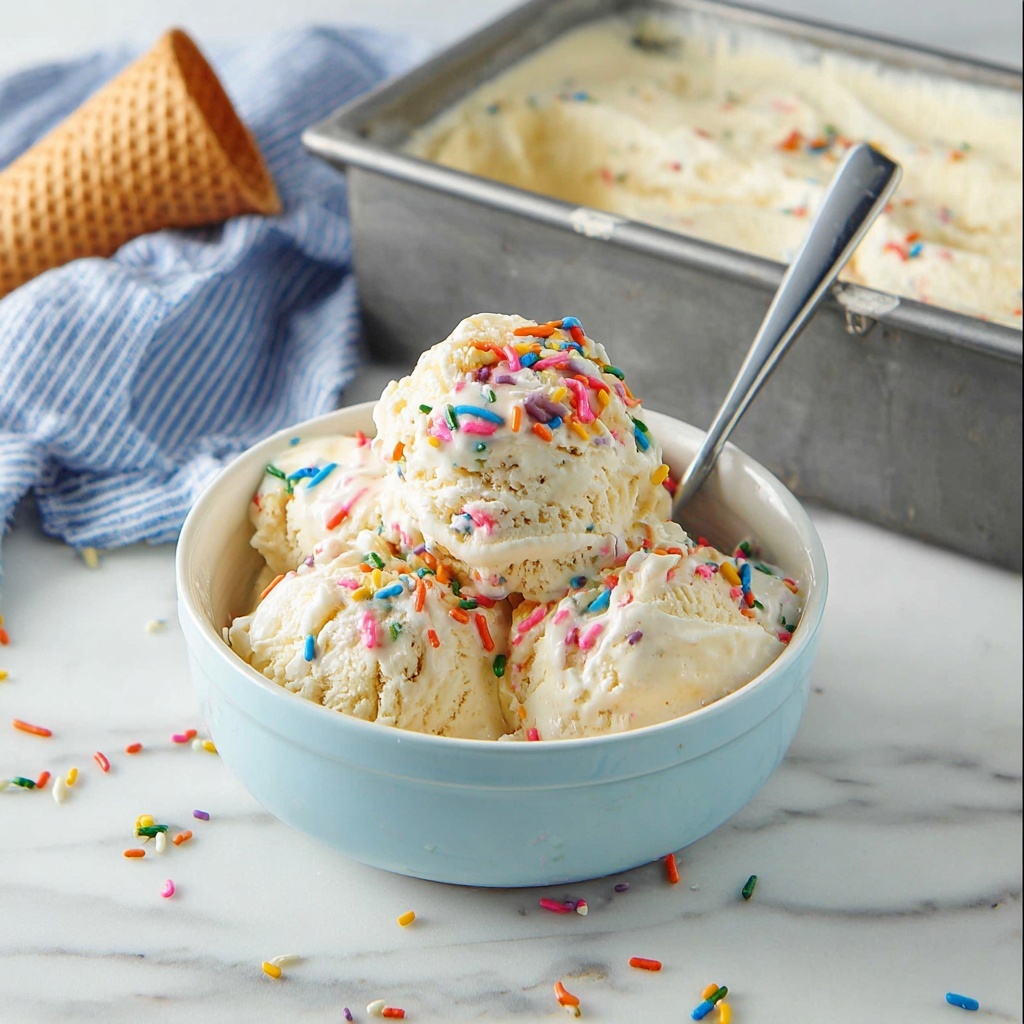
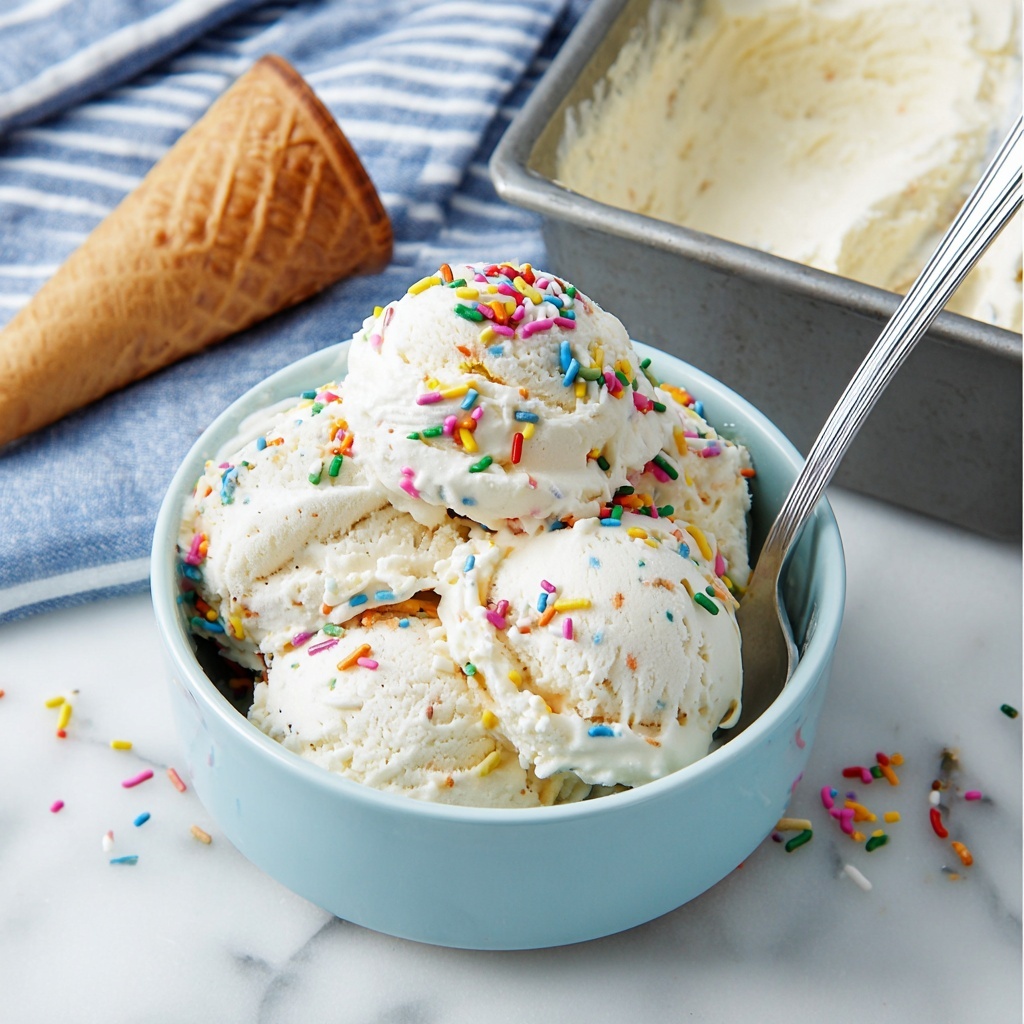
There is something beautifully simple and irresistibly delightful about homemade ice cream, especially when you discover a No Churn Vanilla Ice Cream Recipe that lets you skip the machine yet delivers creamy perfection. This recipe captures the essence of classic vanilla ice cream with just a few easy-to-find ingredients, blending rich heavy cream with sweetened condensed milk and aromatic vanilla. The result is a smooth, luscious treat that’s perfectly scoopable straight from your freezer, making it a go-to dessert for any occasion when you want something sweet and cool without fuss.
Ingredients You’ll Need
The magic of this No Churn Vanilla Ice Cream Recipe lies in its simplicity and quality ingredients. Each component plays a key role: the cold heavy cream provides the creamy, airy texture, the sweetened condensed milk adds sweetness and a silky richness, and the vanilla extract brings that warm, familiar flavor. Even the pinch of sea salt is crucial to balance and elevate the taste, turning this into a dessert you’ll crave.
- 2 cups cold heavy cream: This creates the creamy, luxurious base and whips up to airy softness.
- 14 ounces sweetened condensed milk: Acts as both sweetener and binder, giving body and smooth texture.
- 1 teaspoon vanilla extract: Infuses the ice cream with classic, comforting vanilla flavor.
- Pinch of sea salt: Enhances sweetness and rounds out the flavors beautifully.
- Sprinkles and ice cream cone (optional): For fun, colorful presentation and serving.
How to Make No Churn Vanilla Ice Cream Recipe
Step 1: Chill Your Loaf Pan
Start by placing a loaf pan in the freezer. This ensures the ice cream mixture sets evenly and quickly once poured in, giving your dessert that wonderfully firm yet scoopable texture that everyone loves.
Step 2: Whip the Heavy Cream
Using an electric mixer, whip the cold heavy cream until stiff peaks form. This step is all about incorporating air, which will make your ice cream delightfully light and creamy without any ice crystals.
Step 3: Fold in Sweetened Condensed Milk Mixture
Gently fold in the sweetened condensed milk, vanilla extract, and a pinch of sea salt into the whipped cream. Take your time and fold carefully to keep all that beautiful air trapped inside the mixture—it’s what gives your ice cream that dreamy texture.
Step 4: Pour Into Chilled Pan
Remove your chilled loaf pan from the freezer and pour the vanilla ice cream mixture right in. Smooth the top gently with a spatula so it freezes evenly.
Step 5: Freeze Until Set
Place the filled loaf pan back in the freezer, making sure it rests on a level spot. Let it chill for 6 to 8 hours until fully set. When it’s ready, scoop directly into cones or bowls, add sprinkles if you like, and dig in!
How to Serve No Churn Vanilla Ice Cream Recipe
Garnishes
Sprinkles, chocolate chips, crushed nuts, or even fresh fruit can be sprinkled on top to add a fun crunch and burst of flavor to your ice cream. A drizzle of caramel or hot fudge sauce elevates this simple treat into a party-worthy dessert.
Side Dishes
This vanilla ice cream pairs beautifully with warm desserts like brownies, apple crisp, or a slice of pie. Its cool, creamy texture contrasts perfectly with hot, gooey sweets, making every bite an exciting combination.
Creative Ways to Present
For a playful presentation, serve scoops in waffle cones adorned with colorful sprinkles or crushed candies. You can also layer the ice cream with fresh berries and cookies in a glass to create an inviting parfait. The possibilities are endless when your base ice cream is this delicious.
Make Ahead and Storage
Storing Leftovers
If you end up with leftovers, store them in an airtight container in the freezer to prevent ice crystals from forming. Covering the surface with a piece of parchment paper before sealing helps keep the texture perfect.
Freezing
This No Churn Vanilla Ice Cream Recipe freezes exceptionally well. Just ensure you allow the ice cream to firm up completely (the full 6-8 hours or overnight) before scooping. This makes it easy to keep on hand for last-minute treats.
Reheating
Ice cream doesn’t require reheating, but if it becomes too hard in the freezer, let it sit on the counter for 5-10 minutes before scooping. This brief wait softens it just enough for perfect spoonfuls without melting.
FAQs
Can I use skim or low-fat cream in this recipe?
This recipe works best with heavy cream because its high fat content gives the ice cream its rich texture. Using low-fat cream or skim milk will result in a less creamy and icy texture, so it’s not recommended.
Can I add other flavors or mix-ins?
Absolutely! You can stir in chocolate chips, crushed cookies, or fruit purees to customize your No Churn Vanilla Ice Cream Recipe. Just fold them in gently after mixing the base for best results.
Do I need an ice cream maker for this?
Nope! That’s the beauty of this No Churn Vanilla Ice Cream Recipe — no special equipment required. The whipped cream and condensed milk do all the work to create creamy texture without churning.
How long does this ice cream last in the freezer?
When stored properly in an airtight container, the ice cream stays delicious for up to two weeks. Beyond that, it may develop ice crystals or lose some freshness.
What if my ice cream is too hard after freezing?
Just let it sit at room temperature for a few minutes before scooping. This allows it to soften slightly so it’s easy to serve without losing that perfect scoopable consistency.
Final Thoughts
If you’re craving a homemade ice cream that’s both effortless and truly satisfying, this No Churn Vanilla Ice Cream Recipe will quickly become your new favorite. Its creamy texture, sweet vanilla notes, and simple ingredients mean you can enjoy a luscious dessert anytime without the fuss of traditional ice cream making. Grab your mixer, chill that pan, and get ready for scoop after delightful scoop of frozen happiness.
Print
No Churn Vanilla Ice Cream Recipe
- Prep Time: 15 minutes
- Cook Time: 0 minutes
- Total Time: 6 hours 15 minutes
- Yield: 6 servings
- Category: Dessert
- Method: No-Cook
- Cuisine: American
Description
This No Churn Vanilla Ice Cream recipe is a simple and delicious way to make creamy homemade ice cream without an ice cream maker. Using just a few easy ingredients like heavy cream, sweetened condensed milk, and vanilla extract, you can whip up a rich, smooth vanilla ice cream in your freezer. Perfect for a sweet treat served in cones or bowls topped with colorful sprinkles.
Ingredients
Ice Cream Base
- 2 cups heavy cream (cold)
- 14 ounces sweetened condensed milk
- 1 teaspoon vanilla extract
- Pinch of sea salt
For Serving
- Sprinkles
- Ice cream cone
Instructions
- Chill Loaf Pan: Place a loaf pan in the freezer to chill thoroughly before pouring in the ice cream mixture. This helps the mixture set faster and prevents sticking.
- Beat Heavy Cream: In a large mixing bowl, beat the cold heavy cream with an electric mixer until stiff peaks form. This means the cream holds peaks firmly without collapsing.
- Fold in Sweetened Condensed Milk and Flavorings: Gently fold the sweetened condensed milk, vanilla extract, and a pinch of sea salt into the whipped cream to maintain the airy texture without deflating the cream.
- Pour into Chilled Pan: Remove the loaf pan from the freezer and carefully pour the ice cream mixture into it, spreading it evenly.
- Freeze to Set: Return the pan to the freezer and chill for 6 to 8 hours on a flat surface until the ice cream is fully set. Once set, scoop into cones or bowls, add sprinkles if desired, and enjoy your homemade no churn vanilla ice cream!
Notes
- Make sure the heavy cream is very cold for better whipping results.
- Use a large bowl to allow enough space for whipping the cream.
- Gently folding ingredients helps maintain the light, fluffy texture of the ice cream.
- Freezing time may vary slightly depending on your freezer; ensure ice cream is firm before serving.
- You can customize this recipe by adding mix-ins like chocolate chips or fruit before freezing.