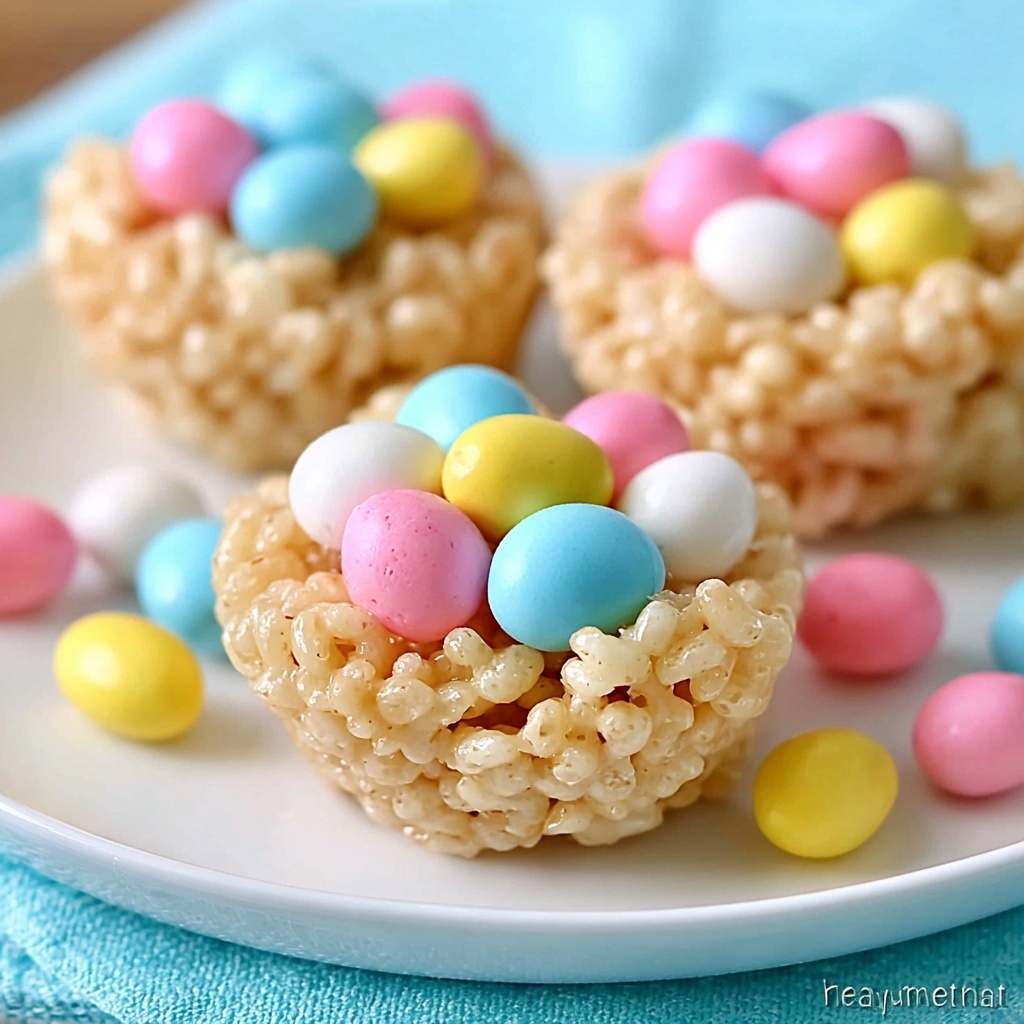
If you are looking for a delightful, fun, and festive treat, the Krispies Easter Egg Nests Recipe is your new best friend. These charming little nests combine the ooey-gooey goodness of melted marshmallows with the light crunch of Rice Krispies cereal, all shaped into perfect little bird nests just waiting to be filled with colorful candy eggs. Whether you’re making them with kids, preparing for an Easter gathering, or simply craving a nostalgic snack with a seasonal twist, this recipe is wonderfully simple and irresistibly cute. It’s a celebration of springtime flavors and textures that comes together in just 20 minutes, guaranteeing smiles all around the table.
Ingredients You’ll Need
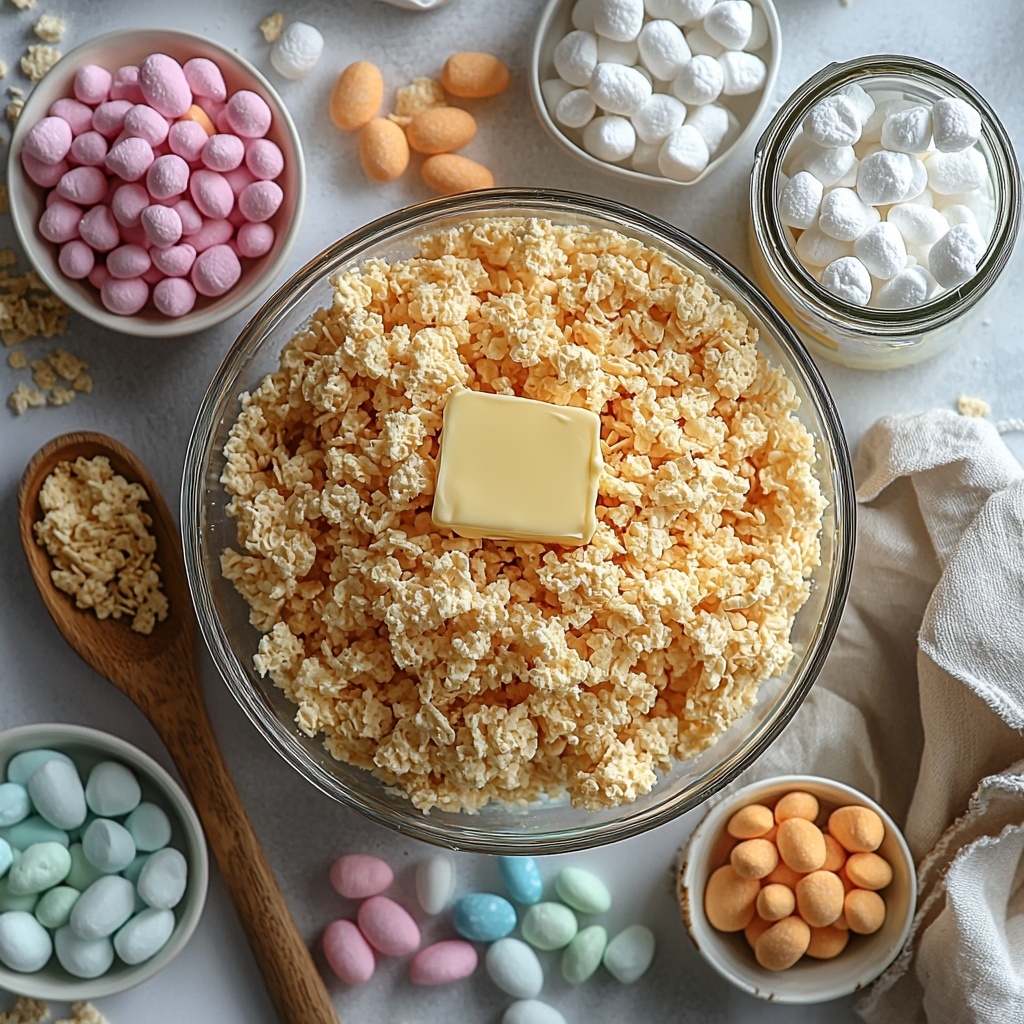
Gathering the right ingredients is the first joyful step toward making these adorable nests. Each component plays a crucial role: butter lends richness, marshmallows provide that sticky, sweet binding, the Rice Krispies bring light crunch and classic cereal flavor, and the candy eggs are the delightful finishing touch bursting with color and fun.
- 4 tablespoons butter: Adds a smooth, creamy base for melting the marshmallows.
- 5 cups mini marshmallows: The glue that holds everything together with a sweet, gooey texture.
- 6 cups Rice Krispies cereal: Gives the nests their signature crispy crunch.
- 1 teaspoon vanilla extract: Enhances the overall flavor with a subtle warmth and depth.
- 1 cup candy eggs (mini chocolate eggs or jellybeans): Bright, festive toppings that make these nests visually irresistible.
- Cooking spray or extra butter (for greasing): Ensures the nests don’t stick when shaping or removing from the pan.
How to Make Krispies Easter Egg Nests Recipe
Step 1: Melt the Butter and Marshmallows
Start by melting the butter over low heat in a large saucepan. Once melted, add the mini marshmallows and stir gently but continuously until they are completely melted and smooth. This luscious base is what will shape your nests and give them their signature chewy texture.
Step 2: Add Vanilla Extract
After removing the pan from the heat, stir in the vanilla extract. This small addition gives a wonderful warm aroma that elevates the sweetness and ties all the flavors together. It’s a subtle trick that makes these nests taste extra special.
Step 3: Fold in Rice Krispies Cereal
Gently fold the Rice Krispies cereal into the marshmallow mixture, making sure every bit of cereal is coated evenly. This step is key for that delightful crunch and ensures your nests hold their shape without falling apart.
Step 4: Shape the Nests
Lightly grease a muffin tin or your hands with cooking spray or butter to prevent sticking. Spoon the cereal mixture into each muffin cup, then press the center of each portion to create a nest shape – a little well to hold your candy eggs later. This tactile step is fun and allows you to customize the size of your nests.
Step 5: Cool the Nests
Allow the nests to cool and set for 10 to 15 minutes. This resting period is crucial to firm them up while keeping the marshmallow inside delightfully chewy yet sturdy enough for decorating.
Step 6: Fill with Candy Eggs
Carefully remove the nests from the muffin tin and fill each one’s center with the colorful candy eggs. Whether you choose mini chocolate eggs or jellybeans, this playful addition brings the perfect pop of Easter cheer and sweetness to every bite.
Step 7: Serve and Enjoy
Arrange your finished nests on a platter, share with family and friends, or store them to enjoy later. The Krispies Easter Egg Nests Recipe is ready to be the star of any Easter table or festive celebration.
How to Serve Krispies Easter Egg Nests Recipe
Garnishes
Try dusting your nests lightly with powdered sugar for a delicate, frosty look, or sprinkle edible glitter for some extra sparkle. Fresh mint leaves or small edible flowers placed alongside can add a fresh, spring-inspired touch that’s sure to impress guests.
Side Dishes
Pair these nests with a light fruit salad or a creamy vanilla yogurt dip to balance the sweetness. For an Easter brunch, they’re fantastic alongside soft-boiled eggs and fresh orange juice, creating a colorful and cheerful spread.
Creative Ways to Present
Consider serving your Krispies Easter Egg Nests Recipe in mini cupcake liners for easy grabbing and less mess, or place them in small clear favor bags tied with pastel ribbons for gifting. You can also elevate them by placing the nests on a bed of shredded coconut dyed green to resemble grass for a charming picnic display.
Make Ahead and Storage
Storing Leftovers
Store any leftover nests in an airtight container at room temperature for up to three days. Keeping them sealed will prevent the marshmallows from drying out and maintain their perfect chewy texture.
Freezing
If you want to prepare your Krispies Easter Egg Nests Recipe in advance, you can freeze them for up to one month. Place the nests on a baking sheet to freeze individually before transferring to a freezer-safe container to prevent them from sticking together.
Reheating
While these nests are best enjoyed fresh, if needed, you can gently warm them in the microwave for 5 to 10 seconds to soften any hardened marshmallow. Be careful not to overheat, as this can make them too sticky or melt the candy eggs.
FAQs
Can I use regular marshmallows instead of mini marshmallows?
Absolutely! If you don’t have mini marshmallows, regular-sized ones work just fine. Just chop them a bit to help them melt faster and evenly for that perfect marshmallow coating in your nests.
What other candies can I use instead of candy eggs?
Feel free to get creative! Small gummy candies, mini chocolate chips, or even tiny fruit snacks can work beautifully as the centerpieces of your nests. The key is that they fit nicely into the nest cavity and add a burst of color.
Can I make this recipe gluten-free?
Yes! Just make sure to use a gluten-free crispy rice cereal. Most Rice Krispies are not gluten-free by default, but many brands offer a gluten-free version that works perfectly.
Is it okay to use butter alternatives for a dairy-free version?
You can substitute the butter with coconut oil or a vegan butter alternative. This tweak keeps the recipe delicious while accommodating dietary restrictions without compromising on texture or flavor.
How do I prevent the nests from sticking to my hands when shaping?
Lightly greasing your hands with butter or cooking spray before shaping the nests is the best way to keep the sticky marshmallow mixture from clinging. This little tip makes molding the nests much easier and less messy.
Final Thoughts
The Krispies Easter Egg Nests Recipe is such a joyful, simple treat that brings an extra touch of magic to any spring celebration. They’re quick to make, endlessly customizable, and absolutely adorable, making it impossible not to smile while biting into one. I wholeheartedly encourage you to try this recipe and then watch as these sweet little nests become a beloved tradition in your Easter festivities and beyond.
Print
Krispies Easter Egg Nests Recipe
- Prep Time: 10 minutes
- Cook Time: 10 minutes
- Total Time: 20 minutes
- Yield: 12 servings
- Category: Dessert
- Method: Stovetop
- Cuisine: American
Description
These Krispies Easter Egg Nests are delightful, bite-sized treats made with melted marshmallows and crispy rice cereal, shaped into little nests and filled with colorful candy eggs. Perfect for Easter celebrations or anytime you want a fun, festive snack that’s quick and easy to make.
Ingredients
Base
- 4 tablespoons butter
- 5 cups mini marshmallows
- 6 cups Rice Krispies cereal
- 1 teaspoon vanilla extract
Filling and Preparation
- 1 cup candy eggs (mini chocolate eggs or jellybeans)
- Cooking spray or extra butter (for greasing)
Instructions
- Melt Butter: Melt the butter over low heat in a large saucepan until fully melted and hot, preparing the base for your marshmallow mixture.
- Add and Melt Marshmallows: Add mini marshmallows to the melted butter and stir continuously until the marshmallows are completely melted and the mixture is smooth. Remove the pan from the heat and stir in the vanilla extract to infuse flavor.
- Combine with Rice Krispies: Gently fold the Rice Krispies cereal into the marshmallow mixture, ensuring every piece is well coated without crushing the cereal.
- Prepare Molds: Grease a muffin tin with cooking spray or butter, or grease your hands if forming nests by hand. Spoon the mixture into the muffin cups and press down gently in the center of each to create a nest shape with a shallow well for the candy eggs.
- Cool and Set: Allow the nests to cool and set for 10 to 15 minutes at room temperature so they firm up and keep their shape.
- Fill the Nests: Carefully remove the nests from the muffin tin and fill each nest’s center with the candy eggs, arranging them attractively.
- Serve or Store: Arrange the filled nests on a platter and enjoy immediately, or store them in an airtight container for later consumption.
Notes
- For easier handling, lightly grease your hands before shaping nests by hand to prevent sticking.
- You can substitute candy eggs with any other small Easter-themed candies or colored chocolate chips.
- These treats are best eaten within 2 days as they may become hard or stale over time.
- To keep nests chewy, store them in an airtight container at room temperature rather than refrigerating.
- If preferred, the nests can be made in silicone muffin molds for easier removal.