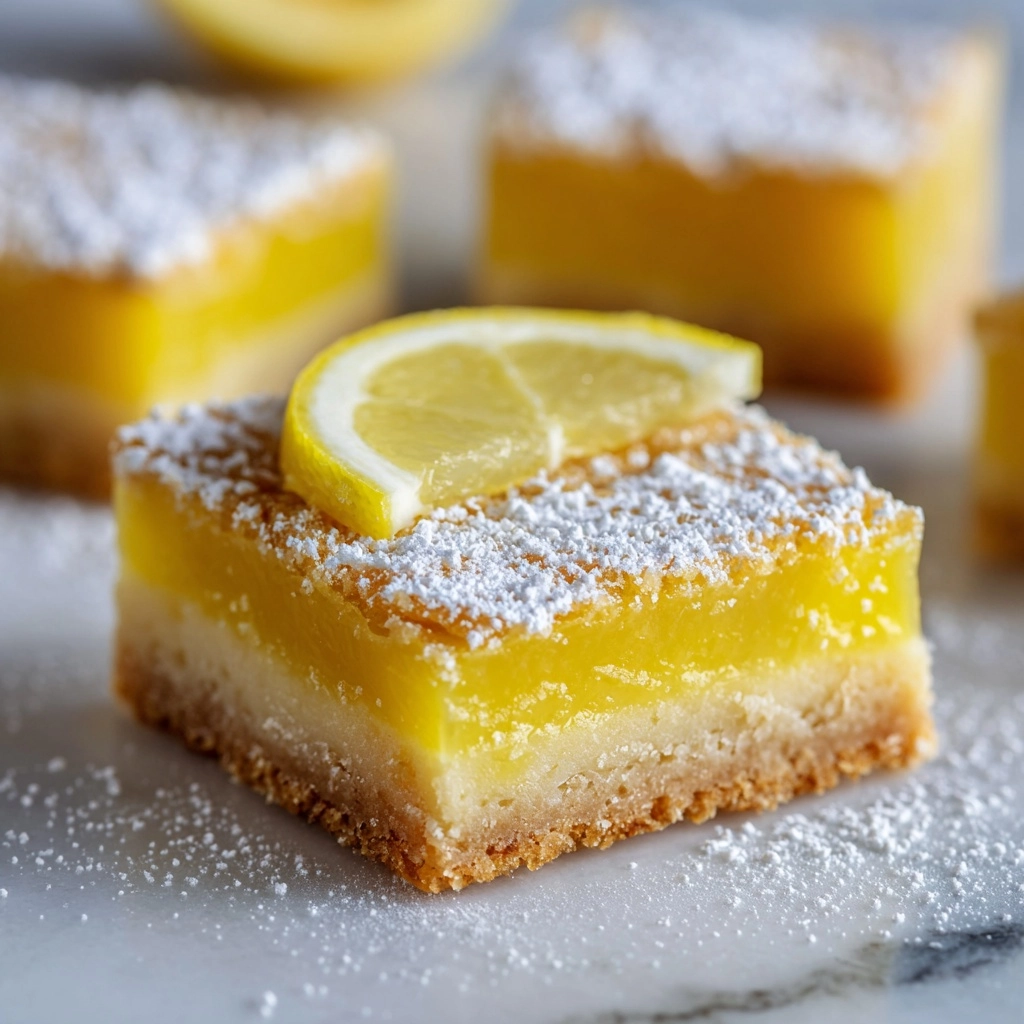
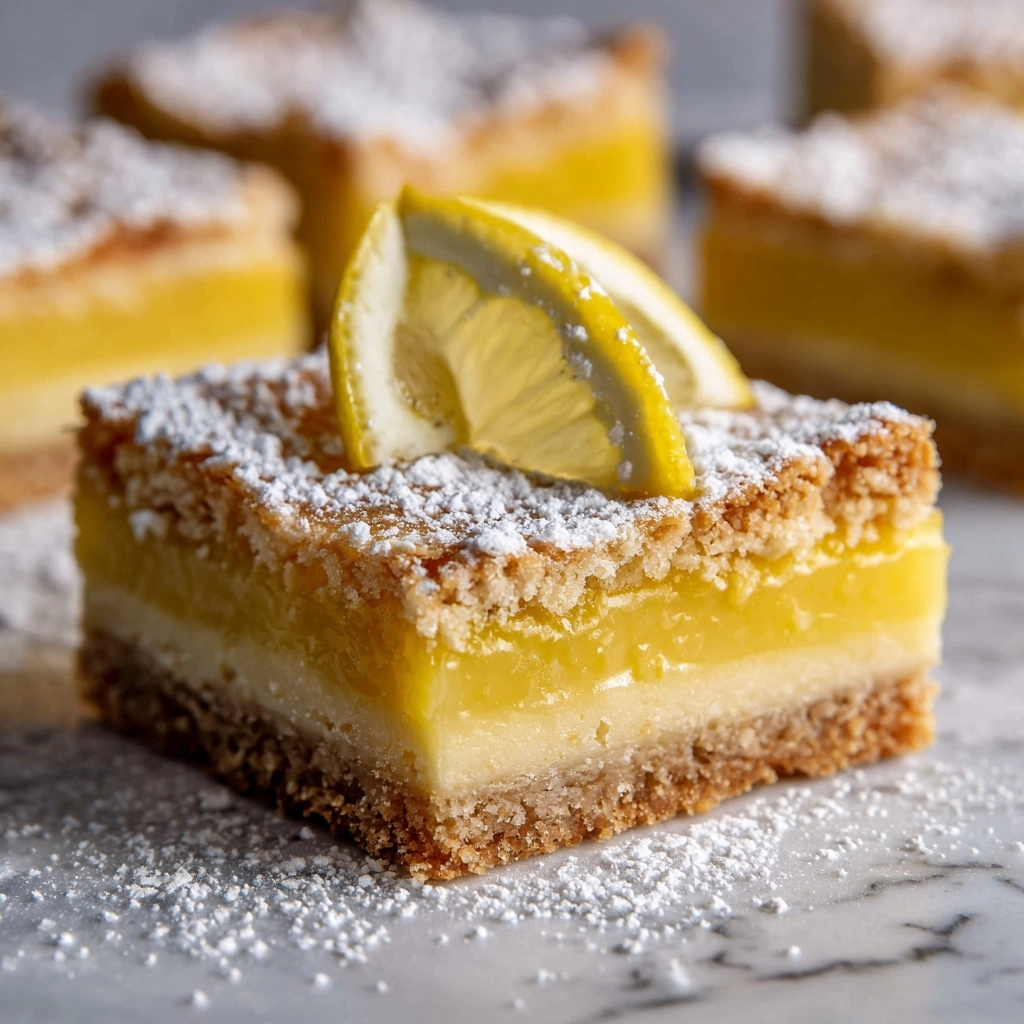
If you crave something sweet, tart, and truly uplifting, this Classic Lemon Bars Recipe will become your new go-to dessert. Imagine a melt-in-your-mouth shortbread crust, topped with a sunshine-bright and tangy lemon layer that practically sparkles on your taste buds. Whether you’re hosting a brunch, need an afternoon pick-me-up, or just want to spoil your friends and family, these bars bring a burst of brightness to any table. The real secret? Their gorgeous simplicity lets the lemon flavor shine—trust me, you’ll be making these again and again!
Ingredients You’ll Need
The ingredient list for the Classic Lemon Bars Recipe is refreshingly short, but each component plays an essential role. From the richness of real butter to the vibrant freshness of lemon zest, every ingredient is carefully chosen to balance flavor and texture in every bite.
- Unsalted butter: Softened butter creates that classic tender and crumbly shortbread base—don’t substitute with margarine for the best flavor.
- Granulated sugar: Sugar adds sweetness to both the crust and the lemon filling, mellowing the tartness just perfectly.
- All-purpose flour: Flour gives structure to both the crust and the filling, locking in that layered perfection.
- Salt: Just a pinch sharpens flavors and brings balance to the buttery base.
- Eggs: Eggs are the backbone of the filling, making it set into a luscious, creamy curd.
- Freshly squeezed lemon juice: The undeniable star! Always use fresh lemons for the brightest, purest citrus zing.
- Lemon zest: Zest elevates the citrus notes, making every bite aromatic and irresistible.
- Powdered sugar (optional): A gentle snowfall of powdered sugar on top adds a lovely finishing touch and a sweet counterpoint to the lemon.
How to Make Classic Lemon Bars Recipe
Step 1: Prepare Your Pan
Start by preheating your oven to 350°F (175°C). Line a 9×13-inch baking dish with parchment paper, ensuring there’s a generous overhang on each side. This not only keeps the bars from sticking but makes lifting them out for slicing a total breeze later on.
Step 2: Mix the Crust
In a large bowl, use an electric mixer or sturdy wooden spoon to cream together the softened butter and sugar until lighter in color and fluffy—this step ensures a delicate texture. Once combined, mix in the flour and salt just until a crumbly dough forms. Over-mixing here can make the crust tough, so stop as soon as the dough holds together when pinched.
Step 3: Bake the Crust
Press the dough evenly into your prepared baking dish, making sure to reach all the corners for a uniform layer. Bake for 18–20 minutes, just until the edges start to turn a light, golden brown. This step creates that iconic buttery foundation every Classic Lemon Bars Recipe needs.
Step 4: Prepare the Lemon Filling
While the crust is baking, whisk together the sugar and flour for the lemon filling in a clean bowl. Add the eggs, freshly squeezed lemon juice, and lemon zest, whisking until the mixture is beautifully smooth and cohesive. Don’t skimp on the lemon zest—it’s your shortcut to a fragrance that practically announces “lemon bars are coming!” before you even taste them.
Step 5: Bake the Filling
Once the crust comes out of the oven, immediately pour the lemon filling over the warm base. This helps the layers bond together for that signature two-tiered look. Return the dish to the oven and bake for another 20 to 25 minutes, or until the center is just set—no jiggling when you give it a gentle shake.
Step 6: Cool, Chill, and Slice
Let your lemon bars cool completely in the pan (patience pays off!) before transferring to the refrigerator to chill for at least an hour. This ensures ultra-clean slices and that perfectly set curd. Just before serving, dust with powdered sugar for a classic finish to your Classic Lemon Bars Recipe.
How to Serve Classic Lemon Bars Recipe

Garnishes
The most classic garnish is a light dusting of powdered sugar, which looks stunning against the lemony yellow. For extra flair, add thin slices of fresh lemon, a sprinkle of extra zest, or even edible flowers for a springtime vibe.
Side Dishes
Lemon bars shine on their own, but they also pair well with a dollop of whipped cream, a scoop of vanilla bean ice cream, or fresh berries. For an elegant dessert platter, set them out alongside shortbread cookies and fresh fruit.
Creative Ways to Present
For parties, cut the bars into small squares and arrange them in cupcake liners or on a tiered dessert tray. Tiny, bite-sized versions are always a hit at gatherings. Stack them in a pyramid, drizzle lightly with melted white chocolate, or put a twist on tradition by serving them as part of a dessert charcuterie board.
Make Ahead and Storage
Storing Leftovers
Keep leftover lemon bars covered in the refrigerator, where they’ll stay irresistibly fresh for up to five days. Place a piece of parchment or wax paper between layers if stacking to prevent sticking.
Freezing
The Classic Lemon Bars Recipe freezes beautifully. Wrap pieces individually in plastic wrap, then store in an airtight container for up to two months. Thaw in the refrigerator overnight for best results and top with a fresh dusting of powdered sugar before enjoying again.
Reheating
Lemon bars are usually best served chilled or at room temperature, but if you love them warm, you can microwave individual bars for just 10 to 15 seconds. Be cautious—too much heat can make the delicate curd layer separate.
FAQs
Why is my lemon layer not setting?
If your lemon layer is still jiggly after baking, it likely needs a few more minutes in the oven. Make sure the filling just barely jiggles in the center before removing it, as it will continue to set as it cools.
Can I use bottled lemon juice instead of fresh?
Freshly squeezed lemon juice really makes all the difference in the Classic Lemon Bars Recipe. Bottled juice can be more bitter and doesn’t have the same vibrant kick, so reach for real lemons if at all possible.
How can I get clean, sharp edges when slicing?
For ultra-neat bars, chill them thoroughly in the fridge and use a sharp knife, wiping the blade between each cut. Lining your pan with parchment paper makes it even easier to lift the whole slab out before slicing.
Can I make these gluten-free?
Yes! Swap the all-purpose flour for your favorite 1:1 gluten-free flour blend. The bars might be ever so slightly more crumbly, but the bright lemon taste will remain the star.
Why did my powdered sugar topping disappear?
Powdered sugar can dissolve if the top is even a little bit moist. For a pristine finish, dust the bars with sugar just before serving rather than ahead of time.
Final Thoughts
I just know you’ll fall in love with this Classic Lemon Bars Recipe—the balance of sweet and tart, the melt-in-your-mouth crust, and that pop of sunshine in every bite make it a treat that never goes out of style. Give it a try, and soon it’ll become a favorite in your kitchen, too!
Print
Classic Lemon Bars Recipe
- Prep Time: 15 minutes
- Cook Time: 45 minutes
- Total Time: 1 hour
- Yield: 16 bars
- Category: Dessert
- Method: Baking
- Cuisine: American
- Diet: Vegetarian
Description
Indulge in the zesty and sweet flavors of these classic lemon bars. With a buttery crust and a tangy lemon filling, these bars are the perfect balance of sweet and sour, making them an irresistible treat for any occasion.
Ingredients
For the Crust:
- 1 cup unsalted butter, softened
- 1/2 cup granulated sugar
- 2 cups all-purpose flour
- 1/4 teaspoon salt
For the Lemon Filling:
- 1 1/2 cups granulated sugar
- 1/4 cup all-purpose flour
- 4 large eggs
- 2/3 cup freshly squeezed lemon juice (about 3–4 lemons)
- 1 tablespoon lemon zest
- powdered sugar for dusting (optional)
Instructions
- Preheat the oven: Preheat the oven to 350°F (175°C) and line a 9×13-inch baking dish with parchment paper, leaving a bit of overhang on the sides.
- Prepare the crust: Cream together the butter and sugar for the crust until light and fluffy. Add flour and salt, mix until a crumbly dough forms, then press it into the baking dish. Bake until lightly golden.
- Make the filling: Whisk together sugar and flour, add eggs, lemon juice, and zest. Pour the filling over the warm crust and bake until set.
- Cool and serve: Let the bars cool, refrigerate, then slice. Dust with powdered sugar before serving, if desired.
Notes
- For cleaner slices, use a sharp knife wiped clean between cuts.
- Store bars in the refrigerator for up to 5 days or freeze for longer storage.
Nutrition
- Serving Size: 1 bar
- Calories: 210
- Sugar: 19g
- Sodium: 55mg
- Fat: 10g
- Saturated Fat: 6g
- Unsaturated Fat: 3g
- Trans Fat: 0g
- Carbohydrates: 28g
- Fiber: 0g
- Protein: 2g
- Cholesterol: 60mg