If you’re craving a delicious treat that’s quick to whip up and guaranteed to satisfy your sweet tooth, this No-Bake Peanut Butter Bars Recipe is an absolute winner. Combining the rich creaminess of peanut butter with the decadent sweetness of chocolate, these bars are the perfect blend of smooth and crunchy, with no oven needed. Whether you’re making a last-minute dessert for guests or simply want a snack that’s both comforting and indulgent, these bars deliver on flavor and ease, becoming an instant favorite with every bite.
Ingredients You’ll Need
These ingredients are simple pantry staples that come together beautifully to create a luscious and satisfying dessert. Each plays a vital role: the graham cracker crumbs add a subtle crunch, butter brings richness, powdered sugar balances sweetness, and peanut butter unites everything with its creamy, nutty goodness. Finally, the chocolate topping adds a luscious finish that makes these bars irresistible.
- 1 cup unsalted butter (melted): Provides a smooth, buttery base that binds the ingredients.
- 2 cups graham cracker crumbs: Adds a light, crumbly texture to the crust layer.
- 2 cups powdered sugar: Sweetens and gives the bars their melt-in-the-mouth quality.
- 1 cup creamy peanut butter: The star flavor that adds creaminess and depth.
- 1½ cups semi-sweet chocolate chips: Creates a rich, comforting chocolate layer on top.
- ¼ cup peanut butter (for topping layer): Mixed with chocolate for a perfectly smooth and decadent finish.
How to Make No-Bake Peanut Butter Bars Recipe
Step 1: Mix the Base Ingredients
Start by combining the melted butter, graham cracker crumbs, powdered sugar, and 1 cup of creamy peanut butter in a large mixing bowl. Stir everything together until the mixture is smooth and thoroughly combined. This step forms the sturdy and flavorful base of your bars, so make sure you get it nice and even.
Step 2: Press into the Pan
Next, transfer the peanut butter mixture into a greased or parchment-lined 9×13-inch baking dish. Use the back of a spoon or your hands to press it down firmly until the layer is smooth and compact. This ensures your bars hold together perfectly when sliced.
Step 3: Prepare the Chocolate Topping
In a microwave-safe bowl, melt the semi-sweet chocolate chips with ¼ cup of peanut butter. Do this in 30-second intervals, stirring after each, until you achieve a silky smooth mixture. This blending of chocolate and peanut butter on top makes these bars a heavenly combination of flavors.
Step 4: Spread and Chill
Pour the melted chocolate mixture evenly over the peanut butter base, smoothing it with a spatula. Place the dish in the refrigerator for at least 2 hours or until the bars are firm. The chilling time is essential—it allows the layers to set and makes slicing neat and easy.
Step 5: Slice and Serve
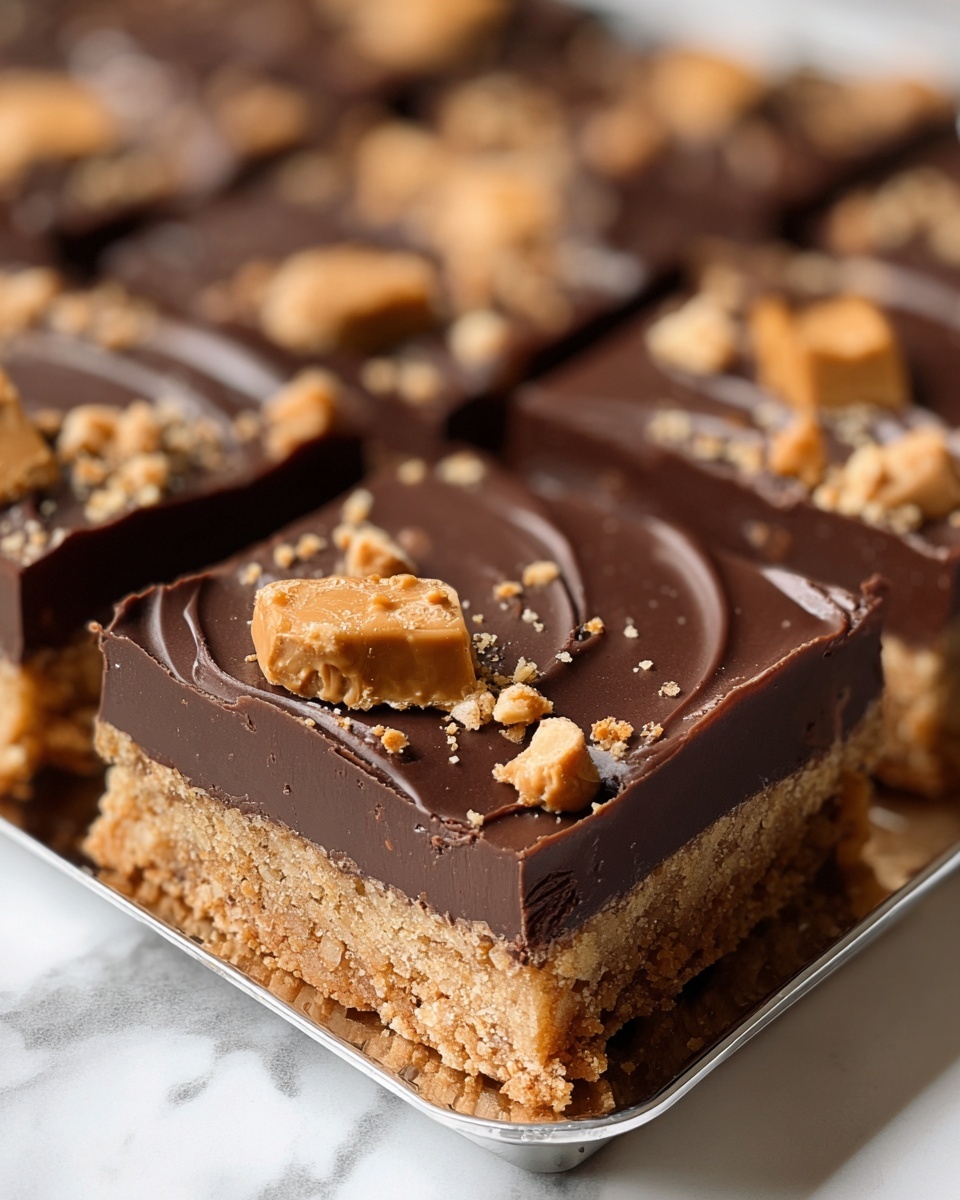
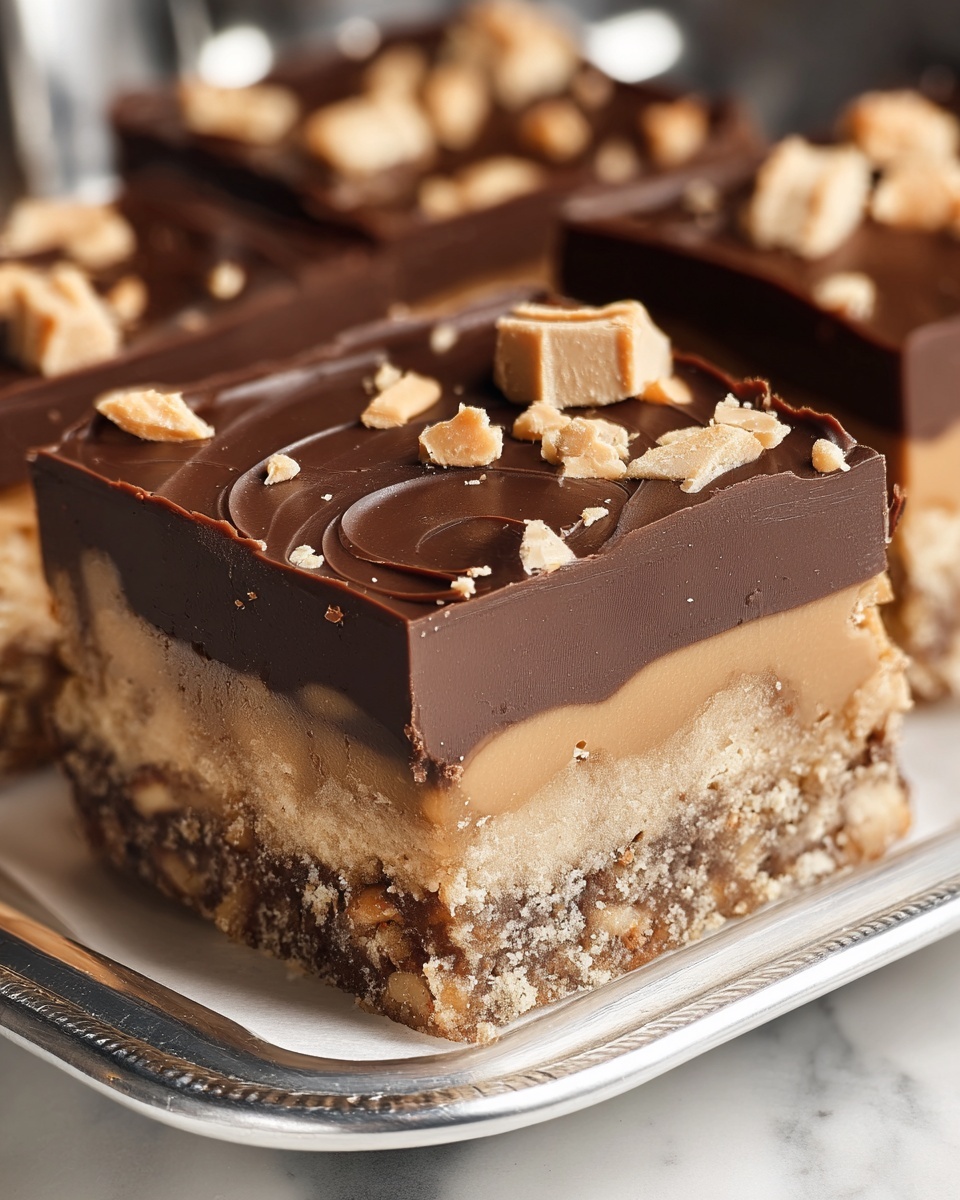
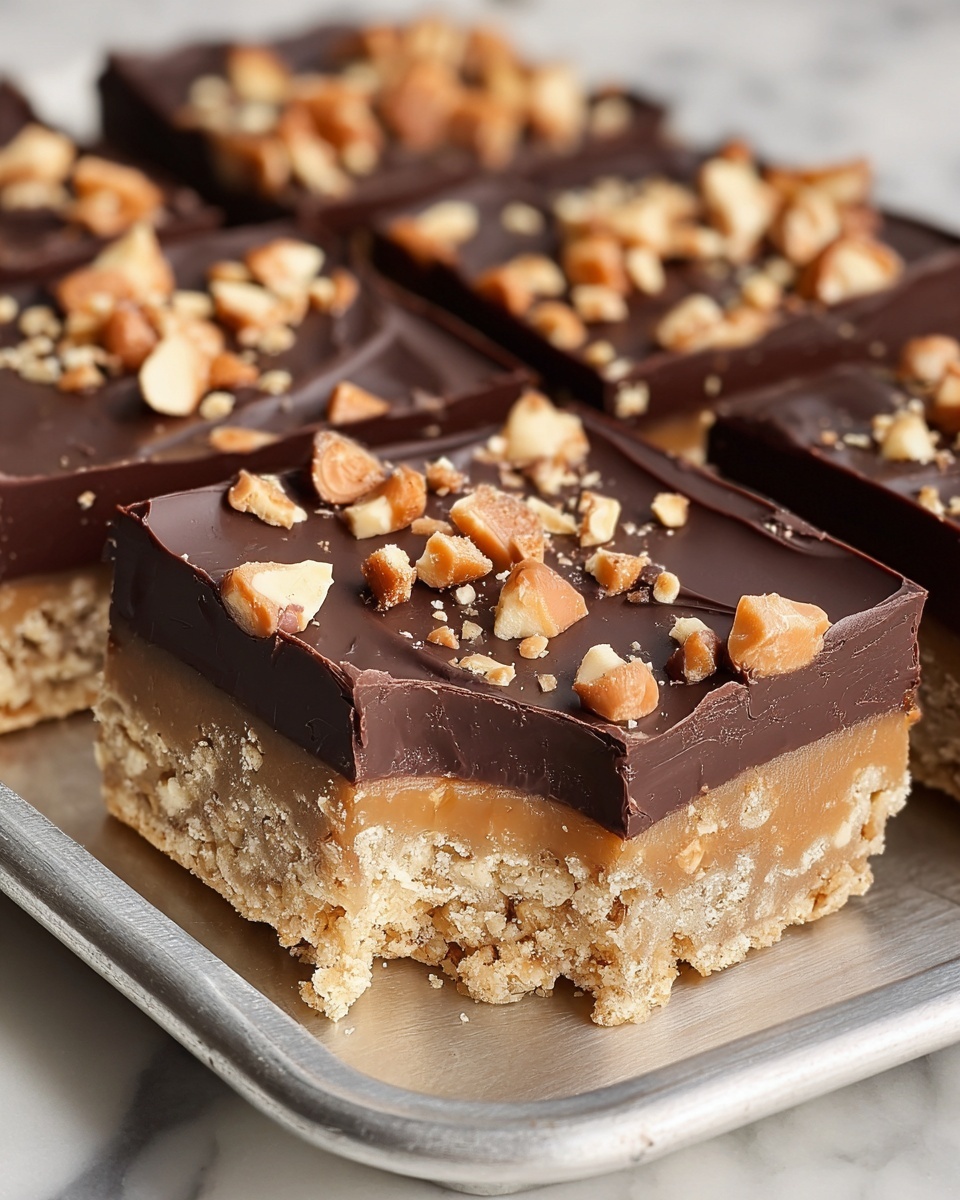
Once chilled and set, remove the bars from the dish and cut them into 24 squares. These bites of peanut butter and chocolate bliss are now ready to be enjoyed!
How to Serve No-Bake Peanut Butter Bars Recipe
Garnishes
To make these bars even more eye-catching, sprinkle chopped peanuts or a light dusting of powdered sugar on top before serving. You can also drizzle a little extra melted chocolate or a swirl of caramel for added flair and texture.
Side Dishes
These bars pair wonderfully with a scoop of vanilla ice cream or a dollop of whipped cream to balance their density with a fresh creaminess. A cup of hot coffee or cold milk is also a classic match that brings out the peanut butter and chocolate notes beautifully.
Creative Ways to Present
Try cutting these bars into bite-sized cubes and serving them on a platter for parties. You can also layer them in a parfait glass with yogurt and fresh berries, turning this No-Bake Peanut Butter Bars Recipe into a fun and unexpected dessert presentation.
Make Ahead and Storage
Storing Leftovers
Leftover bars should be kept in an airtight container in the refrigerator. They’ll stay fresh and delicious for up to one week, making them a fantastic option for quick snacks throughout your busy week.
Freezing
If you want to keep these bars longer, wrap them tightly in plastic wrap and store in a freezer-safe container. Frozen bars can last for up to 3 months. Just thaw them overnight in the fridge before enjoying.
Reheating
Because this is a no-bake recipe, reheating isn’t necessary. If you prefer a softer texture, warm individual bars slightly in the microwave for about 10 seconds, but be careful not to melt the chocolate topping.
FAQs
Can I substitute crunchy peanut butter for creamy?
Absolutely! Using crunchy peanut butter adds a delightful texture and extra nuttiness to the bars, making each bite even more satisfying. Just remember that it may affect the smoothness of the base slightly.
Do I need to refrigerate these bars?
Yes, refrigeration is key. Since these bars don’t bake, chilling them allows the layers to firm up so they hold together well when served. Plus, it keeps the peanut butter and chocolate fresh and delicious.
Can I use natural peanut butter in this recipe?
You can, but be aware natural peanut butter tends to be thinner and less sweet, which might affect the texture and flavor. If using natural, consider reducing the butter slightly or adding a pinch more powdered sugar.
Is it possible to make this recipe gluten-free?
Definitely! Just swap the graham cracker crumbs for gluten-free graham cracker crumbs or finely crushed gluten-free cookies. The taste and texture will be just as delightful.
How long does it take to prepare?
The actual prep time is about 10 minutes, and because this recipe requires no baking, it’s super quick to assemble. You do need some patience for the chilling process, which takes about 2 hours to firm up the bars properly.
Final Thoughts
This No-Bake Peanut Butter Bars Recipe is a total game-changer for when you want dessert without the fuss. It’s simple, buttery, rich, and truly a crowd-pleaser every time. Once you try it, I’m sure it will become one of your go-to recipes for sweet cravings and spontaneous gatherings. Give it a whirl—you won’t regret it!
Print
No-Bake Peanut Butter Bars Recipe
- Prep Time: 10 minutes
- Cook Time: 0 minutes
- Total Time: 2 hours 10 minutes
- Yield: 24 bars
- Category: Dessert
- Method: No-Cook
- Cuisine: American
- Diet: Vegetarian
Description
Delicious and easy-to-make No-Bake Peanut Butter Bars combining a buttery graham cracker crust with creamy peanut butter and a rich chocolate topping. Perfect for a quick dessert without using the oven, these bars are creamy, chocolaty, and packed with peanut butter flavor, making them a family favorite treat.
Ingredients
Base Layer
- 1 cup unsalted butter, melted
- 2 cups graham cracker crumbs
- 2 cups powdered sugar
- 1 cup creamy peanut butter
Topping
- 1½ cups semi-sweet chocolate chips
- ¼ cup peanut butter (for topping layer)
Instructions
- Prepare the base mixture: In a large mixing bowl, combine the melted butter, graham cracker crumbs, powdered sugar, and 1 cup of creamy peanut butter. Stir thoroughly until the mixture is fully combined and smooth, ensuring no lumps remain.
- Press the base into the pan: Transfer the mixture to a greased or parchment-lined 9×13-inch baking dish. Firmly and evenly press the mixture into the pan to create a solid base layer for your bars.
- Melt the chocolate topping: Place the semi-sweet chocolate chips and ¼ cup peanut butter into a microwave-safe bowl. Heat in 30-second intervals, stirring well between each, until the mixture is smooth and fully melted.
- Spread the chocolate layer: Pour the melted chocolate and peanut butter mixture evenly over the peanut butter base. Use a spatula to spread it evenly across the entire surface.
- Chill to set: Refrigerate the pan for at least 2 hours or until the bars are firm and set.
- Serve: Once chilled and firm, cut into 24 bars and serve. Store leftovers in the refrigerator or freeze for longer storage.
Notes
- These bars can be stored in the refrigerator for up to one week or frozen to extend shelf life.
- For added crunch, consider stirring chopped peanuts into the base mixture or substituting crunchy peanut butter for creamy.
- Make sure to press the base layer firmly in the pan to help the bars hold together well when set.
- Microwaving the chocolate and peanut butter in short intervals prevents burning and ensures smooth texture.