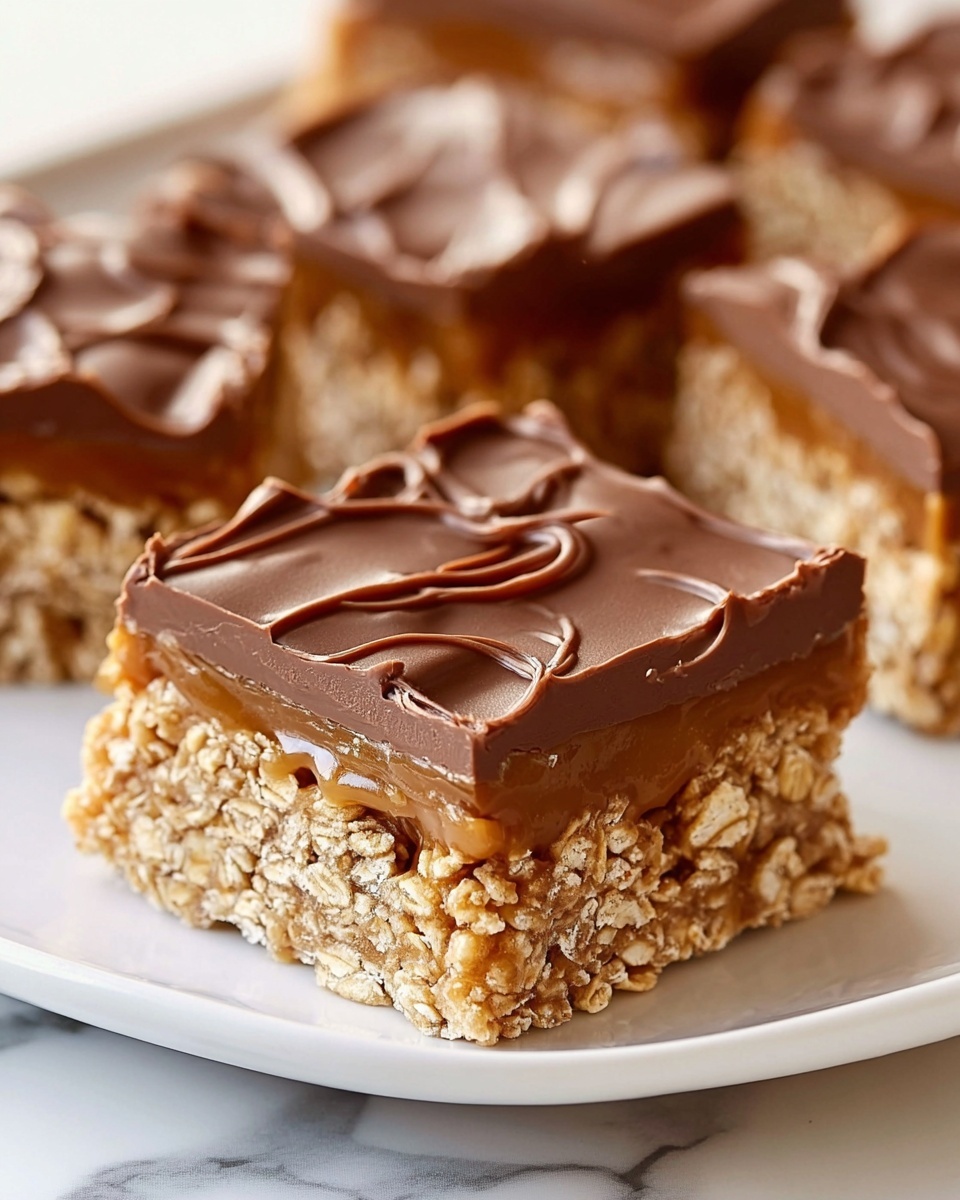
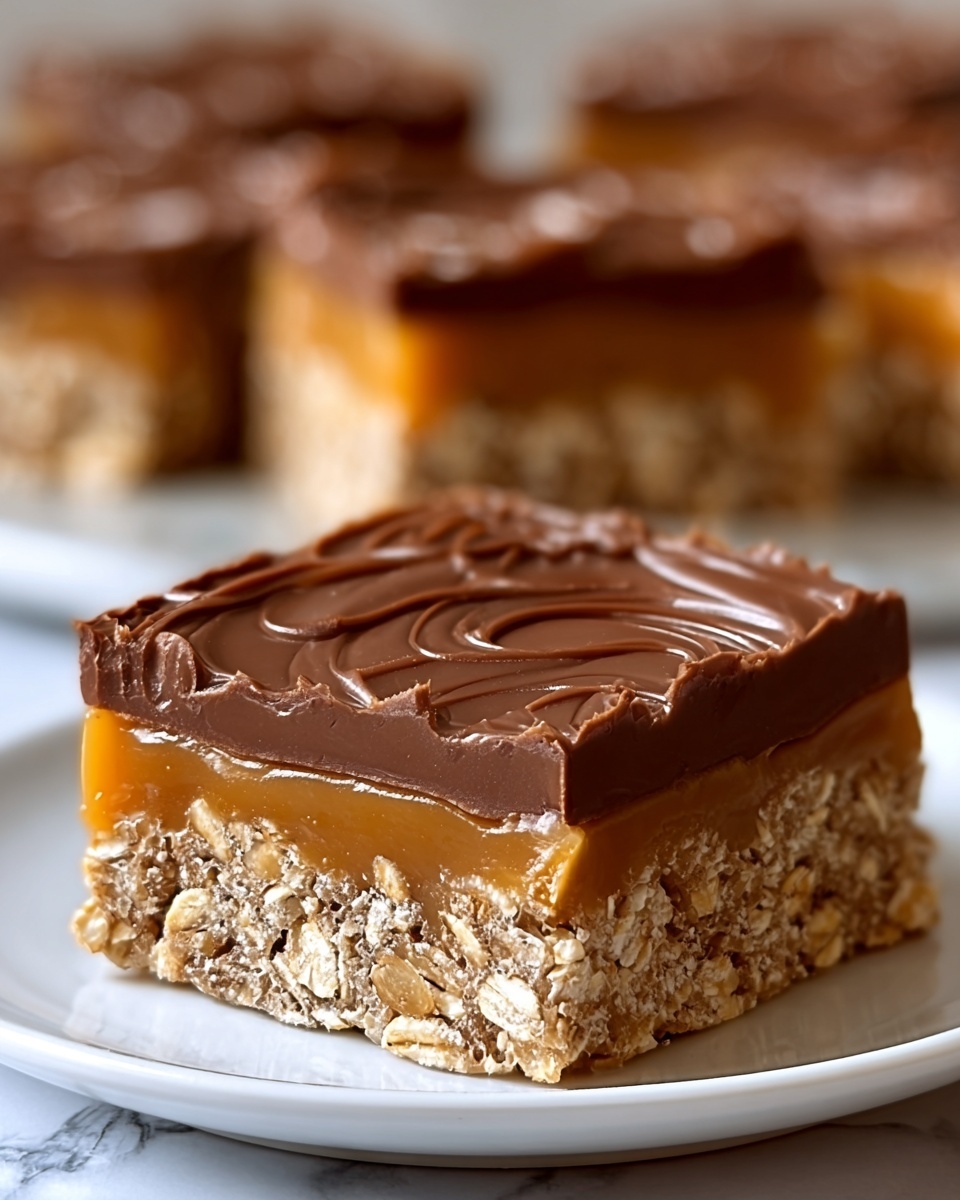
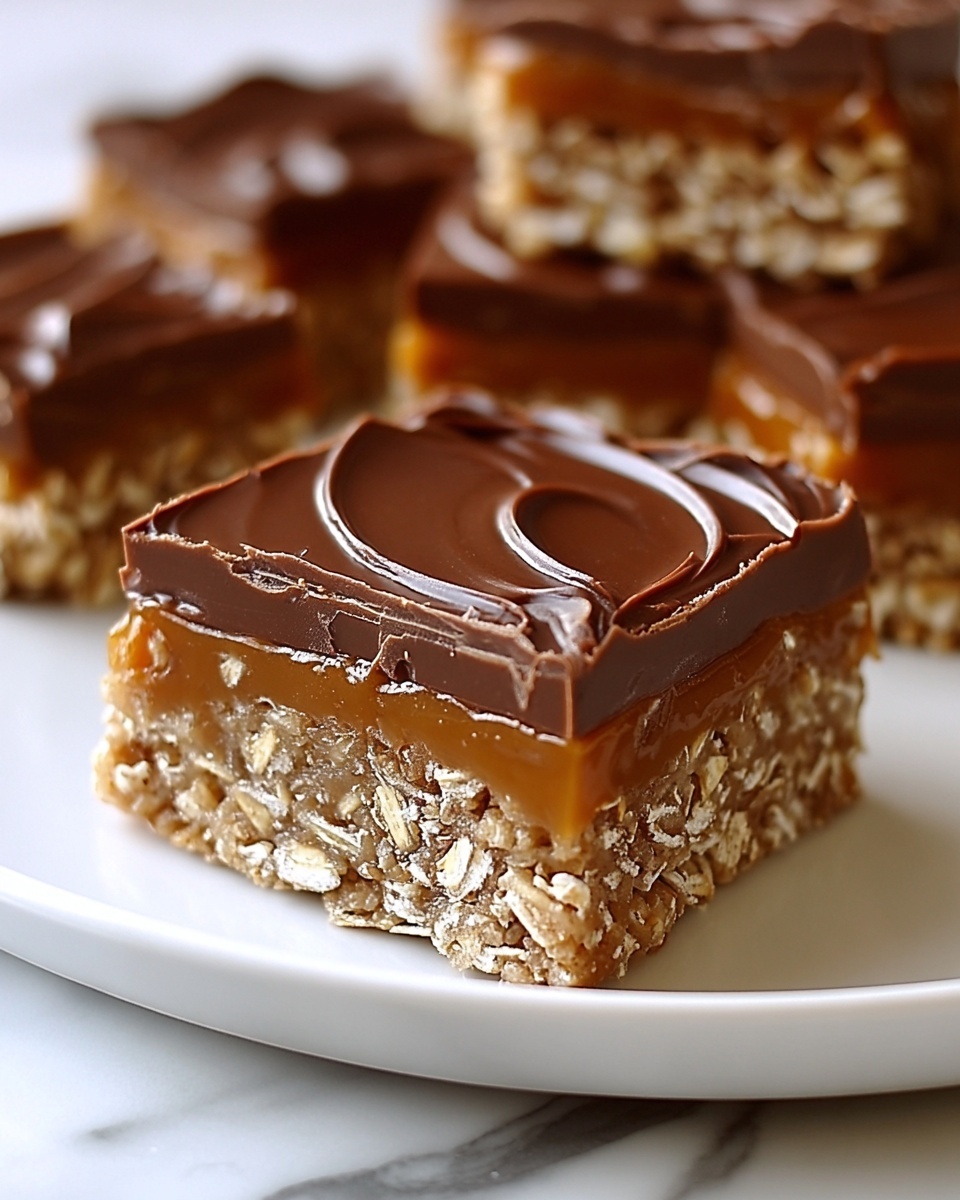
If you’re craving a delicious, easy-to-make treat that satisfies your sweet tooth without turning on the oven, you cannot go wrong with the Best No-Bake Chocolate Oatmeal Bars Recipe. These bars bring together the hearty chew of rolled oats, the rich creaminess of peanut butter, and a decadent layer of semi-sweet chocolate, creating an irresistible blend of flavors and textures. Perfect for a quick dessert, snack, or even an on-the-go energy boost, these bars are straightforward to prepare and require minimal ingredients. Trust me, once you try this recipe, it will become one of your favorite no-bake delights.
Ingredients You’ll Need
What I love most about the Best No-Bake Chocolate Oatmeal Bars Recipe is how simple yet thoughtfully chosen the ingredients are. Each element plays a pivotal role—from creamy peanut butter to naturally sweet maple syrup, every bite bursts with balanced flavor and satisfying texture.
- 2 cups old-fashioned rolled oats: The heart of the bars, providing wholesome chewiness and fiber-packed goodness.
- 1 cup creamy peanut butter: Adds smooth richness and a lovely nutty flavor that binds everything beautifully.
- 1/2 cup coconut oil: Gives the bars a silky texture and helps them set firmly once chilled.
- 1/2 cup maple syrup: A natural sweetener that brings gentle sweetness with a hint of caramel.
- 1 teaspoon vanilla extract: Elevates the flavor, adding warmth and depth.
- 1/4 teaspoon salt: Balances the sweetness and enhances all the other flavors.
- 1 cup semi-sweet chocolate chips: The star topping that melts slightly into the oat layer for a fudgy finish.
- 1/4 cup chopped nuts or shredded coconut (optional): Adds a little crunch and extra dimension if you want a personalized twist.
How to Make Best No-Bake Chocolate Oatmeal Bars Recipe
Step 1: Prepare Your Pan
Start by lining an 8×8-inch baking dish with parchment paper. This simple step is crucial because it makes lifting the bars out of the pan after chilling a breeze, ensuring your bars stay intact and look picture-perfect when serving.
Step 2: Melt and Mix the Wet Ingredients
In a medium saucepan over low heat, combine the peanut butter, coconut oil, and maple syrup. Stir continuously until the mixture is smooth and fully melted—this silky mixture will serve as the glue holding the oats together.
Step 3: Flavor the Base
Once melted, remove the pan from the heat and stir in the vanilla extract and salt. This elevates the flavor profile, offering that warm aromatic note and a pinch of saltiness to balance the sweetness perfectly.
Step 4: Combine with Oats
Add in the rolled oats and mix thoroughly until every oat is fully coated with the luscious peanut butter mixture. This step ensures each bite delivers that perfect combination of creamy and chewy textures.
Step 5: Layer the Bars
Pour half of your oat mixture into the prepared baking dish and press it firmly into an even layer. This base will be the foundation for your chocolate layer, so make sure it’s compacted well to avoid crumbling later.
Step 6: Add the Chocolate
Sprinkle the semi-sweet chocolate chips evenly over the oat layer. The warm oat layer will slightly soften the chips, creating a fudgy, gooey texture that is so irresistible.
Step 7: Finish with the Remaining Oats and Optional Toppings
Pour the rest of the oat mixture on top of the chocolate layer and gently press it down to seal everything together. If you’re feeling adventurous, sprinkle chopped nuts or shredded coconut on top to add a delightful crunch or tropical twist.
Step 8: Chill Until Set
Pop the baking dish into the refrigerator for at least 2 hours to let the bars firm up. This chilling step is vital to achieve that perfect sliceable consistency.
Step 9: Slice and Enjoy
Once set, carefully lift the bars out using the parchment paper and cut into squares or rectangles. Now you have your incredibly satisfying no-bake chocolate oatmeal bars, ready to be devoured!
How to Serve Best No-Bake Chocolate Oatmeal Bars Recipe
Garnishes
While these bars are delightful on their own, adding a sprinkle of flaky sea salt on top right before serving can truly amplify the flavor, balancing the sweetness with a subtle savory crunch. Fresh berries or a dollop of whipped cream can turn these bars into a fancy treat with minimal effort.
Side Dishes
Pair your bars with a cup of freshly brewed coffee or a glass of cold milk for a classic combo that never disappoints. For a wholesome snack box, add some sliced fruits or a handful of nuts alongside these bars to round out the experience.
Creative Ways to Present
Try serving these bars in mini muffin liners for a cute, individual portion option, making them perfect for parties or lunchboxes. You can also drizzle melted white chocolate or caramel sauce over the top for an indulgent centerpiece that will wow your guests.
Make Ahead and Storage
Storing Leftovers
These bars keep beautifully in an airtight container in the refrigerator for up to a week, maintaining their freshness and texture. This makes them an excellent grab-and-go snack to have on hand throughout the week.
Freezing
If you want to stash some away for later, wrap individual bars tightly in plastic wrap and place them in a freezer-safe container or bag. Frozen bars can last up to three months and thaw quickly at room temperature when you’re ready to enjoy them.
Reheating
No need to heat these bars since their texture and flavor are best enjoyed chilled. However, if you prefer a softer bite, a few seconds in the microwave will warm them slightly without melting the chocolate completely.
FAQs
Can I use almond butter instead of peanut butter?
Absolutely! Almond butter is a fantastic substitute that will give the bars a slightly different nutty flavor while keeping that creamy texture. Just make sure it’s smooth to help with binding.
Is it possible to make these bars nut-free?
Yes, you can swap the peanut butter for sunflower seed butter or tahini for a nut-free version. The overall texture and sweetness will remain delightful though the flavor will be a bit different.
Can I use quick oats instead of rolled oats?
Yes, using quick oats will result in a firmer and slightly less chewy bar, but it’s a fine alternative if that’s what you have on hand. The bars may set up a bit faster thanks to the smaller oat size.
How long do these bars last at room temperature?
Because they contain coconut oil and peanut butter, it’s best to store them in the refrigerator to prevent them from becoming too soft or oily. At room temperature, they might only stay fresh for a day or two.
Can I add other mix-ins to the bars?
Definitely! Feel free to mix in dried fruits, seeds, or even a handful of mini marshmallows to customize these bars exactly to your liking. Just keep an eye on the overall quantities to maintain the right texture.
Final Thoughts
I truly hope you give this Best No-Bake Chocolate Oatmeal Bars Recipe a try because it’s one of those dishes that feels like a warm hug on a plate—comforting, satisfying, and incredibly easy to make. Whether you’re a busy parent, a snack lover, or someone looking for a sweet treat that doesn’t require the oven, this recipe has your back. Enjoy every bite and don’t forget to share these bars with friends because good things are meant to be shared!
Print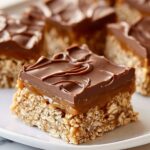
Best No-Bake Chocolate Oatmeal Bars Recipe
- Prep Time: 10 minutes
- Cook Time: 5 minutes
- Total Time: 2 hours 15 minutes
- Yield: 12 bars
- Category: Dessert
- Method: No-Cook
- Cuisine: American
- Diet: Vegetarian
Description
These Best No-Bake Chocolate Oatmeal Bars are a quick and delicious treat featuring creamy peanut butter, rolled oats, and rich chocolate chips. Perfect for a healthy snack or dessert, they require no oven time and are easy to customize with nuts or shredded coconut.
Ingredients
Main Ingredients
- 2 cups old-fashioned rolled oats
- 1 cup creamy peanut butter
- 1/2 cup coconut oil
- 1/2 cup maple syrup
- 1 teaspoon vanilla extract
- 1/4 teaspoon salt
Toppings (Optional)
- 1 cup semi-sweet chocolate chips
- 1/4 cup chopped nuts or shredded coconut
Instructions
- Prepare the baking dish. Line an 8×8-inch baking dish with parchment paper to ensure easy removal of the bars after chilling.
- Melt peanut butter mixture. In a medium saucepan over low heat, combine the peanut butter, coconut oil, and maple syrup. Stir continuously until the mixture is completely smooth and melted.
- Add flavorings. Remove the saucepan from heat and stir in the vanilla extract and salt to enhance the taste.
- Combine oats. Add the rolled oats to the mixture and stir until all oats are fully coated with the peanut butter mixture.
- Layer oat mixture. Pour half of the oat mixture into the prepared baking dish and press down firmly into an even layer to provide a solid base.
- Add chocolate chips. Sprinkle the semi-sweet chocolate chips evenly over the first oat layer for a melty chocolate surprise.
- Top with remaining oats. Pour the remaining oat mixture over the chocolate layer and gently press down to seal the bars.
- Add optional toppings. Sprinkle chopped nuts or shredded coconut on top for added texture and flavor if desired.
- Chill the bars. Refrigerate the dish for at least 2 hours or until the bars firm up sufficiently.
- Cut and serve. Once set, use the parchment paper to lift the bars from the pan and cut into 12 equal pieces.
Notes
- You can substitute almond butter for peanut butter for a different nutty flavor.
- Honey can be used instead of maple syrup as a natural sweetener.
- For a firmer texture, use quick oats instead of old-fashioned rolled oats.
- Ensure oats are certified gluten-free if you want the bars to be gluten-free.