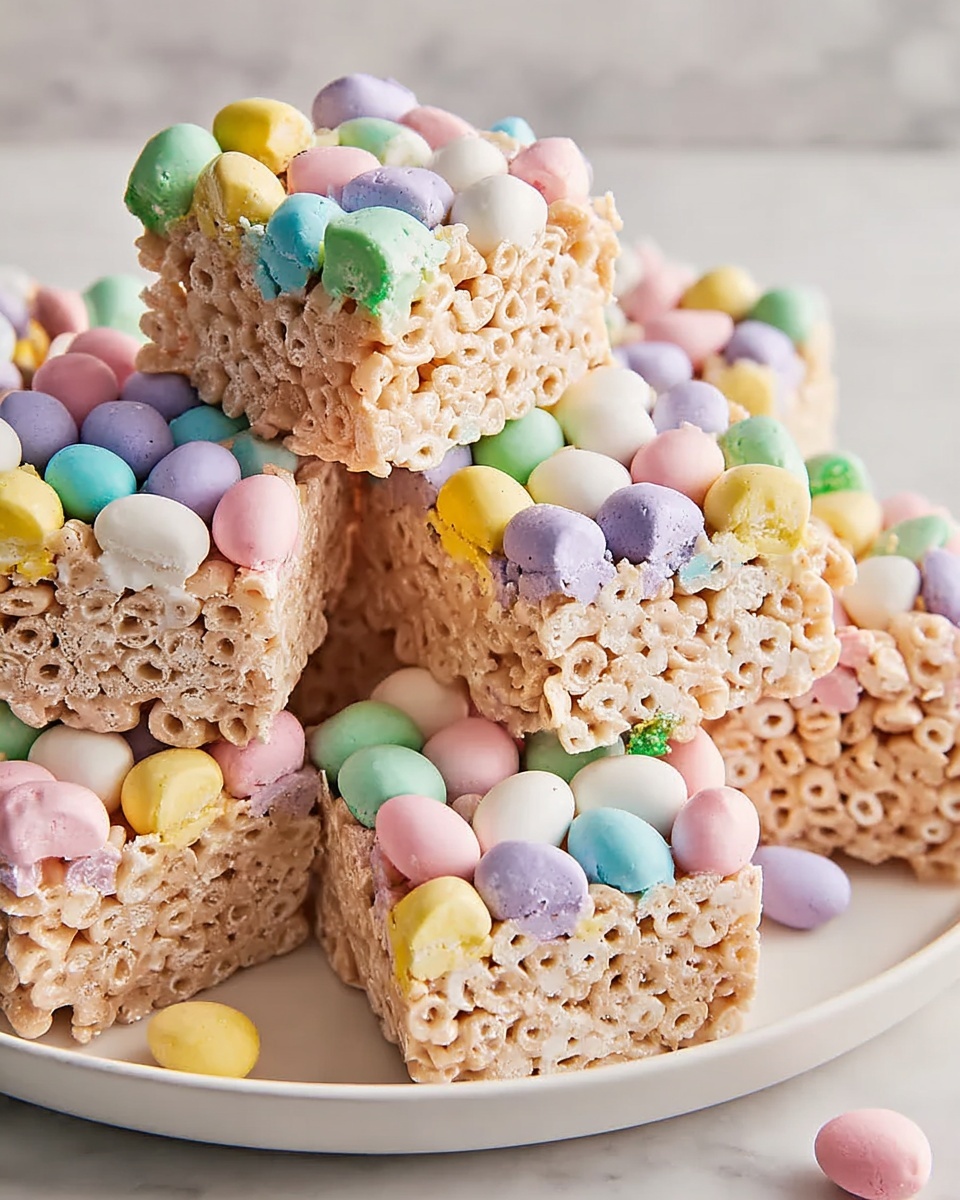
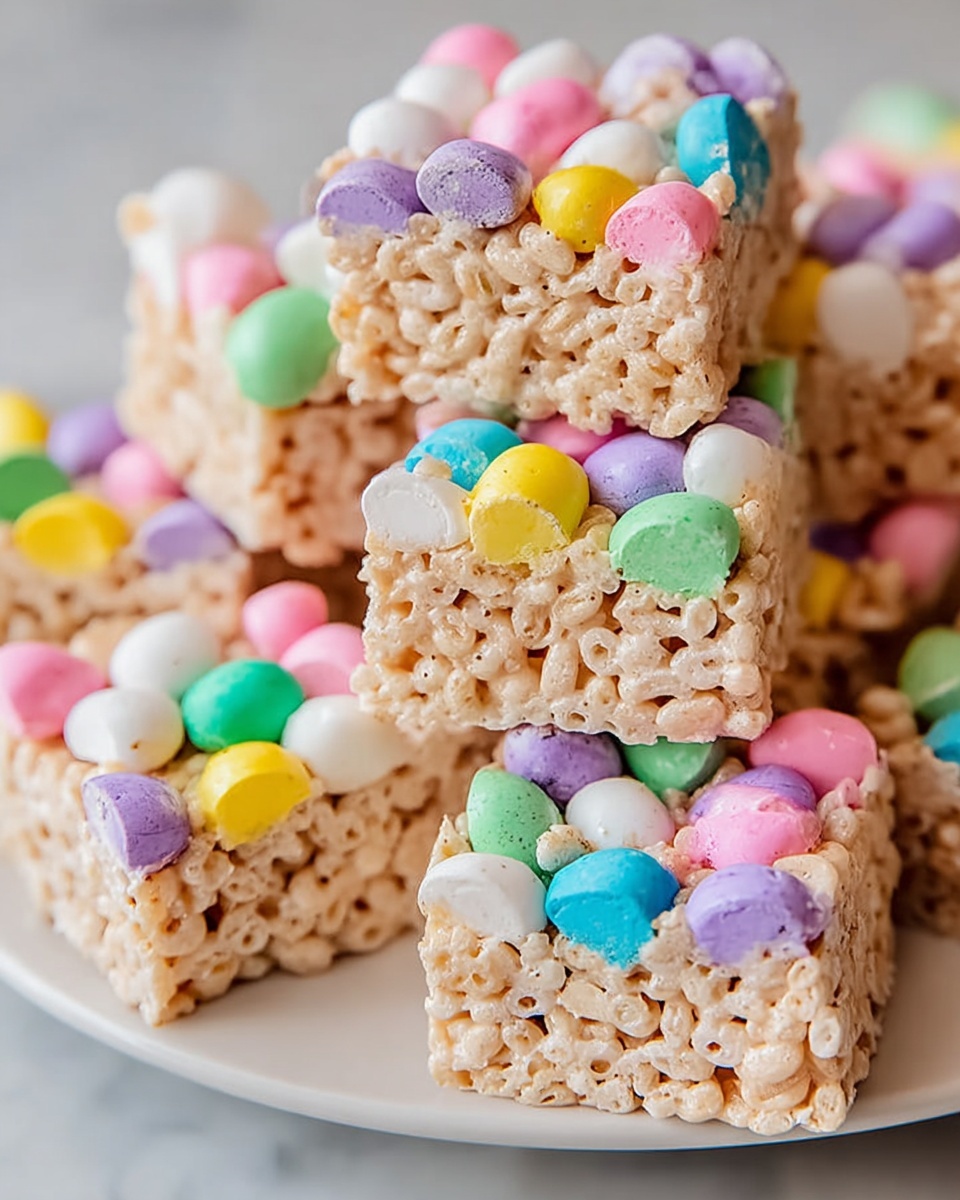
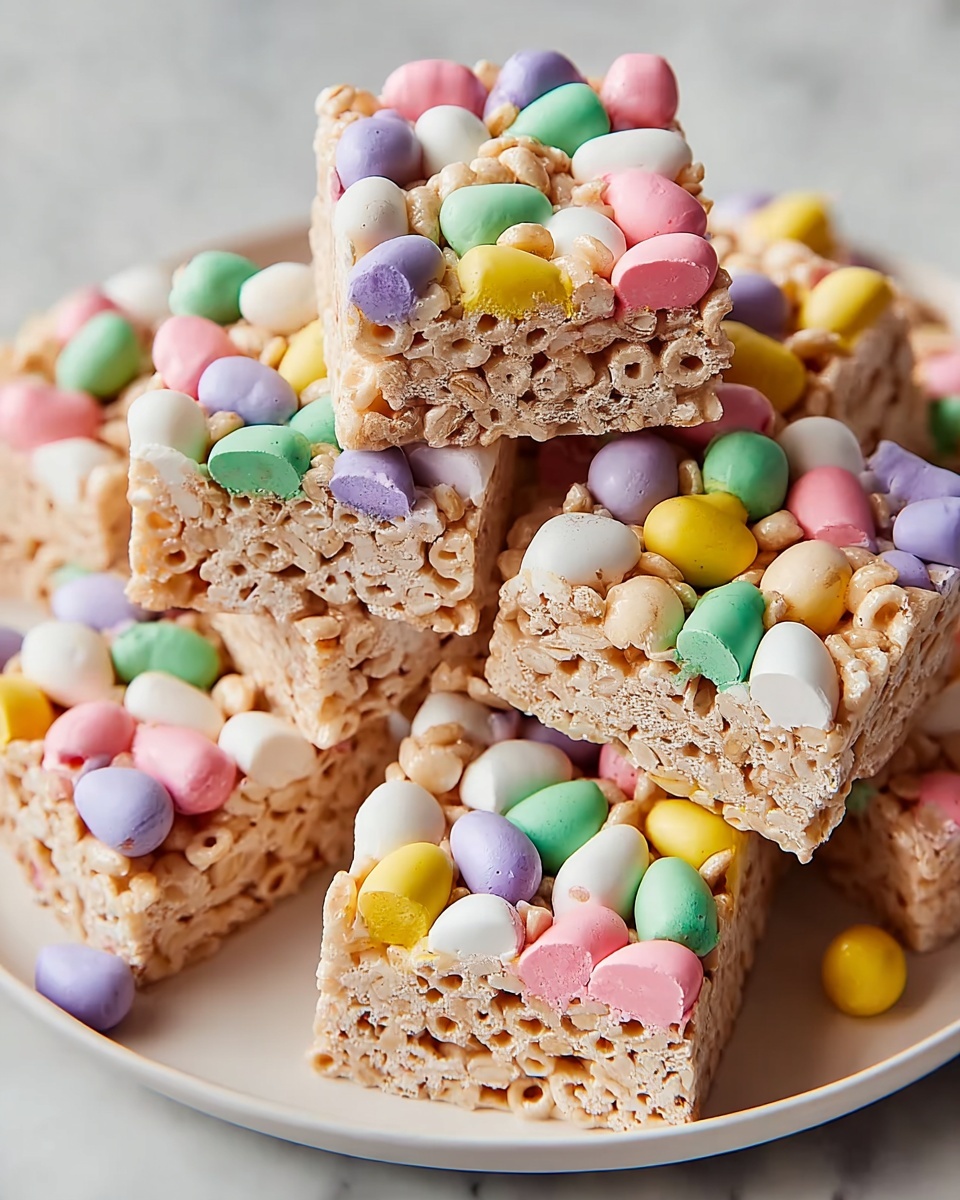
If you’re searching for a fun and festive treat to brighten up your spring celebrations, this Easter Rice Krispie Bars Recipe is your new go-to dessert. These bars are a delightful twist on the classic rice cereal snack, bursting with pastel-colored candies and a drizzle of white chocolate that makes them perfect for Easter gatherings or any cheerful occasion. The gooey marshmallow base pairs beautifully with the crisp Rice Krispies, while the colorful M&M’s and sprinkles add both a playful look and a satisfying crunch, making every bite a joyful celebration of flavor and texture.
Ingredients You’ll Need
Getting started with this recipe is a breeze because the ingredients are straightforward, yet they each play a crucial role in making these Easter Rice Krispie Bars Recipe extra special. From the buttery richness to the sweet marshmallows, every element contributes to the perfect balance of chewy, crunchy, and colorful delight.
- Rice Krispies cereal: The crunchy backbone of the bars, providing that iconic crispy texture.
- Mini marshmallows: The glue that holds everything together with a soft, chewy sweetness.
- Unsalted butter: Adds a silky richness and helps melt the marshmallows smoothly.
- Vanilla extract (optional): Introduces a subtle depth of flavor that enhances the overall sweetness.
- Pastel-colored M&M’s or candy-coated chocolate eggs: Bring a fun, festive splash of color and an extra chocolatey bite.
- White chocolate chips (optional): Perfect for melting and drizzling, adding an elegant touch of sweetness and flair.
- Easter-themed sprinkles: Sprinkle these on top to complete the festive, cheerful look.
How to Make Easter Rice Krispie Bars Recipe
Step 1: Melt the Butter
Begin by melting the unsalted butter in a large pot over medium-low heat. Melting it slowly ensures it won’t burn, providing a smooth, flavorful base for your marshmallow mixture.
Step 2: Melt the Mini Marshmallows
Add the mini marshmallows to the melted butter and stir constantly until they’re completely melted and silky. This step is what creates the gooey texture that holds the bars together so beautifully.
Step 3: Add Vanilla Extract
Remove the pot from the heat and stir in vanilla extract if you’re using it. This little touch gives a warm, aromatic quality that elevates the entire dish without stealing the spotlight.
Step 4: Fold in Rice Krispies Cereal
Gently fold the Rice Krispies cereal into the marshmallow mixture, stirring until the cereal is evenly coated. This ensures every bite has that trademark crispy crunch wrapped in marshmallow goodness.
Step 5: Mix in Candy Coated Chocolates
Carefully fold in the pastel M&M’s or candy-coated chocolate eggs. Stir gently to avoid melting them—they add festive color and a delightful chocolate surprise in every bite.
Step 6: Prepare the Baking Dish
Grease or line a 9×13-inch baking dish with parchment paper for easy removal. This step guarantees your bars will come out perfectly formed and mess-free.
Step 7: Press the Mixture into the Dish
Transfer the mixture into the prepared dish and press it down evenly using a spatula or lightly greased hands. Press firmly but gently to compact the bars without crushing the cereal.
Step 8: Drizzle with White Chocolate
Melt white chocolate chips and drizzle over the top for a touch of elegance and extra sweetness. This step is optional but highly recommended for that extra wow factor.
Step 9: Add Easter Sprinkles
Sprinkle Easter-themed sprinkles on top while the white chocolate is still warm so they stick nicely. This adds festive charm and a bit of crunch to your bars.
Step 10: Let Set and Slice
Allow the bars to set for about 30 minutes until firm. Once set, slice into 12 to 16 bars, depending on your preferred size, and get ready to enjoy this festive treat.
How to Serve Easter Rice Krispie Bars Recipe
Garnishes
When serving, consider adding extra sprinkles or a light dusting of powdered sugar for that final pop of festive decoration. A few whole pastel candies perched on top can also make them look irresistible.
Side Dishes
These bars pair perfectly with a cold glass of milk or a cup of hot cocoa, making them an ideal complement to your dessert or snack table. Fresh fruit, like strawberries or orange slices, can also balance the sweetness nicely.
Creative Ways to Present
Try arranging the bars in a colorful Easter basket or wrapping individual pieces in cellophane tied with pastel ribbons for a charming edible gift. You can also serve them on a themed platter surrounded by fresh spring flowers to set the mood.
Make Ahead and Storage
Storing Leftovers
Store your Easter Rice Krispie Bars Recipe in an airtight container at room temperature to keep them soft and chewy. They should stay fresh for up to 3 days, perfect for enjoying well after your celebration.
Freezing
If you want to save some for later, freeze the bars by wrapping them individually in plastic wrap and placing them in a freezer-safe container or bag. They can be frozen for up to 2 months without losing their delicious texture.
Reheating
If frozen, let the bars thaw at room temperature before serving. You can warm them slightly in the microwave for about 10 to 15 seconds if you prefer them soft and melty, but they are delicious eaten cold as well.
FAQs
Can I use regular-sized marshmallows instead of mini marshmallows?
Yes, you can use regular marshmallows, but you may want to chop them into smaller pieces to help them melt more evenly and avoid large melted clumps in the bars.
What is the best way to prevent the candy-coated chocolates from melting?
The key is to fold them gently into the mixture once it’s slightly cooled and to avoid stirring too vigorously. Using pastel M&M’s rather than chocolate eggs can also decrease the chance of melting.
Can I make these bars gluten-free?
Absolutely! Just ensure your Rice Krispies cereal is labeled gluten-free, as some varieties contain barley malt extract. This will keep your Easter Rice Krispie Bars Recipe safe for gluten-sensitive friends and family.
Is it necessary to add white chocolate drizzle?
Not at all; the white chocolate drizzle is an optional step that adds a lovely sweetness and visual appeal, but the bars are delicious even without it.
How do I keep the bars from sticking to the baking dish?
Lining your baking dish with parchment paper or greasing it well will prevent sticking, making it easy to remove and slice the bars without losing their shape.
Final Thoughts
These Easter Rice Krispie Bars Recipe bring a joyous splash of color and festive fun to any table, making them a must-try for your spring celebrations. They’re quick to make, wonderfully tasty, and sure to delight kids and adults alike. Give them a try, and watch how they light up your holiday with every sweet, crunchy bite!
Print
Easter Rice Krispie Bars Recipe
- Prep Time: 10 minutes
- Cook Time: 5 minutes
- Total Time: 45 minutes
- Yield: 12 to 16 bars
- Category: Dessert
- Method: Stovetop
- Cuisine: American
- Diet: Vegetarian
Description
These festive Easter Rice Krispie Bars are a delightful combination of crispy cereal, melted marshmallows, and colorful candy-coated chocolates. Perfect for spring celebrations, they’re easy to make, no-bake treats that are decorated with pastel M&M’s, white chocolate drizzle, and Easter-themed sprinkles to add a cheerful touch. Enjoy these chewy, sweet bars as a fun dessert or snack during the holiday season.
Ingredients
Base
- 6 cups Rice Krispies cereal
- 4 cups mini marshmallows
- 3 tablespoons unsalted butter
- 1 teaspoon vanilla extract (optional)
Mix-ins and Toppings
- 1 cup pastel-colored M&M’s or candy-coated chocolate eggs
- 1/2 cup white chocolate chips (optional, for drizzling)
- Easter-themed sprinkles, as needed for decoration
Instructions
- Melt butter: In a large pot over medium-low heat, melt the unsalted butter carefully until fully liquefied, preparing it as the base for the melted marshmallows.
- Incorporate marshmallows: Add the mini marshmallows to the melted butter, stirring continuously to ensure they melt completely and create a smooth, sticky mixture.
- Add vanilla extract: Remove the pot from the heat and stir in the vanilla extract for added flavor, if you choose to use it.
- Mix in cereal: Gradually fold in the Rice Krispies cereal, stirring gently until every piece is evenly coated with the melted marshmallow mixture.
- Add candy mix-ins: Carefully fold in the pastel-colored M&M’s or candy-coated chocolate eggs, taking care not to crush or melt them in the warm mixture.
- Prepare baking dish: Grease a 9×13-inch baking dish or line it with parchment paper to prevent sticking.
- Press mixture into dish: Transfer the cereal mixture into the prepared dish and press it evenly down using a spatula or greased hands to form a compact layer.
- Optional white chocolate drizzle: Melt the white chocolate chips gently and drizzle over the top of the pressed mixture to add a sweet decorative touch.
- Add sprinkles: Immediately sprinkle Easter-themed sprinkles over the white chocolate drizzle or directly on the bars for a festive appearance.
- Set and serve: Allow the treats to set at room temperature for about 30 minutes until firm. Then slice into 12 to 16 bars and enjoy.
Notes
- Use parchment paper in the baking dish to make removal easier and reduce sticking.
- Press the mixture firmly but gently to achieve bars that hold together well without becoming too dense.
- The vanilla extract is optional but enhances the flavor with a subtle warmth.
- For a nut-free treat, ensure candy mix-ins are free of nut ingredients.
- Store bars in an airtight container at room temperature for up to 3 days for best freshness.