If you’ve ever felt a bit unsure about how to get that perfectly flaky, crisp pie base, let me introduce you to the magic of the Blind Baking Pie Crust Recipe. This method is a game changer, giving you a golden, sturdy shell that bakes evenly and holds any filling beautifully, whether sweet or savory. It’s one of those kitchen skills that once you master, transforms your pie game completely, ensuring the crust never gets soggy or undercooked. Trust me, this recipe is easy, reliable, and totally worth adding to your baking arsenal.
Ingredients You’ll Need
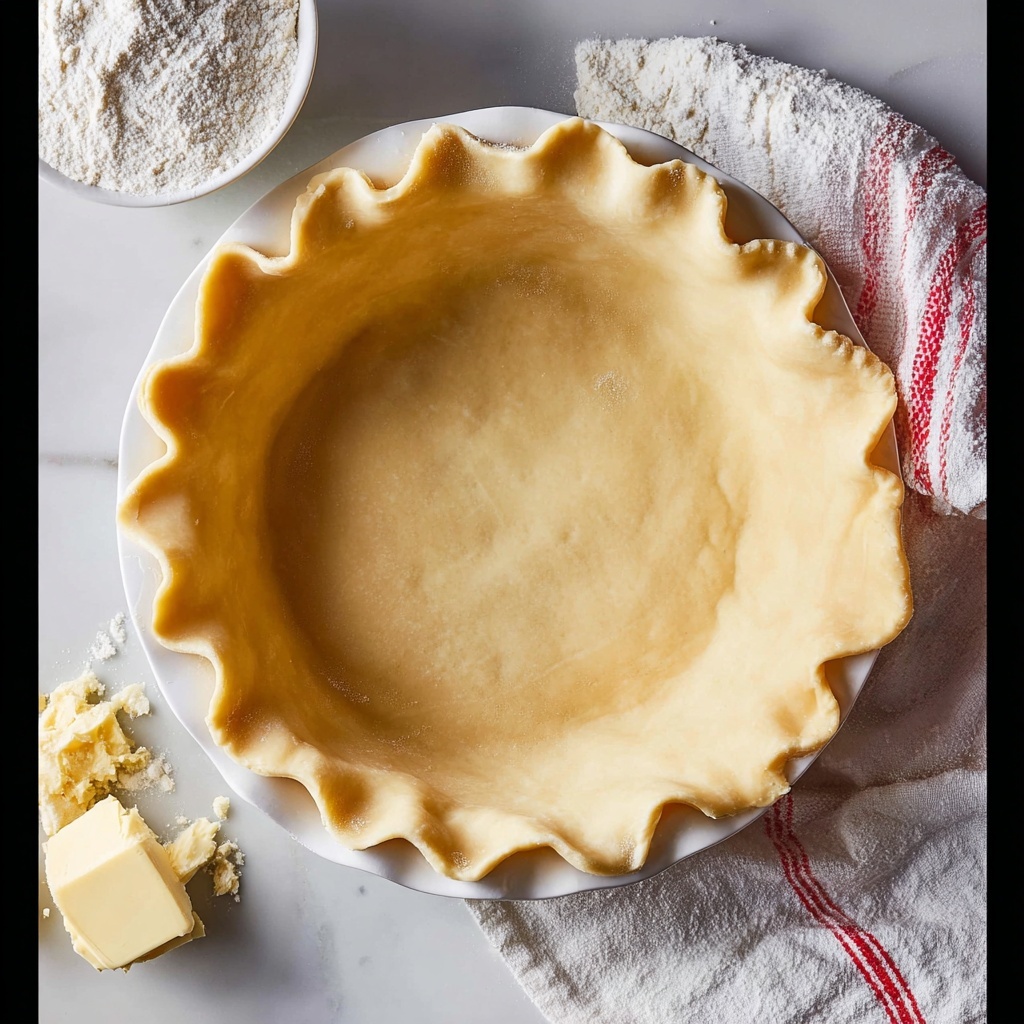
Before you start, it’s great to know that the ingredients for the Blind Baking Pie Crust Recipe are wonderfully simple yet essential. Each element plays a critical role, from the buttery texture of the crust to the crispness you achieve by using weights.
- Pie crust: Use homemade for best results or even store-bought to save time without sacrificing flavor.
- Parchment paper or tin foil: Protects your crust and makes it easy to lift out pie weights without harming the dough.
- Pie weights (or dry beans, dry rice, loose change): These keep your crust sturdy and prevent bubbles during baking.
How to Make Blind Baking Pie Crust Recipe
Step 1: Prepare Your Pie Crust
Start by making or selecting your pie crust. I genuinely recommend making it yourself—it’s so rewarding and tastes heavenly—but a good store-bought crust will also do the trick. Having a nicely chilled, pliable dough is crucial before you begin shaping.
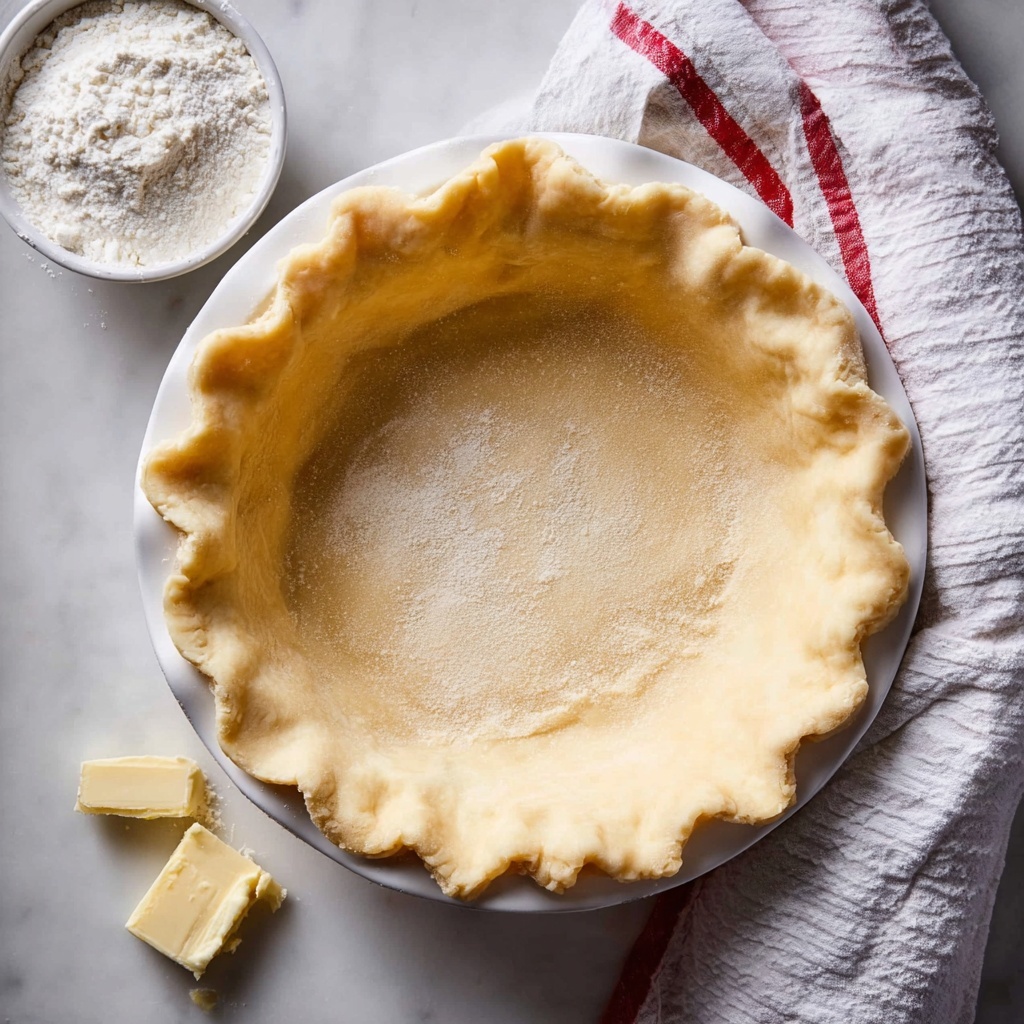
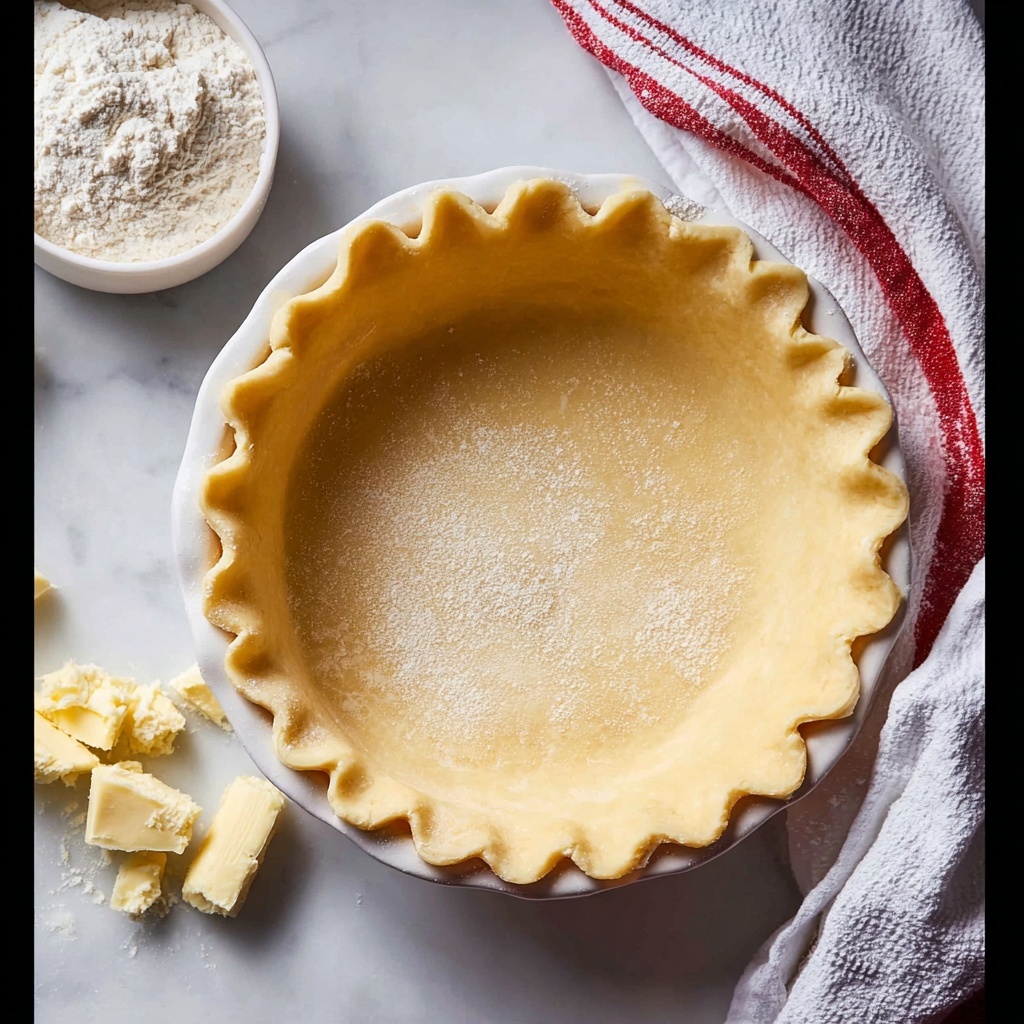
Step 2: Roll and Fit the Crust
Roll out your dough gently, aiming for an even thickness, and transfer it carefully to a 9-inch pie plate. Don’t worry if it’s a bit fragile; you can fix minor cracks as you go.
Step 3: Trim and Shape the Edges
Fold any overhanging dough underneath itself to neatly line up with your pie plate’s rim. You can trim if you want a clean edge, but folding works wonderfully and keeps the crust sturdy. Use your fingers dipped in ice water to smooth out cracks — think of it like shaping play dough!
Step 4: Flute or Fork the Edges
This little touch isn’t just for show. Fluting or pressing with a fork slightly strengthens the edge and adds some charming detail to your pie shell.
Step 5: Chill the Crust
Refrigerate your crust for at least an hour or, if short on time, half an hour will do. Chilling firms up the fat in the dough, creating that sought-after flaky texture once baked.
Step 6: Preheat and Prepare to Bake
Get your oven roaring at 425 degrees Fahrenheit, and pop a pizza stone or metal baking sheet inside to heat thoroughly. This step helps the crust cook evenly from the bottom up.
Step 7: Line and Weight the Crust
Take a large piece of parchment paper or foil, crumple it and smooth it out to soften, then press it gently into the pie crust, leaving enough overhang to grab easily. Fill the lined crust with your pie weights or substitute. Be generous here — the weights prevent bubbles and keep edges upright, giving your crust a perfect shape.
Step 8: Initial Bake
Bake the weighted crust at 425 degrees for around 15 minutes until the edges just begin turning a delicate golden hue. This early color change is a good sign you’re on track.
Step 9: Remove Weights and Prick
Carefully lift out the parchment and weights, keeping the crust intact. You’ll notice the base looks shiny and slightly undercooked — that’s expected. Prick the bottom with a fork to avoid any bubbling during the next bake.
Step 10: Tin Foil Shield for Edges (Full Bake Only)
If you are fully blind baking the crust (baking it completely before filling), shield the edges with a foil wreath to prevent over-browning. Crafting this shield is simple, and it preserves the crust’s beautiful color and texture.
Step 11: Final Bake for Full or Partial Blind Baking
Pop the crust back into the oven for:
– A full bake: 12 to 18 minutes until the bottom turns a lovely golden brown.
– A par-bake: About 3 minutes to get a matte, non-shiny base, ideal if the crust continues baking after adding filling.
Step 12: Cooling and Filling
Once baking is complete, remove your pie crust and let it cool fully before adding any filling. This ensures it holds its structure beautifully and keeps that flakiness intact.
How to Serve Blind Baking Pie Crust Recipe
Garnishes
While the crust itself is a star, you can enhance your pie with fresh fruit slices like apples or berries for a colorful, mouth-watering presentation. A dusting of powdered sugar or a sprinkle of cinnamon can also add a sweet finishing touch when serving desserts.
Side Dishes
For savory pies, pair your beautifully blind-baked crust with fresh salads, roasted vegetables, or a warming soup. These sides complement the flaky texture while balancing flavors on your plate.
Creative Ways to Present
Serve mini pies or tartlets made from this crust for charming appetizers or party treats. Using decorative pie crust cutters or lattice tops can elevate your pies, turning the classic Blind Baking Pie Crust Recipe into an art form that dazzles guests.
Make Ahead and Storage
Storing Leftovers
If you have leftover baked pie crust, wrap it tightly in plastic wrap and store it in the refrigerator for up to two days. It can be crisped up slightly by warming in a hot oven for a few minutes before reuse.
Freezing
This recipe freezes beautifully. After blind baking, allow the crust to cool completely, then wrap it well with foil and place it in an airtight container or freezer bag. It will keep fresh for up to three months and is perfect for quick baking later.
Reheating
To bring a frozen or refrigerated crust back to life, warm it in a preheated 350-degree oven for 5 to 10 minutes. This revives the crispness, making it ready to fill and serve just as delicious as fresh.
FAQs
What is the purpose of blind baking a pie crust?
Blind baking ensures the crust is fully cooked and crisp before adding a wet filling, preventing a soggy bottom and helping the pie hold its shape perfectly.
Can I use store-bought pie dough for this Blind Baking Pie Crust Recipe?
Absolutely! While homemade dough offers richer flavor, store-bought pie dough works wonderfully and speeds up the process without sacrificing the wonderful texture.
What can I use if I don’t have pie weights?
Common kitchen staples like dry beans, dry rice, or even loose change are excellent substitutes for pie weights to keep the crust from bubbling and shrinking.
How do I prevent the edges of the crust from burning while blind baking?
Using a tin foil shield around the edges during the second part of baking helps protect the rim from over-browning while the bottom fully bakes.
Should I prick the pie crust before or after blind baking?
Pricking the crust after removing the pie weights, but before the final bake, helps prevent bubbles forming on the crust’s bottom during baking.
Final Thoughts
This Blind Baking Pie Crust Recipe truly unlocks the secret to flawless pies every time. Whether you’re filling it with luscious fruit, creamy custard, or savory delights, this method sets the foundation for success. Give it a try—it’s simple, dependable, and turns ordinary pie baking into a joy you’ll look forward to again and again!
Print
Blind Baking Pie Crust Recipe
- Prep Time: 10 minutes
- Cook Time: 30 minutes
- Total Time: 40 minutes
- Yield: 1 9-inch pie crust
- Category: Baking
- Method: Baking
- Cuisine: American
Description
Learn how to blind bake a pie crust perfectly to prevent soggy bottoms and achieve a flaky, tender crust. This step-by-step guide covers everything from rolling out your dough and chilling it, to lining with foil and weights, and baking at the right temperature with tips for both full and partial blind baking.
Ingredients
Pie Crust
- 1 pie crust (homemade or store-bought, enough for a 9-inch pie plate)
Additional Supplies
- Parchment paper or tin foil (large enough to line the pie crust with overhang)
- Pie weights (such as dry beans, dry rice, loose change, marbles, or sugar; about 2 ½ pounds)
Instructions
- Prepare the Pie Crust: Roll out your pie crust dough and transfer it to a 9-inch pie plate according to your preferred method or recipe.
- Trim and Fold the Edges: Gently fold the excess dough hanging over the edge underneath itself to align with the pie plate edge, smoothing any cracks with moistened fingers.
- Shape the Crust Edge: Flute the edges using your fingers, knuckles, or press with a fork for a decorative finish.
- Chill the Crust: Refrigerate the crust for at least 30 minutes, ideally 1 hour, to keep the fat cold for a flaky texture.
- Preheat Oven and Prepare for Baking: Heat oven to 425°F (220°C) for at least 20 minutes, placing a pizza stone or metal baking sheet inside to ensure a hot baking surface.
- Line the Crust: Crumple then smooth parchment paper or foil and line it inside the chilled crust, ensuring enough overhang to lift out weights later.
- Add Pie Weights: Fill the lined crust with pie weights, beans, rice, or other heavy items up the sides to prevent shrinking or bubbling during baking.
- Initial Blind Bake: Bake the weighted crust at 425°F for 15 minutes until edges begin to lighten in color.
- Remove Weights and Dock Bottom: Carefully lift out the lining and weights, then prick the bottom of the crust with a fork to prevent air bubbles.
- Create a Tin Foil Shield: For a full blind bake, make an aluminum foil shield by cutting a circle in a folded square of foil and fitting it around the pie edge to prevent over-browning.
- Continue Baking Fully or Partially: For a full bake, return crust to oven at 425°F for 12-18 minutes until the bottom is light golden brown. For par-baking, bake an additional 3 minutes without a foil shield until the bottom is matte and pale.
- Cool and Fill: Remove from the oven and allow the crust to cool completely before adding your pie filling and proceeding with your pie recipe instructions.
Notes
- Chilling the dough before baking is crucial for flaky crusts as it keeps the fat cold and prevents shrinking.
- Using a hot baking surface like a pizza stone or metal sheet helps crisp the bottom crust.
- Pie weights can be reused multiple times if stored properly.
- The foil shield prevents the crust edges from burning during longer baking times.
- Par-baking is recommended if the filling requires further baking so the crust does not overcook or burn.
- Homemade pie crust can be made ahead and frozen for several months.