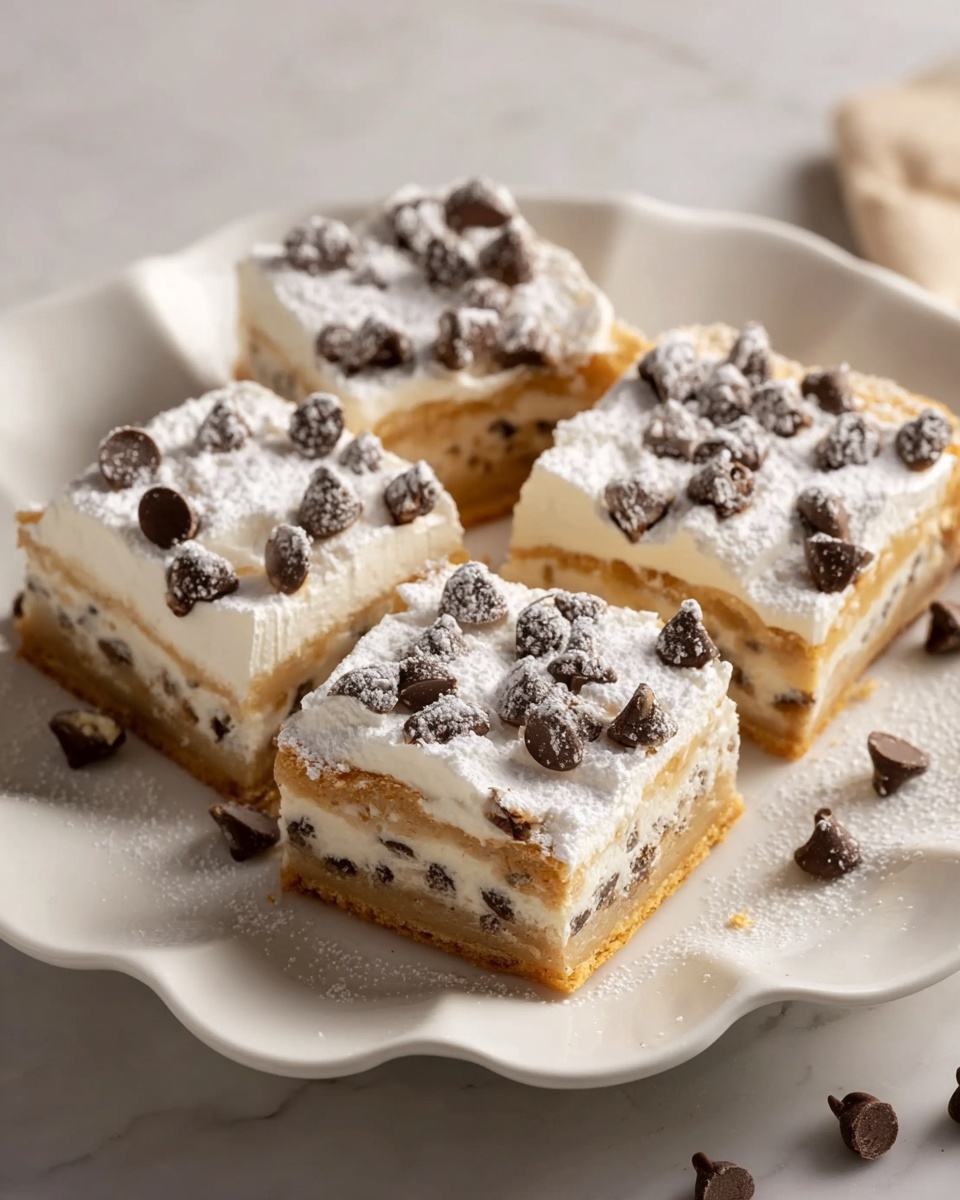
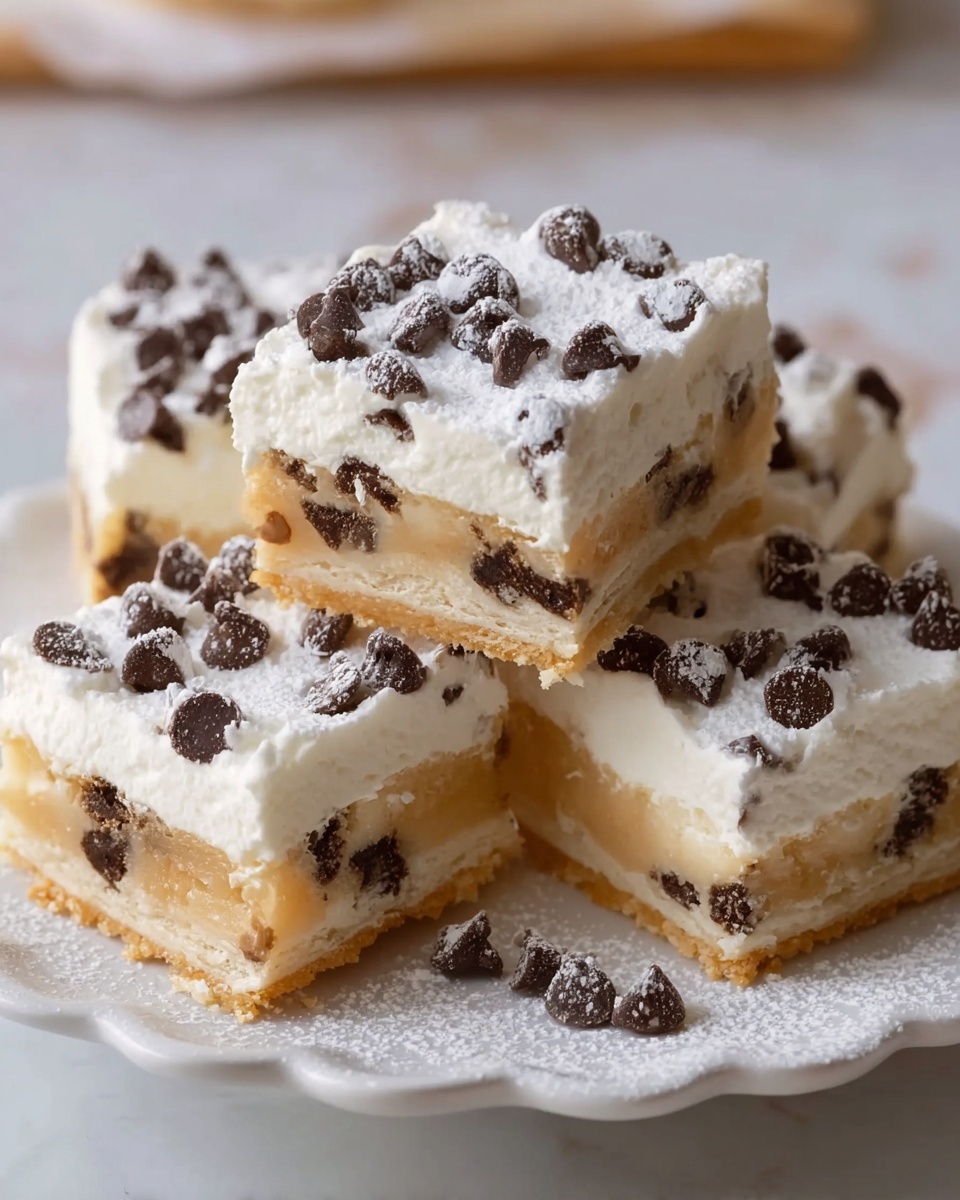
If you’re looking for a delightful dessert that captures the spirit of traditional Italian cannoli but with a simple twist, you’re going to adore this Classic Cannoli Squares Recipe. It’s a charming way to enjoy the creamy ricotta filling and sweet flavors you love in a handheld form that’s easy to slice and serve. Each bite delivers a gorgeous combination of smooth, sweet ricotta, a hint of cinnamon, and the perfect crunch of golden, flaky crust – truly a crowd-pleaser that feels both nostalgic and fresh.
Ingredients You’ll Need
Getting the ingredients for this recipe is a breeze, and each one plays a crucial role in building those authentic cannoli flavors and textures. From the luscious ricotta cheese to the aromatic cinnamon, every component comes together to create a dessert that’s stunning and delicious.
- 2 cups whole-milk ricotta cheese: Use well-drained ricotta for a creamy, rich filling that isn’t too wet.
- 1 cup powdered sugar: This adds sweetness while blending smoothly with the ricotta for that signature cannoli taste.
- 1 teaspoon vanilla extract: Enhances the overall flavor with a warm, inviting note.
- ½ teaspoon ground cinnamon: Adds a subtle, comforting spice that elevates the filling.
- ½ cup mini chocolate chips: These give delightful bursts of chocolate in every bite without overwhelming.
- 2 pre-made pie crusts: Using store-bought crusts keeps preparation easy and ensures a flaky, golden base.
- 1 large egg (for egg wash): Brushed on top to create a shiny, golden finish.
- Sugar (for sprinkling on top): Adds a sweet crunch and enhances the look of the finished squares.
- Optional garnishes – ¼ cup chopped pistachios, 3 maraschino cherries, extra chocolate chips: Perfect for adding pops of color and extra flavor layers.
How to Make Classic Cannoli Squares Recipe
Step 1: Preheat your oven and prepare filling
Start by preheating your oven to 375°F (190°C). This ensures your oven is ready to give the crust a perfect golden bake. Meanwhile, whisk together the ricotta, powdered sugar, vanilla extract, ground cinnamon, and mini chocolate chips in a bowl. Aim for a smooth, well-blended filling that promises a luscious texture inside each square.
Step 2: Line the baking dish with pie crust
Press one pie crust firmly into a 9×9-inch baking dish, making sure it fits snugly into all the corners. This crust is the sturdy, buttery foundation for your cannoli squares, so don’t rush this step! A well-placed crust means every square will hold together beautifully.
Step 3: Spread the ricotta filling
Carefully spread your prepared ricotta mixture evenly over the bottom crust. Leave a small border around the edges so the top crust can seal tight without pushing out the filling. This layer is where the magic happens – creamy, sweet, and bursting with chocolate chips.
Step 4: Top with second crust and seal edges
Gently place the second pie crust over the filling and seal the edges by crimping with your fingers or the tines of a fork. This step keeps all the creamy filling nicely tucked inside as it bakes, while creating that classic pie silhouette.
Step 5: Apply egg wash and sugar topping
Beat the egg and brush it over the entire top crust. This egg wash not only helps achieve that beautiful golden color but also provides a slightly glossy finish. Sprinkle sugar generously on top for some extra sparkle and sweetness.
Step 6: Bake until golden and bubbling
Pop the baking dish into your preheated oven and bake for 30 to 35 minutes. You’ll know it’s ready when the crust turns a rich golden brown and the filling looks gently bubbly under the crust, signaling a creamy, luscious center.
Step 7: Cool before slicing
Let your Classic Cannoli Squares cool for at least 30 minutes once out of the oven. This step is essential – it allows the filling to set so your squares cut cleanly without any messy oozing. The wait is worth it!
Step 8: Serve warm or chilled
Whether you enjoy these squares warm or chilled, both ways are utterly satisfying and highlight different textures and flavors within the dish.
How to Serve Classic Cannoli Squares Recipe
Garnishes
To give your Classic Cannoli Squares a stunning and authentic final touch, consider topping them with chopped pistachios for a nutty crunch, maraschino cherries for a pop of color and sweetness, or sprinkle extra mini chocolate chips for added richness. These garnishes not only elevate the presentation but also add delicious textural contrasts.
Side Dishes
Pairing these squares with a cup of rich espresso or a scoop of vanilla gelato makes for an unforgettable dessert experience. The creamy or bitter notes balance the sweet, spicy ricotta perfectly, enhancing every bite.
Creative Ways to Present
For parties or special occasions, arrange your Classic Cannoli Squares on a decorative platter with fresh berries and mint leaves. Alternatively, serve individual slices with a dusting of powdered sugar and a drizzle of chocolate or caramel sauce to impress your guests with minimal effort.
Make Ahead and Storage
Storing Leftovers
Keep leftover cannoli squares covered tightly with plastic wrap or in an airtight container in the refrigerator. They’ll stay fresh for up to 3 days, maintaining that creamy filling and flaky crust texture without drying out.
Freezing
If you want to make these ahead of time or save some for later, wrap them individually in plastic wrap and then in aluminum foil before placing in the freezer. Frozen cannoli squares can last up to 2 months and thaw beautifully in the fridge overnight.
Reheating
To enjoy your cannoli squares warm after refrigeration or freezing, reheat them in a 350°F (175°C) oven for about 10-15 minutes. Avoid microwaving if possible to preserve the flaky crust texture and prevent sogginess.
FAQs
Can I make the ricotta filling ahead of time?
Absolutely! The ricotta filling can be prepared a day in advance and kept refrigerated. Just give it a quick stir before spreading it onto the crust to ensure it’s smooth and ready to go.
What if I don’t have pre-made pie crust?
You can certainly make your own pie crust if you prefer! A simple buttery, flaky crust recipe works perfectly and can add that extra homemade touch to your Classic Cannoli Squares Recipe.
Can I substitute mini chocolate chips with something else?
Of course! You can substitute mini chocolate chips with chopped dark chocolate, white chocolate chips, or even dried fruit to customize the flavor according to your taste.
Is it better to serve these warm or cold?
Both ways are delicious. Warm squares offer a melty, tender texture, while chilled ones have a firmer filling that’s refreshing. Feel free to try both and see which you prefer!
How do I prevent the filling from becoming watery?
Draining your ricotta well before mixing is key. Place the ricotta in a fine mesh strainer or cheesecloth for 30 minutes to remove excess liquid and avoid a soggy filling.
Final Thoughts
This Classic Cannoli Squares Recipe has such a special place in my heart because it takes a beloved Italian treat and turns it into something delightfully approachable and shareable. I promise, once you try these squares, they’ll become a staple in your dessert rotation. So go ahead and make a batch—you’re going to love how they bring a little Italian magic right to your kitchen!
Print
Classic Cannoli Squares Recipe
- Prep Time: 30 minutes
- Cook Time: 35 minutes
- Total Time: 1 hour 5 minutes
- Yield: 9 squares
- Category: Dessert
- Method: Baking
- Cuisine: Italian-American
- Diet: Vegetarian
Description
Classic Cannoli Squares combine the creamy, sweet ricotta filling of traditional cannoli with the ease of a baked square dessert. Featuring a smooth ricotta, powdered sugar, and chocolate chip filling nestled between flaky pre-made pie crusts, this recipe offers a delightful Italian-inspired treat that’s perfect for any occasion.
Ingredients
Filling
- 2 cups whole-milk ricotta cheese (drained if very watery)
- 1 cup powdered sugar
- 1 teaspoon vanilla extract
- ½ teaspoon ground cinnamon
- ½ cup mini chocolate chips
Crust and Topping
- 2 pre-made pie crusts (for a 9×9-inch baking dish)
- 1 large egg (for egg wash)
- Sugar (for sprinkling on top)
Optional Garnishes
- ¼ cup chopped pistachios
- 3 maraschino cherries
- Extra chocolate chips
Instructions
- Preheat the Oven: Preheat your oven to 375°F (190°C) to prepare for baking the cannoli squares.
- Prepare the Filling: In a mixing bowl, whisk together the whole-milk ricotta cheese, powdered sugar, vanilla extract, ground cinnamon, and mini chocolate chips until smooth and well combined to create the classic creamy filling.
- Arrange the Bottom Crust: Press one of the pre-made pie crusts into a 9×9-inch baking dish, making sure it fits snugly into the corners to create an even base.
- Spread the Filling: Evenly spread the ricotta mixture over the bottom crust, leaving a small border around the edges to facilitate sealing with the top crust.
- Add the Top Crust: Place the second pie crust over the filling carefully and seal the edges by crimping with your fingers or a fork to prevent leakage during baking.
- Egg Wash and Sugar Topping: Beat the egg and brush it over the top crust to give it a beautiful golden sheen. Sprinkle generously with sugar for a sweet, crunchy finish.
- Bake the Squares: Bake the assembled dessert in the preheated oven for 30 to 35 minutes, or until the crust turns golden brown and the filling begins to gently bubble, ensuring doneness.
- Cool the Dessert: Allow the baked cannoli squares to cool for at least 30 minutes. This resting time helps the filling to set properly and makes slicing easier.
- Serve and Garnish: Slice into 9 squares and serve warm or chilled. Add optional garnishes such as chopped pistachios, maraschino cherries, or extra chocolate chips to enhance presentation and flavor.
Notes
- Drain ricotta well if watery to prevent soggy crust.
- Use chilled pie crusts to handle and press easily.
- Allow adequate cooling time for filling to firm up completely before slicing.
- Store leftovers covered in the refrigerator and consume within 3 days for best freshness.
- Customize with additional mix-ins like chopped nuts or dried fruit in the filling if desired.