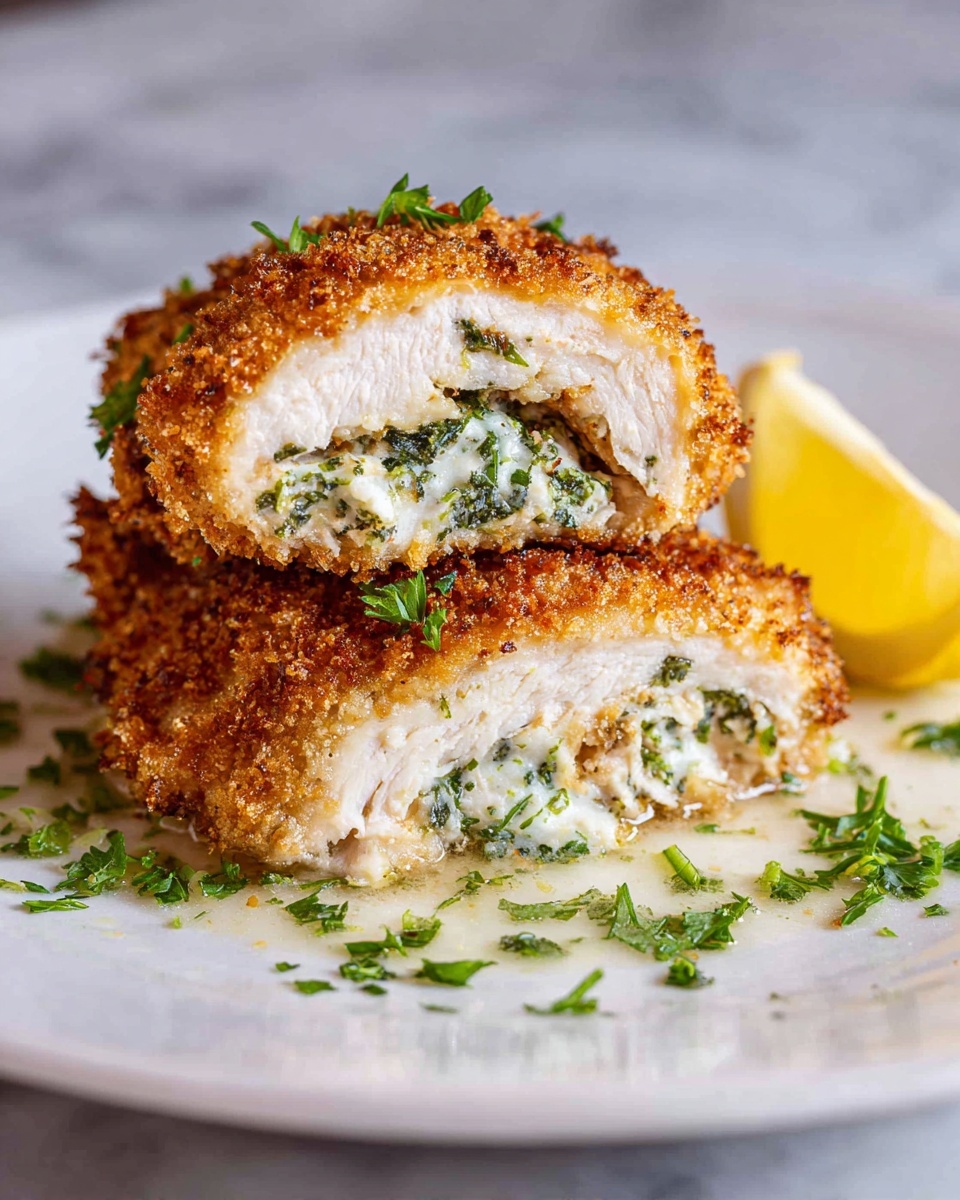
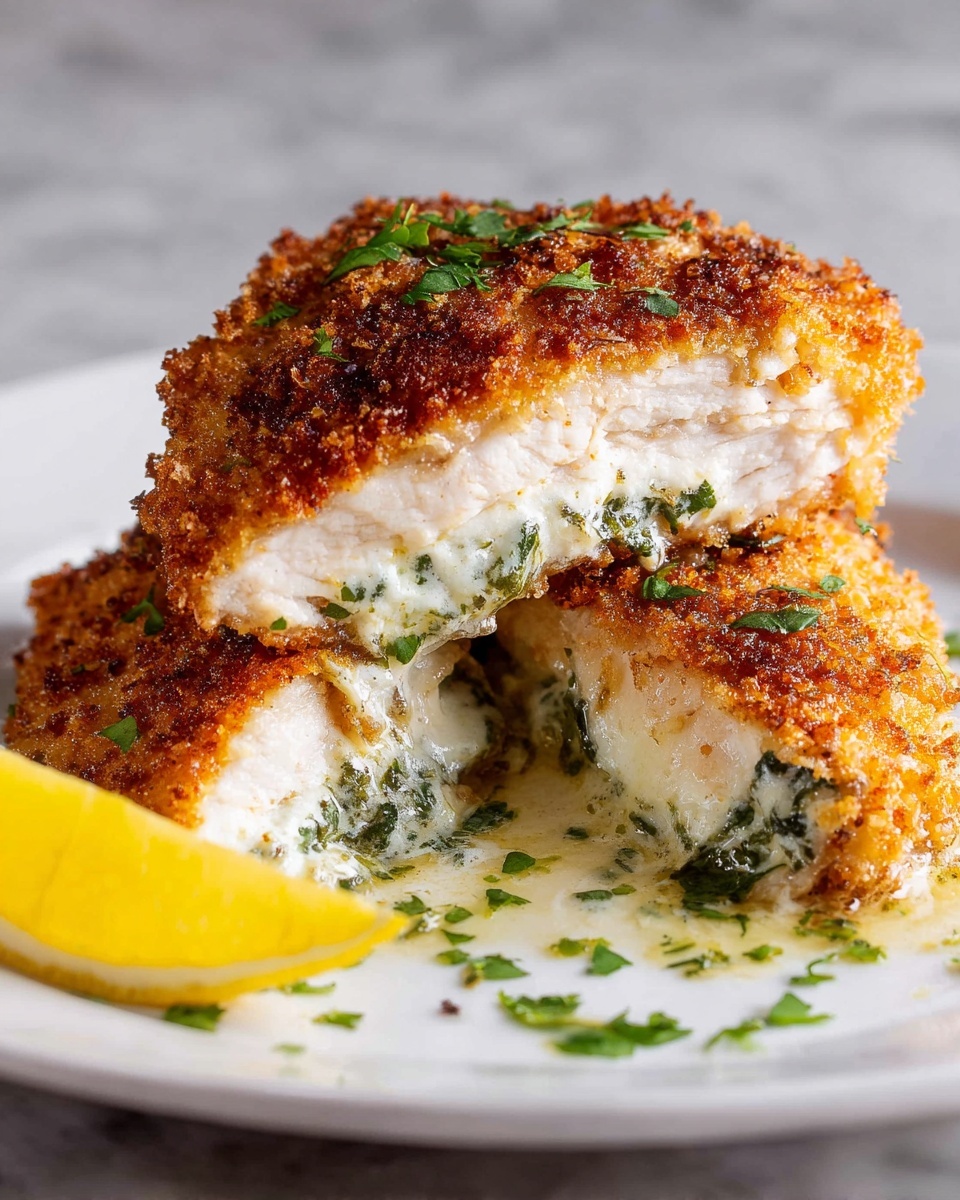
If you have ever wanted to create a restaurant-quality dinner at home that oozes flavor and indulgence, then this Classic Chicken Kiev Recipe is just the ticket. Crispy on the outside, bursting with garlicky, lemon-infused butter on the inside, this dish brings warmth and comfort to any dinner table. The blend of fresh herbs, the satisfying crunch of panko crumbs, and the juicy chicken breast all come together to create a meal that’s as impressive as it is delicious. Trust me, once you try this Classic Chicken Kiev Recipe, it will quickly become one of your favorite go-to recipes for special occasions or simply a flavorful weeknight treat.
Ingredients You’ll Need
These ingredients may appear simple, but each one plays a vital role in building the flavor, texture, and vibrant look of this dish. From the creamy, herb-packed butter to the crispy panko coating, every component works harmoniously to create a stunning Classic Chicken Kiev Recipe.
- Unsalted butter (6 Tbsp, room temp): The star of the filling, softened butter allows easy mixing with garlic and herbs for that luscious, melt-in-your-mouth center.
- Garlic clove (1 large, minced): Adds a punch of aromatic flavor that brightens the butter filling beautifully.
- Lemon juice (1 Tbsp, plus wedges): Lends a fresh zing that keeps the dish light and perfectly balanced, especially when squeezed over before serving.
- Fresh parsley (2 Tbsp chopped, plus extra for garnish): Brings color and herbal freshness, elevating both the butter filling and the overall presentation.
- Salt (1/2 tsp, plus to taste): Essential for seasoning both the butter and the chicken, enhancing all the flavors seamlessly.
- Black pepper (1/2 tsp freshly ground, plus to taste): Provides just the right touch of warmth and depth in the seasoning.
- Chicken breasts (3 large, about 12 oz each): The canvas for this recipe, thick and juicy breasts guarantee a satisfying bite and ample room for a generous butter filling.
- Eggs (2, beaten): Helps the breading stick beautifully, making sure the crust is crispy and golden.
- All-purpose flour (1/2 cup): The first step in the breading process, creating that initial layer to grab onto the egg wash.
- Panko bread crumbs (2 cups): The secret to the delightful crunch that contrasts perfectly with the tender chicken and creamy butter.
- Extra light olive oil or canola oil (for sautéing): Needed for frying the kiev to a golden crisp without overpowering the delicate flavors.
How to Make Classic Chicken Kiev Recipe
Step 1: Make the Flavored Butter
The magic begins by blending softened butter with minced garlic, fresh parsley, lemon juice, salt, and pepper. Using a fork, mash them together until the mixture becomes evenly combined and creamy. This is the luscious, flavorful butter that will soon melt inside the chicken, delivering that unforgettable burst of flavor.
Step 2: Prepare the Chicken
Grab a sharp, slim knife and carefully slice each chicken breast in half lengthwise to create two even pieces. Then, cut a deep pocket into each piece without slicing all the way through. This pocket is where you will nestle the herbed butter, so make it generous — about 2 inches wide and 3 inches long. Scoop about one tablespoon of the flavored butter into each pocket, then fold the chicken over to encase it tightly. Pinch the edges firmly to seal the butter inside. Give each piece a light seasoning of salt and pepper on both sides for maximum flavor throughout.
Step 3: Prepare the Breading Stations
Set up your three essential breading stations: one with flour, one with beaten eggs, and one with panko bread crumbs. Dip each stuffed chicken breast first into the flour, shaking off any excess, then into the eggs, ensuring full coverage, and finally roll it through the crunchy panko crumbs. This three-step coating gives the chicken its irresistible golden crust.
Step 4: Fry the Chicken Kievs
Pour about a quarter-inch of oil into a large, deep skillet and heat over medium heat until very hot — around 350 degrees Fahrenheit. You’ll know it’s ready when a breadcrumb sizzles on contact. Fry the chicken breasts in a single layer for about 4 minutes per side, watching carefully so they don’t brown too quickly. The interior should reach 165 degrees Fahrenheit to ensure the chicken is perfectly cooked and safe to eat. Fry the second batch after the first is done.
Step 5: To Serve
Once your Classic Chicken Kiev Recipe is golden and cooked through, season with a pinch of salt and garnish with fresh parsley for a beautiful pop of green. Serve immediately with lemon wedges on the side — a squeeze over the hot chicken is a game changer, brightening and balancing every bite. Just be cautious when you first cut into each piece, as the hot butter inside can spurt out.
How to Serve Classic Chicken Kiev Recipe
Garnishes
A sprinkle of fresh parsley is more than just decoration; it adds a lively freshness that cuts through the richness of the butter. Don’t forget those lemon wedges either — a simple squeeze over the chicken enhances its citrusy notes and adds a zesty lift to the dish.
Side Dishes
Classic Chicken Kiev pairs wonderfully with creamy mashed potatoes or buttery new potatoes to soak up the luscious melted butter. Steamed green beans, roasted asparagus, or a simple crisp garden salad provide a satisfying contrast in texture and balance.
Creative Ways to Present
For a special occasion, slice the chicken Kiev into medallions and arrange them elegantly on a platter with a drizzle of garlic butter sauce. You can also serve them atop a bed of wild rice or risotto for a more indulgent twist. Even skewering smaller Kiev bites with fresh herb sprigs creates a fun appetizer variation.
Make Ahead and Storage
Storing Leftovers
If you have any leftovers, wrap them tightly and store in an airtight container in the refrigerator for up to 3 days. The flavors develop nicely, but the crispiness of the breading may diminish slightly.
Freezing
This Classic Chicken Kiev Recipe freezes beautifully before or after frying. To freeze raw, breaded chicken, place pieces on a parchment-lined tray until firm, then transfer to a freezer-safe bag for up to 1 month. Cook from frozen and add a few extra minutes to the frying time. Alternatively, freeze cooked Kievs the same way and reheat thoroughly before serving.
Reheating
The best way to reheat leftover or frozen Kievs is in a preheated oven at 350 degrees Fahrenheit for 15 to 20 minutes. This method helps restore some crispiness without drying the chicken out. Avoid microwaving, which can make the coating soggy and the butter inside lose its charm.
FAQs
Can I make the flavored butter ahead of time?
Absolutely! You can prepare the garlic-herb butter up to 2 days in advance and keep it covered in the refrigerator. Just make sure to bring it back to room temperature before stuffing the chicken for easier spreading.
What type of breadcrumbs work best for chicken Kiev?
Panko breadcrumbs are highly recommended for their extra crunch and light texture, which perfectly complements the tender chicken and rich butter filling.
Is it possible to bake the chicken Kiev instead of frying?
Yes, baking is a healthier alternative. Preheat your oven to 375 degrees Fahrenheit, place the breaded chicken on a baking sheet, and bake for 25 to 30 minutes, or until golden and cooked through. You might want to finish with a quick broil to crisp up the crust.
Can I use chicken thighs instead of breasts?
You can, but chicken breasts remain the classic choice due to their size and ability to hold the butter pocket firmly. Chicken thighs may be smaller or less uniform, making the butter filling trickier to seal inside.
How do I prevent the butter from leaking out while cooking?
Firmly sealing the edges of the pocket and chilling the stuffed chicken in the fridge for 15-20 minutes before breading can help the butter stay inside during cooking. Also, frying at the proper medium heat prevents the crust from burning before the chicken cooks through.
Final Thoughts
This Classic Chicken Kiev Recipe is truly a joy to make and even more delightful to eat. Its crispy exterior and buttery, herb-infused center bring a feast of flavors that feels both special and comforting. Whether you’re cooking for friends, family, or just treating yourself, this recipe will impress and satisfy every time. Get ready to fall in love with chicken all over again!
Print
Classic Chicken Kiev Recipe
- Prep Time: 20 minutes
- Cook Time: 20 minutes
- Total Time: 40 minutes
- Yield: 6 servings
- Category: Main Course
- Method: Frying
- Cuisine: European
Description
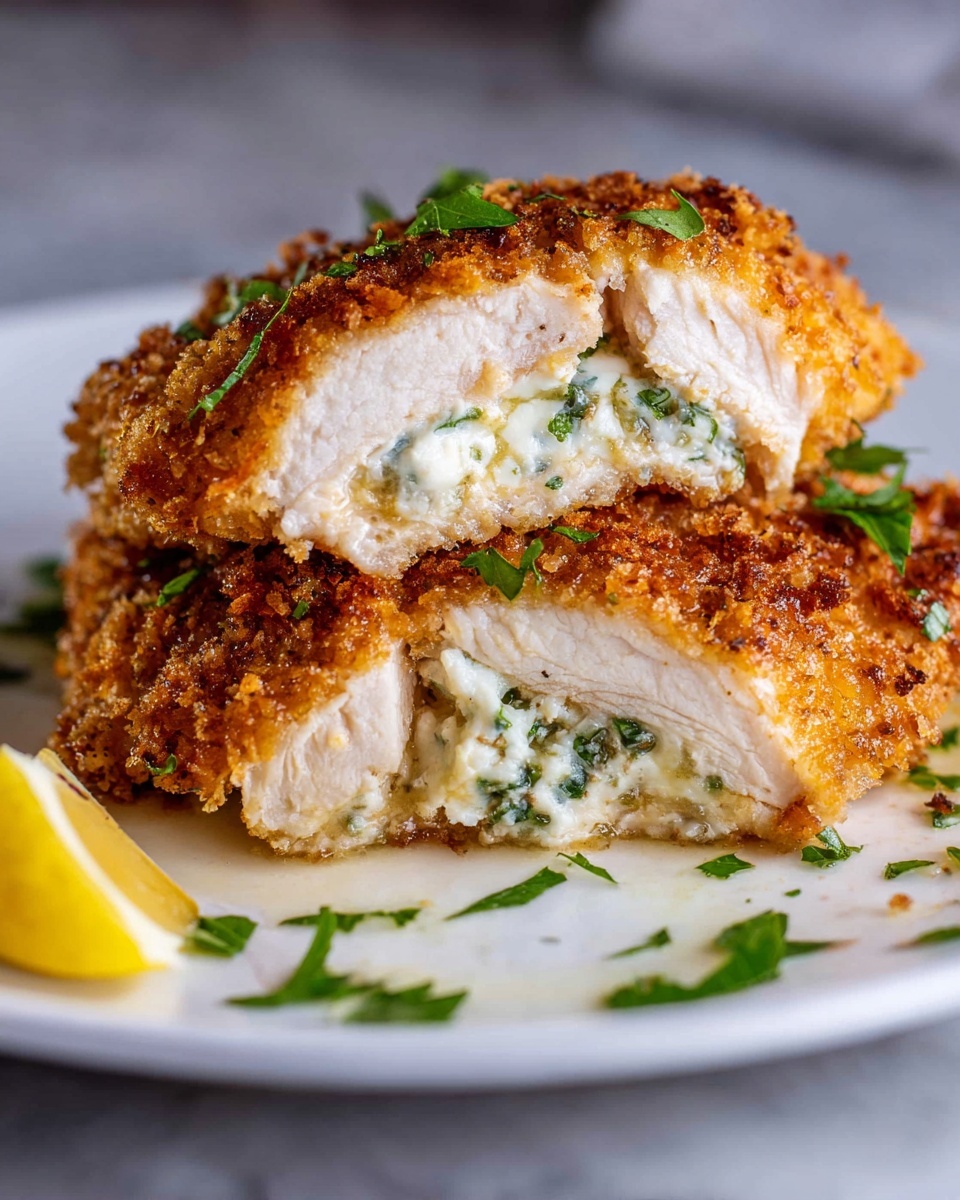
Chicken Kiev is a classic dish featuring tender chicken breasts stuffed with flavorful garlic parsley butter, breaded with panko crumbs, and fried to golden perfection. This recipe offers a delicious combination of crispy exterior and rich, melted butter inside, perfect for a satisfying meal.
Ingredients
Flavored Butter
- 6 Tbsp unsalted butter (room temperature)
- 1 large garlic clove (minced)
- 1 Tbsp lemon juice
- 2 Tbsp chopped fresh parsley
- 1/2 tsp salt (sea salt preferred)
- 1/2 tsp freshly ground black pepper
Chicken and Breading
- 3 large chicken breasts (12 oz each)
- 2 eggs (beaten)
- 1/2 cup all-purpose flour
- 2 cups Panko bread crumbs
- 1/2 tsp salt
- 1/2 tsp black pepper
- Extra light olive oil or canola oil (for sautéing/frying)
To Serve
- Lemon wedges (for squeezing over the finished chicken)
- Additional chopped fresh parsley (for garnish)
Instructions
- Make the Flavored Butter: In a medium bowl, combine the unsalted butter, minced garlic, lemon juice, chopped fresh parsley, salt, and black pepper. Mash everything together with a fork until the lemon juice is fully incorporated and the mixture is well blended. This may take a couple of minutes but results in a delicious, aromatic butter.
- Prepare the Chicken: With a sharp, slim knife, slice each chicken breast in half lengthwise to create two equal halves. Carefully cut a deep pocket in the side of each chicken piece, about 2 inches wide and 3 inches long, being careful not to cut through to the other side. Stuff each pocket with 1 tablespoon of the prepared flavored butter. Seal the pocket by pinching the opening closed and pressing the butter evenly within the chicken. Season both sides of the chicken breasts with salt and pepper.
- Set Up the Breading Stations: Arrange three plates or shallow dishes for the breading process. Place the flour on the first plate. Beat the eggs in the second bowl. Place the panko bread crumbs on the third plate. To bread the chicken, dredge each piece first in the flour, shaking off any excess, then dip into the beaten eggs ensuring full coating, allowing any extra egg to drip off. Finally, coat the chicken with the panko bread crumbs. Place the breaded chicken on a platter while you prepare the remaining pieces.
- Fry the Chicken Kiev: Pour about 1/4 inch of oil into a large, deep skillet and heat it over medium heat until hot (about 350°F), tested by adding a breadcrumb – it should sizzle immediately. Place the chicken Kievs in a single layer, frying for about 4 minutes on each side or until a golden brown crust forms. If the chicken browns too fast, reduce the heat to prevent burning. Use an instant-read thermometer to check that the internal temperature reaches 165°F for safe cooking. Fry in batches if necessary.
- Serve: Once fried, season the chicken Kievs with a light sprinkle of salt. Garnish with extra chopped fresh parsley and serve immediately with lemon wedges to squeeze over the top. When cutting into the chicken, be cautious of the hot, melted butter that can spurt out. Enjoy the crispy crust with the flavorful, buttery center.
Notes
- Ensure the chicken breasts are of similar size for even cooking.
- If the butter is too soft, refrigerate briefly before stuffing to avoid leakage during frying.
- Use an instant-read thermometer to avoid over or undercooking the chicken.
- Monitor oil temperature closely to maintain a steady frying heat.
- To keep cooked pieces warm, place them on a baking rack in a low oven (around 200°F) while frying remaining batches.