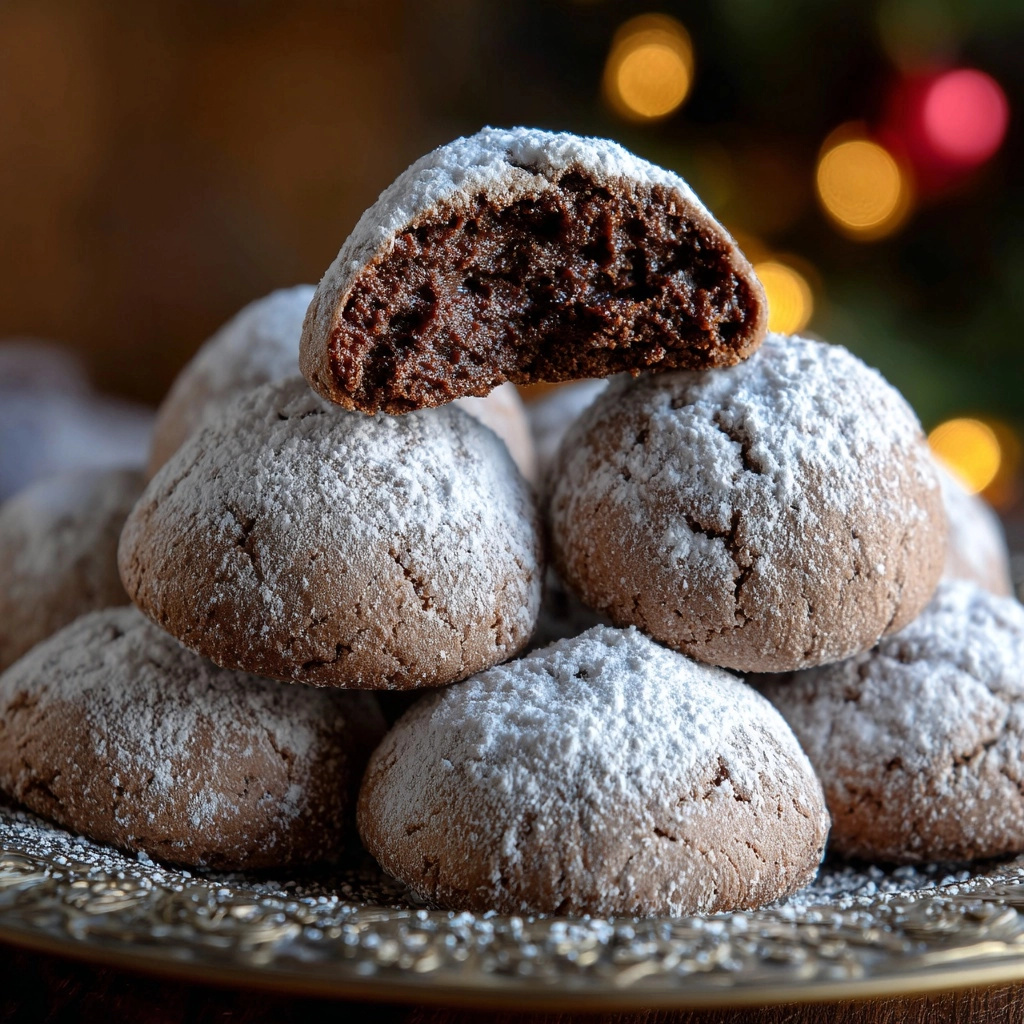
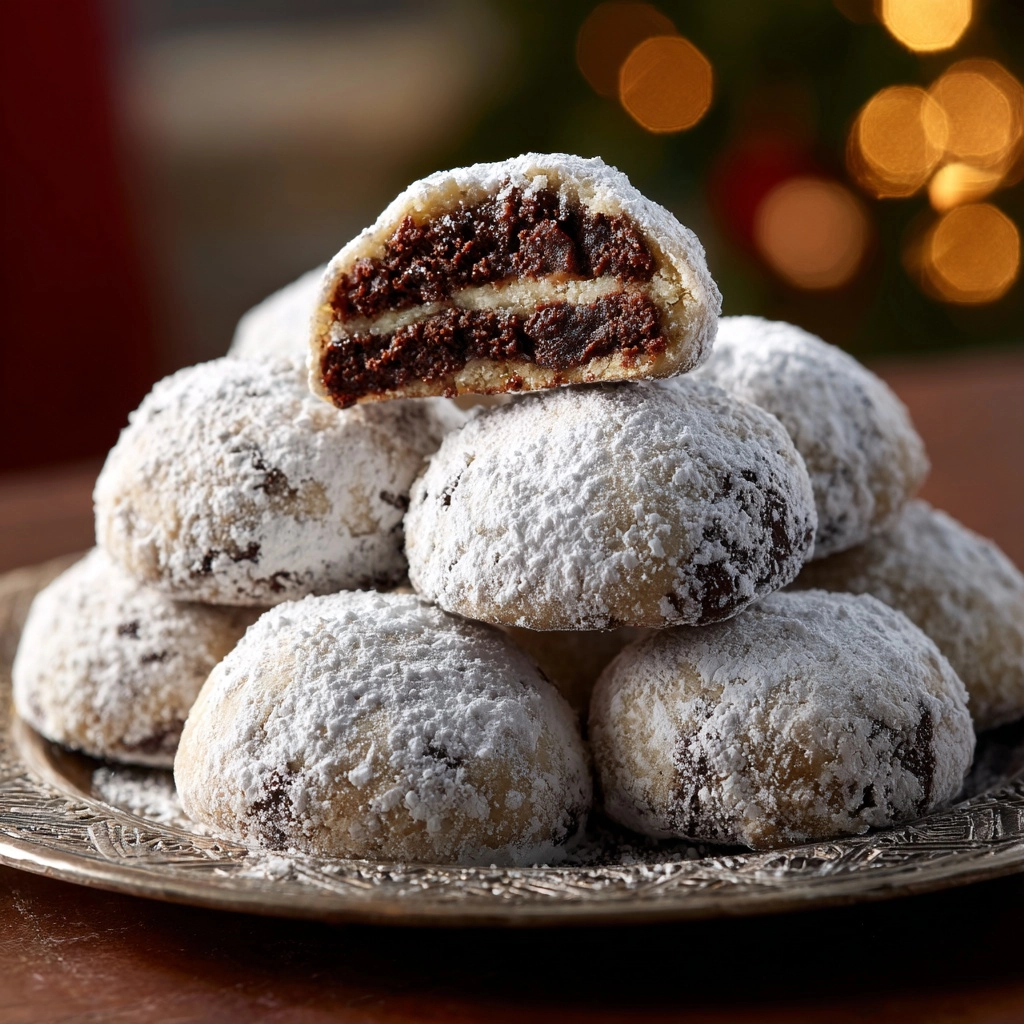
If you’re searching for the perfect bite-sized treat that brings instant festive cheer, look no further than Classic Chocolate Snowball Cookies. These cookies are tender, melt-in-your-mouth chocolate confections, generously coated in snowy powdered sugar, with a delicate crunch from roasted nuts. They’re not only delicious, but a joy to make and share—whether for a holiday tray, a weeknight bake, or a special edible gift, this recipe promises irresistible results every time.
Ingredients You’ll Need
This recipe proves that sometimes the best things in life are simple. Each ingredient plays a crucial role, from creamy butter to rich cocoa, coming together to create that signature snowball texture and flavor. Here’s why each element matters:
- Unsalted Butter: Provides a rich, tender base and ensures these cookies practically melt in your mouth.
- Powdered Sugar (plus more for rolling): Adds delicate sweetness to the dough and an irresistible snowy finish on top.
- Vanilla Extract: A must-have for a subtle floral note that balances all the rich chocolate flavors.
- All-Purpose Flour: The backbone that gives these cookies their structure without weighing them down.
- Unsweetened Cocoa Powder: Delivers deep chocolate essence and that beautiful cocoa color.
- Salt: Just a pinch brings out all the other flavors.
- Finely Chopped Walnuts or Pecans: These add a delicate crunch and toasty flavor—feel free to substitute your favorite nut or omit for nut-free cookies.
How to Make Classic Chocolate Snowball Cookies
Step 1: Prep and Preshape
Preheat your oven to 350°F (175°C), then line a large baking sheet with parchment paper to prevent sticking. This simple step guarantees easy cleanup later and perfect bottoms on your cookies. Measure out all your ingredients before starting—the process moves quickly once you begin!
Step 2: Cream Butter and Sugar
In a large mixing bowl, use a hand mixer or stand mixer to cream together the softened butter and powdered sugar. Beat until absolutely light and fluffy, about 2–3 minutes. This not only blends the two but also adds air for tenderness. Mix in the vanilla extract until fully combined.
Step 3: Combine Dry Ingredients
In a separate bowl, whisk together the flour, cocoa powder, and salt. You want these to be evenly mixed so that every cookie bakes up perfectly balanced in flavor and texture, with no streaks or surprises.
Step 4: Form the Cookie Dough
Gradually add the dry ingredients into the creamed mixture. Stir until a soft dough forms—it may look crumbly at first, but will come together quickly. Fold in your finely chopped walnuts or pecans. The dough should be easy to handle and not sticky; if it feels too dry, use your hands to gently knead it together.
Step 5: Shape and Bake
Scoop out tablespoon-sized amounts of dough and roll gently between your palms to form little balls, placing them one inch apart on your prepared baking sheet. Bake for 12–14 minutes, until the cookies are just set and the tops look matte—don’t overbake, as you want them soft and tender inside.
Step 6: Powdered Sugar Perfection
As soon as the cookies come out of the oven, let them cool for just 5 minutes—enough so you can handle them but while they’re still warm. Roll each cookie in a bowl of powdered sugar until it’s completely coated. Place the cookies onto a wire rack to cool completely. For double snowy delight, once they’re cool, roll them in powdered sugar a second time. The contrast of chocolate wrapped in a sweet white blanket is pure magic!
How to Serve Classic Chocolate Snowball Cookies
Garnishes
Give each cookie a final dusting of powdered sugar right before serving for extra visual impact. For a festive look, consider a tiny pinch of edible glitter or a drizzle of melted white chocolate across the tops—these little touches make your Classic Chocolate Snowball Cookies look like they belong in a bakery window.
Side Dishes
Pair your snowball cookies with a mug of hot cocoa, a creamy latte, or even a spiked eggnog for the adults. They also shine alongside a platter of fresh berries or simple chocolate truffles, creating a gorgeous assortment for dessert buffets or cookie exchanges.
Creative Ways to Present
Present these cookies stacked high on a pretty cake stand or arranged in a rustic basket lined with parchment. For gifting, tuck them into clear cellophane bags tied with a ribbon, or nestle them in a holiday tin with wax paper between layers—the snowball coating holds up beautifully, making these cookies travel-friendly for any occasion.
Make Ahead and Storage
Storing Leftovers
Classic Chocolate Snowball Cookies store wonderfully at room temperature, retaining their tender texture for up to 5 days. Simply keep them in an airtight container to prevent them from drying out or absorbing other kitchen odors. A little extra powdered sugar sprinkled in between layers keeps them picture-perfect.
Freezing
You can easily freeze these cookies for future cravings! After baking and cooling, place them in a single layer on a tray to freeze, then transfer to an airtight bag or container. For best results, freeze without the final powdered sugar coating, and give them a fresh roll or dust after thawing to restore that snowy sheen.
Reheating
Though these cookies are at their best served at room temperature, if you love a just-baked feel, allow frozen cookies to thaw at room temp, then warm them in a low oven (about 275°F) for 3–4 minutes. This revives their texture and makes them taste almost freshly baked—remember to re-roll in powdered sugar after reheating!
FAQs
Can I make Classic Chocolate Snowball Cookies nut free?
Absolutely! You can simply leave out the nuts, and the dough will still hold together beautifully. The result is a soft, melt-in-your-mouth cookie with pure chocolate flavor. If you like, add a few mini chocolate chips for a different kind of crunch.
What’s the secret to getting that snowy look?
The trick is to roll the cookies in powdered sugar while they’re still warm, which lets a layer melt into the cookie, then to roll them again after they’ve cooled completely. This gives Classic Chocolate Snowball Cookies a thick, flawless coating that looks like fresh-fallen snow!
Can I substitute cocoa powder with melted chocolate?
For this recipe, unsweetened cocoa powder is best because it keeps the dough light and not overly rich. Melted chocolate would change the texture and moisture, making it harder to achieve the classic snowball crumb.
Why did my cookies spread too much or flatten out?
Usually, this happens if your butter was too warm or if the dough wasn’t firm enough. Make sure your butter is just softened, not melted, and if your dough feels sticky, chill it for 15 minutes before rolling. This helps maintain that lovely round snowball shape.
Can I make Classic Chocolate Snowball Cookies in advance for gifting?
Definitely! These cookies are ideal for making ahead, as their flavor and texture improve after a day or two. Bake, cool, and store them in a pretty tin, adding extra powdered sugar just before gifting for a fresh, snowy appearance.
Final Thoughts
Once you bake a batch of Classic Chocolate Snowball Cookies, you’ll see why they’ve become a perennial favorite in so many homes. Each bite offers the dreamiest blend of chocolate, crunch, and sweet snowy sugar. So gather your ingredients, invite a friend or the kids to help, and make some kitchen memories—you’re going to love every crumb!
Print
Classic Chocolate Snowball Cookies Recipe
- Prep Time: 15 minutes
- Cook Time: 14 minutes
- Total Time: 29 minutes
- Yield: 24 cookies
- Category: Dessert
- Method: Baking
- Cuisine: American
- Diet: Vegetarian
Description
Indulge in these rich and chocolatey Classic Chocolate Snowball Cookies that are perfect for holiday gatherings or a sweet treat any time of year. These buttery cookies are rolled in powdered sugar for a snowy finish and are sure to be a hit with chocolate lovers.
Ingredients
Main Ingredients:
- 1 cup unsalted butter, softened
- ½ cup powdered sugar (plus more for rolling)
- 1 teaspoon vanilla extract
- 1¾ cups all-purpose flour
- ¼ cup unsweetened cocoa powder
- ¼ teaspoon salt
- ¾ cup finely chopped walnuts or pecans
Instructions
- Preheat the oven: Preheat the oven to 350°F (175°C) and line a baking sheet with parchment paper.
- Cream butter and sugar: In a large bowl, cream together the softened butter and powdered sugar until light and fluffy. Mix in the vanilla extract.
- Combine dry ingredients: In a separate bowl, whisk together the flour, cocoa powder, and salt. Gradually add the dry ingredients to the wet mixture and mix until a soft dough forms. Fold in the chopped nuts.
- Shape the cookies: Scoop out tablespoon-sized portions and roll them into balls. Place the dough balls 1 inch apart on the prepared baking sheet.
- Bake: Bake for 12–14 minutes, or until the cookies are set but not overbaked. Remove from the oven and let cool for 5 minutes.
- Roll in powdered sugar: While still warm, roll each cookie in powdered sugar, then transfer to a wire rack to cool completely. Once cooled, roll again in powdered sugar for a snowy finish.
Notes
- These cookies can be made ahead and stored in an airtight container for up to 5 days.
- You can substitute almonds or hazelnuts for the nuts, or leave them out entirely for a nut-free version.
Nutrition
- Serving Size: 1 cookie
- Calories: 130
- Sugar: 6g
- Sodium: 35mg
- Fat: 9g
- Saturated Fat: 5g
- Unsaturated Fat: 3g
- Trans Fat: 0g
- Carbohydrates: 12g
- Fiber: 1g
- Protein: 1g
- Cholesterol: 20mg