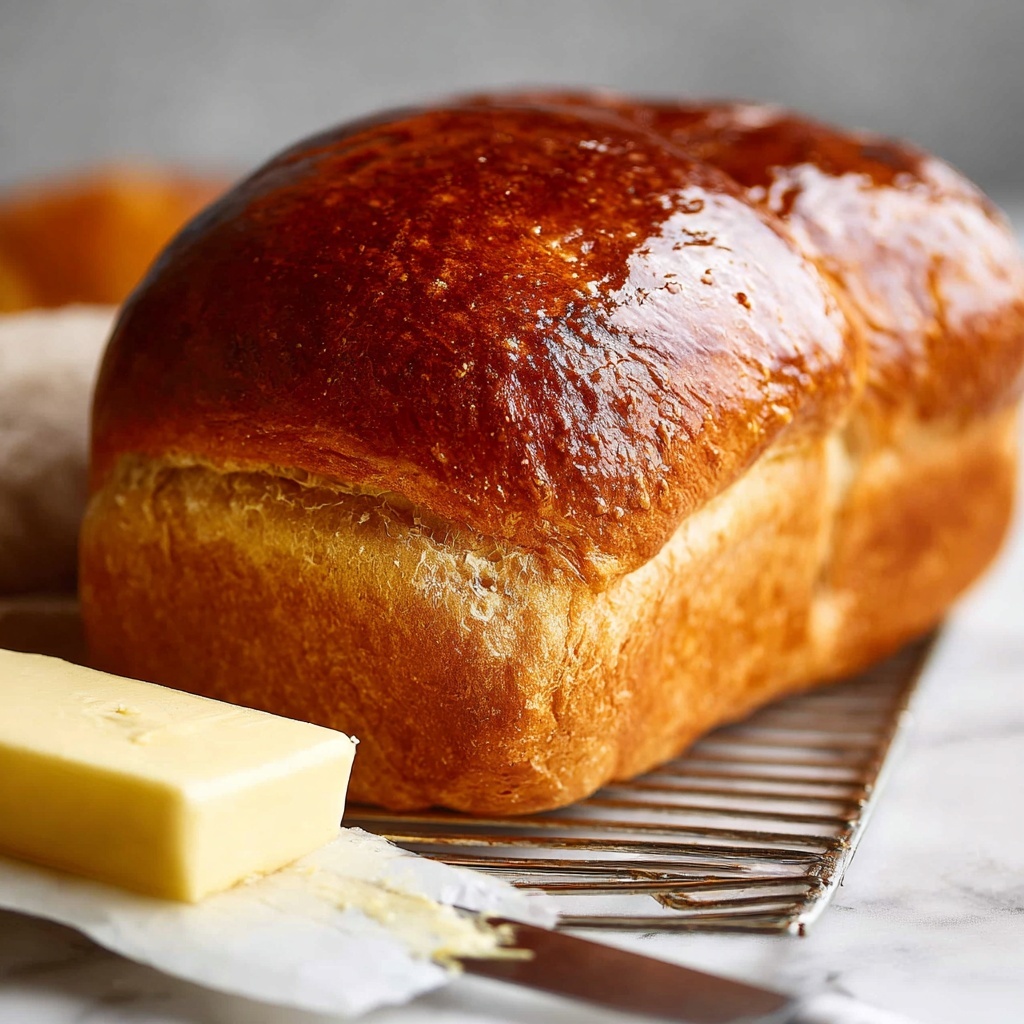
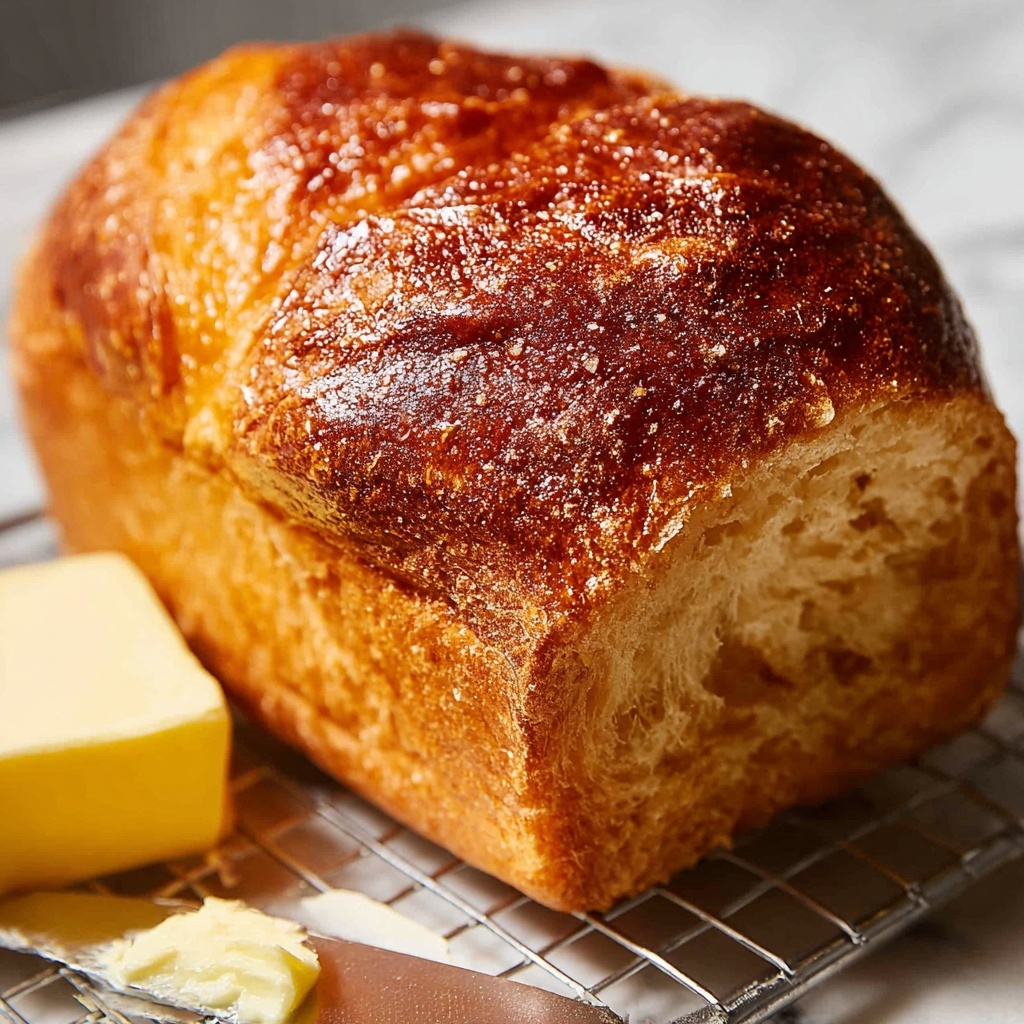
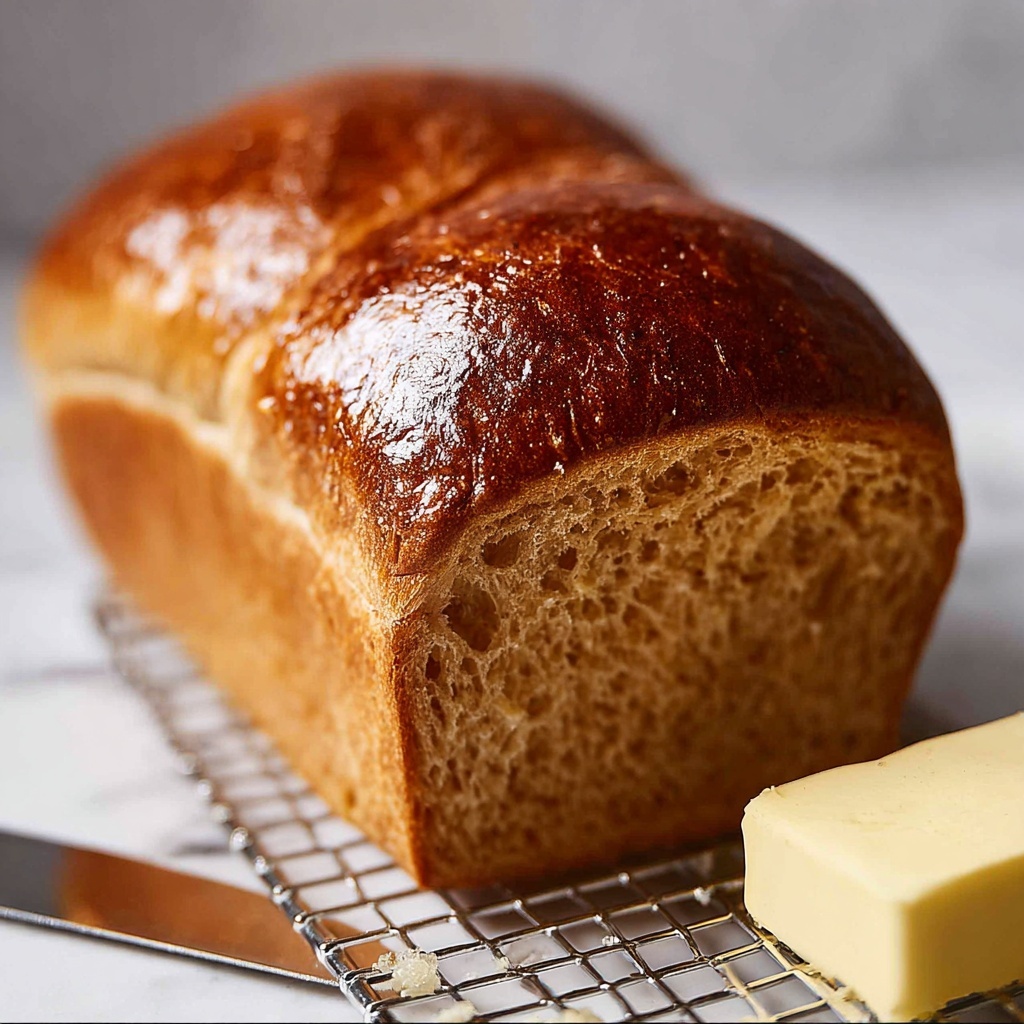
If you have ever wanted to bake a truly heartwarming and delicious loaf that feels like a warm hug from your family’s kitchen, then Grandma Prudy’s Rye Bread Recipe is exactly what you need. This classic rye bread has a perfect balance of hearty texture and subtle sweetness, filled with the gentle aroma of caraway seeds and molasses. It’s a recipe that has stood the test of time, delivering consistently soft, tender loaves crowned with a golden-brown crust that you’ll want to slice into again and again. Whether you are a seasoned baker or trying your hand at rye bread for the first time, Grandma Prudy’s method gives you all the tips and tricks to bake bread that feels like it came from your own grandma’s oven.
Ingredients You’ll Need
Believe it or not, the magic of Grandma Prudy’s Rye Bread Recipe starts with a simple list of ingredients, each playing a vital part in delivering the flavor, softness, and color of the finished loaf. From the richness of molasses to the sturdiness provided by vital wheat gluten, each component has a distinct role that works harmoniously to bring this classic bread to life.
- 1 scant tablespoon active dry yeast: The powerhouse that helps your dough rise beautifully and develop that lovely texture.
- 1 teaspoon sugar: Feeds the yeast to get it bubbly and active for the perfect rise.
- 1/4 cup warm water: Keeps the yeast comfortable so it can get to work without being shocked by the temperature.
- 1/2 cup granulated sugar: Adds just the right amount of sweetness to balance the rye’s earthiness.
- 2 tablespoons molasses: Infuses the bread with deep, rich color and a subtle caramel flavor that’s simply irresistible.
- 2 tablespoons shortening (butter-flavored Crisco recommended): Provides tenderness and moisture to the crumb.
- 2 teaspoons kosher salt: Enhances the taste and controls yeast growth for a balanced flavor.
- 1 tablespoon caraway seed (optional): Gives the bread that classic rye aroma and a hint of spice.
- 2 cups warm water: Hydrates the dough and brings all dry ingredients together.
- 2 cups light or dark rye flour: The star ingredient, spooned and leveled for precise measurement.
- 1/4 cup vital wheat gluten: Adds strength to the dough, giving rye bread its chewy texture.
- 3 cups all-purpose flour (plus about 1/2 cup more if needed): Balances the density of rye with lighter flour for a tender loaf.
- Vegetable oil or olive oil: For greasing your bowls and pans, preventing sticking with ease.
- 1/4 cup butter: Rubbed on the bread while still warm for a rich, glossy finish.
How to Make Grandma Prudy’s Rye Bread Recipe
Step 1: Activate the yeast
Start by placing 1 scant tablespoon of active dry yeast in the mixing bowl. To get the yeast bubbling with life, add 1 teaspoon sugar and 1/4 cup of warm water that feels like bath water to the touch—between 105 and 110 degrees Fahrenheit is perfect. Mix gently and wait for about 5 minutes. If your yeast doesn’t foam up with bubbles, no worries—just start over with fresh yeast. This step is the foundation of a successful rise.
Step 2: Mix in the wet ingredients and seasonings
Once your yeast is beautifully foamy, it’s time to incorporate the sweetness and flavor layers. Add 1/2 cup granulated sugar, 2 tablespoons molasses, 2 tablespoons shortening, 2 teaspoons kosher salt, and optionally, 1 tablespoon of caraway seeds. Then pour in 2 cups of warm water to bring it all together. Stir well using a dough hook or a wooden spoon until your mixture feels consistent.
Step 3: Combine the flours and gluten
Next comes the mix of rye, vital wheat gluten, and all-purpose flour. Add 2 cups of rye flour—remember to spoon and level for accuracy! Then add 1/4 cup vital wheat gluten. Start your mixer on low. Now slowly incorporate 3 cups of all-purpose flour, one cup at a time, mixing between additions. This stage is the trickiest since rye dough can become dense and dry if too much flour is added. Keep an eye on the texture as you go.
Step 4: Knead the dough
Knead on medium-low speed for about 5 minutes. Expect the dough to be sticky—this is normal for rye bread. If necessary, dust with up to 1/2 cup additional all-purpose flour, a little at a time. Kneading should continue for a total of 7 to 10 minutes. The dough will gradually clean the sides of the bowl but not completely detach from the bottom. Don’t worry if it feels a bit tacky—that’s the secret to the loaf’s tenderness. If you prefer, knead by hand on an oiled surface for 10–12 minutes.
Step 5: First rise
Grease a large bowl with 1 tablespoon vegetable oil. Shape your dough into a ball and transfer it to the bowl, turning it to coat all sides with oil. Cover with parchment or greased plastic wrap. Place the bowl in a warm spot—an oven warmed at 350 degrees F for 45 seconds then turned off is ideal—and let the dough rise for about 1 hour, or until it doubles in size.
Step 6: Punch down and second rise
Punch the dough down gently to release air. Reshape into a ball, grease the bowl again, and put the dough back inside, turning it to coat with oil. Cover and allow a second rise in the warm oven for another hour, until doubled again. This step builds structure and develops flavor.
Step 7: Shape the loaves
After punching down the dough a second time, prepare your work surface with about a tablespoon of oil to prevent sticking. Divide the dough into four pieces for 7×4 inch pans, or halve for larger pans. Flatten each piece into a 7-inch square, fold and roll the dough into tight logs, pinching edges together and tucking the ends underneath. Place each roll seam-side down in well-greased pans.
Step 8: Final rise and bake
Cover the pans with parchment or greased plastic wrap and let the dough rise again in your warm spot until it crowns the pans and rises an inch or more above the edges, about 45 minutes. Meanwhile, preheat your oven to 375 degrees F. Bake smaller loaves for 30–35 minutes and larger ones for 40–45 minutes. Use an instant-read thermometer to check for doneness; the bread should hit 205 degrees F (208–210 degrees F for larger pans) inside. It’s better to slightly over-bake than under-bake this dense bread to avoid doughiness.
Step 9: Cool and butter
Remove the loaves from the oven and set the pans on wire racks. While the bread is still hot, generously butter the tops. Then carefully turn each loaf out onto the racks and cool them on their sides to prevent crushing the tender crumb. Be patient—let your rye bread cool for 30 to 60 minutes before slicing to maintain its structure.
How to Serve Grandma Prudy’s Rye Bread Recipe
Garnishes
Grandma Prudy’s rye bread just loves a good rub of butter right after baking to keep it moist and flavorful. Sprinkle a tiny bit of flaky sea salt on the butter for an elegant, savory touch that pairs perfectly with the bread’s sweet and earthy notes.
Side Dishes
This rye bread shines alongside a warming bowl of hearty soup, such as split pea or borscht, soaking up the flavors wonderfully. It’s also divine with classic deli meats and cheeses for a satisfying sandwich experience.
Creative Ways to Present
For a festive spin, serve slices toasted crisp and spread thickly with liver pâté and a dollop of tangy mustard—a traditional Christmas Eve treat inspired by Grandma Prudy herself. Or toast the bread lightly, smear with cream cheese, and top with smoked salmon and fresh dill for an elegant appetizer that’s easy to prepare but impressive.
Make Ahead and Storage
Storing Leftovers
Once totally cooled, store the bread in a large ziplock bag on the counter for up to 3 days. To keep it from drying out, slice only what you intend to eat immediately. The gentle crumb texture stays at its best when handled minimally.
Freezing
If you want to keep Grandma Prudy’s rye bread longer, freezing is the way to go. Wrap the loaf tightly in a ziplock bag, press out excess air, and it will maintain great quality for up to 3 months. When ready, thaw with the bag sealed on the counter for about an hour.
Reheating
For quick defrosting, you can microwave slices on the defrost or low power settings—just keep an eye so the bread doesn’t dry out or get tough. The best way to enjoy thawed bread is by popping slices in the toaster until warmed through and slightly crisp on the edges.
FAQs
Can I substitute the shortening with butter?
Absolutely! While butter-flavored Crisco is traditional for this recipe’s specific moisture and texture, using softened butter instead will impart a rich flavor. Just keep in mind the dough may be slightly less tender.
Do I have to use caraway seeds?
Caraway seeds are optional but highly recommended as they give that unmistakable rye bread aroma and taste. If you’re not a fan, you can omit them or substitute with a pinch of fennel or anise seeds for a different twist.
Why is vital wheat gluten included in this recipe?
Since rye flour alone tends to produce a dense, crumbly bread, vital wheat gluten strengthens the dough by improving elasticity and rise, resulting in a lighter, chewier texture typical of Grandma Prudy’s beloved rye bread.
Can I mix this dough by hand without a stand mixer?
Yes! Kneading by hand on an oiled surface for 10–12 minutes works perfectly well. It’s a great way to feel the dough’s texture and bond with the baking process.
How long should I wait before slicing the baked bread?
Patience is key here. Waiting at least 30 to 60 minutes allows the crumb to set so your slices won’t smoosh. Using a sharp serrated knife with gentle sawing motions drastically improves your results.
Final Thoughts
Grandma Prudy’s Rye Bread Recipe is more than just bread. It’s comfort, tradition, and a delicious journey back to cozy kitchens and joyful family moments. There’s something truly special about baking this loaf—the aroma filling your home and the pleasure of biting into a slice with perfect crumb and tender crust. I cannot recommend enough that you try this recipe; your oven will become a gateway to many happy meals and happy memories.
Print
Grandma Prudy’s Rye Bread Recipe
- Prep Time: 20 minutes
- Cook Time: 30-35 minutes
- Total Time: 2 hours 30 minutes (including rising and baking)
- Yield: 40 slices (4 loaves; approximately 10 slices per loaf)
- Category: Bread
- Method: Baking
- Cuisine: American
- Diet: Vegetarian
Description
Grandma Prudy’s Rye Bread is a classic, soft, and tender homemade rye bread recipe packed with rich flavors from molasses and caraway seeds. This bread features a delightful dense crumb with a perfect crust, ideal for slicing thin and enjoying with butter, jam, or even a retro spread of liver pate. It requires careful kneading and rising processes to achieve the ideal texture, and it bakes beautifully in the oven. Perfect for rye bread lovers looking for a flavorful, homemade loaf.
Ingredients
Yeast Mixture
- 1 scant tablespoon active dry yeast (about one 1/4 ounce packet yeast)
- 1 teaspoon sugar (to feed the yeast)
- 1/4 cup warm water (105-110°F)
Wet Ingredients
- 1/2 cup granulated sugar
- 2 tablespoons molasses
- 2 tablespoons shortening (butter-flavored Crisco preferred)
- 2 cups warm water (not too hot)
Dry Ingredients
- 2 teaspoons kosher salt (use less if using table salt)
- 1 tablespoon caraway seed (optional)
- 2 cups light or dark rye flour (spooned and leveled)
- 1/4 cup vital wheat gluten
- 3 to 3 1/2 cups all purpose flour (plus extra 1/2 cup flour as needed)
Additional Ingredients
- Vegetable oil or olive oil (for greasing pans and surface)
- 1/4 cup butter (for rubbing on bread after baking)
Instructions
- Activate the yeast: In a stand mixer bowl, combine 1 scant tablespoon active dry yeast with 1 teaspoon sugar and 1/4 cup warm water (105-110°F). Stir and let sit for 5 minutes until foamy and bubbly, indicating the yeast is active.
- Add wet and flavor ingredients: Once the yeast is foamy, add 1/2 cup sugar, 2 tablespoons molasses, 2 tablespoons shortening, 2 teaspoons kosher salt, and 1 tablespoon caraway seeds. Stir to combine.
- Add warm water: Add 2 cups warm water and mix using the dough hook or wooden spoon until blended.
- Add flours and gluten: Spoon and level 2 cups rye flour and add along with 1/4 cup vital wheat gluten. Mix on low speed to prevent flour poof.
- Add all-purpose flour gradually: Add 3 cups all-purpose flour one cup at a time, mixing on low speed between additions. Use no more than 3 cups initially to avoid dry bread.
- Knead the dough: Knead on medium-low speed for about 5 minutes; the dough will be sticky. Gradually add up to 1/2 cup more flour as needed while kneading a total of 7-10 minutes until the dough cleans the bowl edges but not the bottom. Alternatively, knead by hand on a lightly oiled surface for 10-12 minutes.
- Prepare bowl for rising: Grease a large bowl with 1 tablespoon vegetable oil.
- First rise: Transfer dough to the greased bowl, shape into a ball, turn to coat with oil, cover with parchment paper or greased plastic wrap, and let rise in a warm place (like a warmed oven at about 90-100°F) for 1 hour or until doubled in size.
- Punch down and second rise: Punch down the dough, reshape into a ball, coat the bowl with oil again, return dough to bowl, cover, and let rise a second time in a warm place for about 1 hour until doubled again.
- Prepare work surface and pans: Oil a work surface with about 1 tablespoon oil. Prepare four 7×4-inch pans with nonstick spray or use two 9×5 or 8×4-inch pans, coating generously to prevent sticking.
- Shape the loaves: Divide risen dough into 4 equal pieces (or 2 pieces for larger pans). Flatten each piece into a 7-inch square, fold the top inch down, roll tightly into a loaf shape, pinch edges, tuck ends under, and place seam side down in greased pans.
- Final rise: Cover pans with parchment paper or greased plastic wrap and let rise in a warm place until dough crowns and rises over the pan edges by about 1 inch, approximately 45 minutes.
- Preheat oven: Remove pans and preheat oven to 375°F. Avoid preheating with bread inside.
- Bake the bread: Bake 7×4-inch pans for 30-35 minutes or 9×5-inch pans for 40-45 minutes. Use an instant-read thermometer to check doneness; bread is done at 205°F (7×4 pans) or 208-210°F (9×5 pans). Bread should be well browned and firm on top.
- Butter and cool: Remove hot pans and place on wire racks. Immediately rub 1/4 cup butter over the tops. Carefully turn loaves out onto racks and cool them on their sides to prevent smooshing the soft bread bottom.
- Rest before slicing: Wait 30-60 minutes for the bread to cool completely before slicing to avoid crushing the tender crumb. Use a sharp serrated knife to slice with a gentle sawing motion.
- Serve & store: Serve with butter, jam, or liver pate. Store completely cooled bread in a large ziplock bag at room temperature for up to 3 days or freeze sealed for up to 3 months. Defrost partially frozen slices in the toaster or on the counter.
Notes
- Use warm water (105-110°F) to activate yeast properly; too hot will kill yeast, too cold won’t activate.
- Use kosher salt for best texture and flavor; adjust if using table salt.
- Do not substitute rye flour with whole wheat or other flours; this impacts bread flavor and texture.
- Be cautious adding too much all-purpose flour; rye dough is stickier and requires less flour than standard bread dough.
- Letting dough rise in a warm but not hot environment is critical for proper fermentation.
- Butter the top of the bread immediately after baking to keep crust soft and flavorful.
- Allow bread to cool thoroughly before slicing to preserve crumb structure.
- Freezing slices is recommended for longer storage and maintains freshness.