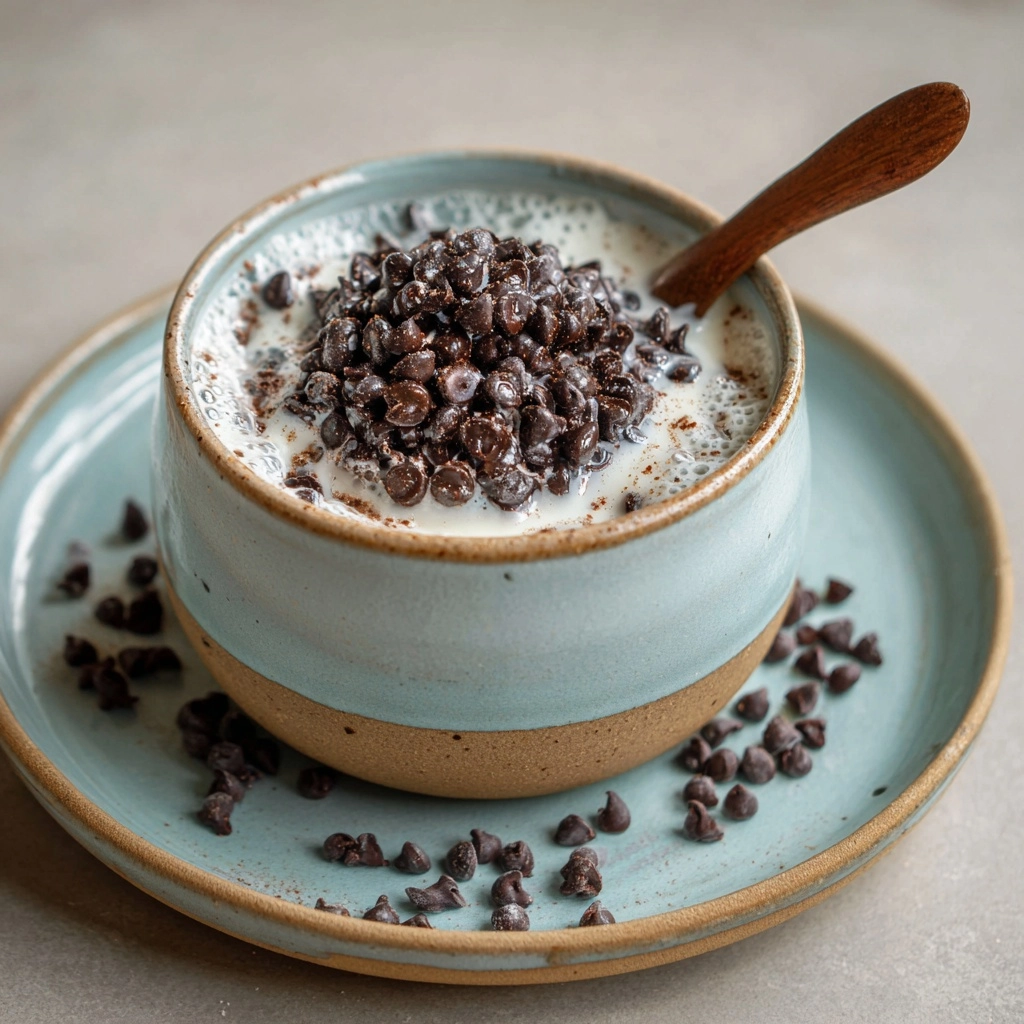
If you’ve ever dreamed of enjoying a bowl of crisp, chocolatey goodness at breakfast—without any questionable ingredients—Homemade Chocolate Cereal is about to become your new obsession. Imagine crunchy, bite-sized squares with deep cocoa flavor and just the right touch of sweetness, ready to greet you every morning. This homemade version lets you control every ingredient for a healthier, gluten-free, and totally satisfying treat.
Ingredients You’ll Need
The beauty of Homemade Chocolate Cereal lies in its simplicity. Every ingredient is chosen for flavor, texture, and its role in giving you those perfect cereal bites you crave. Let’s break down what you’ll need—and why you’ll love each one!
- Oat Flour: The wholesome backbone of the cereal, oat flour creates that signature crunch and brings a warm, subtle nuttiness.
- Almond Flour: Adds a tender bite and a gentle richness, keeping things light yet indulgent.
- Unsweetened Cocoa Powder: Essential for deep, real chocolate flavor—don’t worry, your milk will thank you even before you add any!
- Coconut Sugar (or Brown Sugar): Offers a mellow sweetness and beautiful caramel notes; use coconut sugar for a lower glycemic index.
- Salt: Just a pinch makes the chocolate pop—don’t skip it!
- Melted Coconut Oil: Provides richness and ensures every piece bakes up perfectly crisp and golden.
- Maple Syrup: Delivers natural sweetness and a hint of earthy flavor that pairs beautifully with chocolate.
- Vanilla Extract: Rounds out the chocolate and enhances every bite with delicious warmth.
- Water (as needed): The secret to bringing your dough together—just enough for rolling and cutting, but not a drop more!
How to Make Homemade Chocolate Cereal
Step 1: Prep Your Oven and Baking Sheet
Start by preheating your oven to 325°F (165°C), then line a baking sheet with parchment paper. This simple step ensures your Homemade Chocolate Cereal bakes evenly and lifts off the tray with zero fuss—no sticky aftermath to clean!
Step 2: Combine the Dry Ingredients
In a large mixing bowl, whisk together your oat flour, almond flour, cocoa powder, coconut sugar, and salt. Give it a good mix, making sure the cocoa is evenly distributed—no streaks left behind! This dry blend sets the stage for perfectly uniform chocolate flavor.
Step 3: Mix the Wet Ingredients
In a separate, smaller bowl, whisk together your melted coconut oil, maple syrup, and vanilla extract until glossy and fully combined. This sweet, fragrant mixture is what ties all the flavors together and helps bring out the natural chocolate notes in your cereal.
Step 4: Make the Dough
Pour the wet mixture into the bowl of dry ingredients, stirring with a sturdy spoon or spatula until a stiff dough begins to form. If it’s looking too dry or crumbly, add water one tablespoon at a time—just enough so the dough holds together when pressed but isn’t overly sticky. Take your time here; the finished texture is worth it!
Step 5: Roll Out and Score the Dough
Place your dough ball between two sheets of parchment paper. Roll it out to about 1/8 inch thickness—a bit thinner than you think you need, since thinner means crispier! Remove the top sheet, then use a pizza cutter or sharp knife to lightly score the dough into 1/2 inch squares. No need for perfection; rustic edges are part of the homemade charm.
Step 6: Bake to Crispy Perfection
Carefully transfer your scored dough (along with the bottom parchment) to your prepared baking sheet. Bake for 15–18 minutes, keeping an eye on those edges as they turn crisp and chocolaty. For ultra-crunchy cereal, let the tray sit in the oven (turned off, door cracked) for another 10–15 minutes.
Step 7: Cool, Break Apart, and Store
Let your cereal cool completely before breaking along the scored lines. Patience is key—the cooling time transforms your Homemade Chocolate Cereal from soft to crunchy, making every spoonful irresistible. Once cooled, store it in an airtight container and try not to snack on it all before breakfast!
How to Serve Homemade Chocolate Cereal

Garnishes
Top your Homemade Chocolate Cereal with a shower of fresh berries, banana slices, or a handful of toasted coconut flakes. Each adds a pop of color and fresh flavor that takes your bowl from everyday to show-stopping.
Side Dishes
This chocolatey cereal pairs wonderfully with classic breakfast sides like Greek yogurt, nut butter, or a crisp apple. Let’s not forget a hot cup of coffee or a smoothie—the perfect breakfast duo!
Creative Ways to Present
Don’t just pour on the milk—try using your cereal as a crunchy topping for smoothie bowls, folding it into parfaits, or even sprinkling over ice cream for a dessert twist. There’s no wrong way to enjoy Homemade Chocolate Cereal; make it your morning canvas!
Make Ahead and Storage
Storing Leftovers
Keep your Homemade Chocolate Cereal fresh and crunchy by storing it in a tightly sealed container at room temperature. It will stay crisp for up to a week—if it lasts that long! A cool, dry pantry is your best friend here.
Freezing
If you want to keep Homemade Chocolate Cereal on hand for busy mornings, freezing is a great option. Spread completely cooled pieces on a baking sheet, freeze until solid, then transfer to a freezer-safe bag or container. They’ll keep their crunch in the freezer for up to 2 months.
Reheating
If your stored cereal loses a bit of its crisp, a quick fix is to pop the pieces in a 300°F (150°C) oven for 5-7 minutes. Let them cool and they’ll regain that delightful snap—almost as good as fresh!
FAQs
Can I use regular sugar instead of coconut sugar?
Absolutely! Regular brown sugar works just as well in this Homemade Chocolate Cereal, lending a classic sweetness and chewy texture. Coconut sugar simply offers a subtle flavor and lower glycemic impact, so use whichever best fits your taste or pantry.
What’s the best milk to pair with this cereal?
The magic of Homemade Chocolate Cereal is that it pairs beautifully with just about any milk—dairy, almond, oat, or soy. For an extra treat, try chocolate almond milk for a double-dose of chocolaty goodness!
How do I make it extra crunchy?
For amped-up crunch, after your cereal is done baking, leave the tray in the hot oven (turned off, door open a crack) for about 10–15 minutes. This dries out the pieces fully and guarantees a crispy bite every time.
Is it possible to make this nut-free?
Definitely! Swap the almond flour for sunflower seed flour or additional oat flour if you’re avoiding nuts. Homemade Chocolate Cereal is flexible—just keep in mind that the flavor and texture may be slightly different, but still delicious.
Can I use honey instead of maple syrup?
Yes, honey is a fantastic substitute for maple syrup in this recipe. You’ll get a slightly different flavor profile, but the natural sweetness pairs wonderfully with chocolate and still gives you that perfect dough consistency.
Final Thoughts
There’s just something so special about pouring a bowl of your very own Homemade Chocolate Cereal, knowing every bite is made with care and the best ingredients. Give this recipe a go—you’ll wonder why you ever bought boxed cereal in the first place. Happy crunching, friends!
Print
Homemade Chocolate Cereal Recipe
- Prep Time: 15 minutes
- Cook Time: 18 minutes
- Total Time: 33 minutes
- Yield: 6 servings
- Category: Breakfast
- Method: Baking
- Cuisine: American
- Diet: Vegan, Gluten-Free
Description
Indulge in a delightful bowl of homemade chocolate cereal that is not only delicious but also healthier than store-bought options. This vegan and gluten-free recipe is easy to make and perfect for a nutritious breakfast treat.
Ingredients
Dry Ingredients:
- 1 1/2 cups oat flour
- 1/2 cup almond flour
- 1/4 cup unsweetened cocoa powder
- 1/4 cup coconut sugar (or brown sugar)
- 1/4 teaspoon salt
Wet Ingredients:
- 1/4 cup melted coconut oil
- 1/4 cup maple syrup
- 1 teaspoon vanilla extract
- 2–4 tablespoons water (as needed)
Instructions
- Preheat the oven: Preheat the oven to 325°F (165°C) and line a baking sheet with parchment paper.
- Mix dry ingredients: In a large bowl, combine oat flour, almond flour, cocoa powder, coconut sugar, and salt.
- Prepare wet ingredients: In a separate bowl, whisk melted coconut oil, maple syrup, and vanilla extract.
- Combine ingredients: Pour the wet ingredients into the dry mixture and stir until a dough forms. Add water gradually to reach desired consistency.
- Roll out dough: Roll the dough between parchment paper to 1/8 inch thickness.
- Cut into squares: Use a knife or pizza cutter to score the dough into small squares.
- Bake: Transfer to baking sheet and bake for 15–18 minutes until crisp.
- Cool and store: Let cool completely before breaking apart and storing in an airtight container.
Notes
- For a crunchier texture, let the cereal sit in the turned-off oven with the door slightly open after baking.
- You can use honey as a substitute for maple syrup or opt for gluten-free flours if needed.
Nutrition
- Serving Size: 3/4 cup
- Calories: 210
- Sugar: 8g
- Sodium: 90mg
- Fat: 11g
- Saturated Fat: 5g
- Unsaturated Fat: 5g
- Trans Fat: 0g
- Carbohydrates: 24g
- Fiber: 4g
- Protein: 4g
- Cholesterol: 0mg