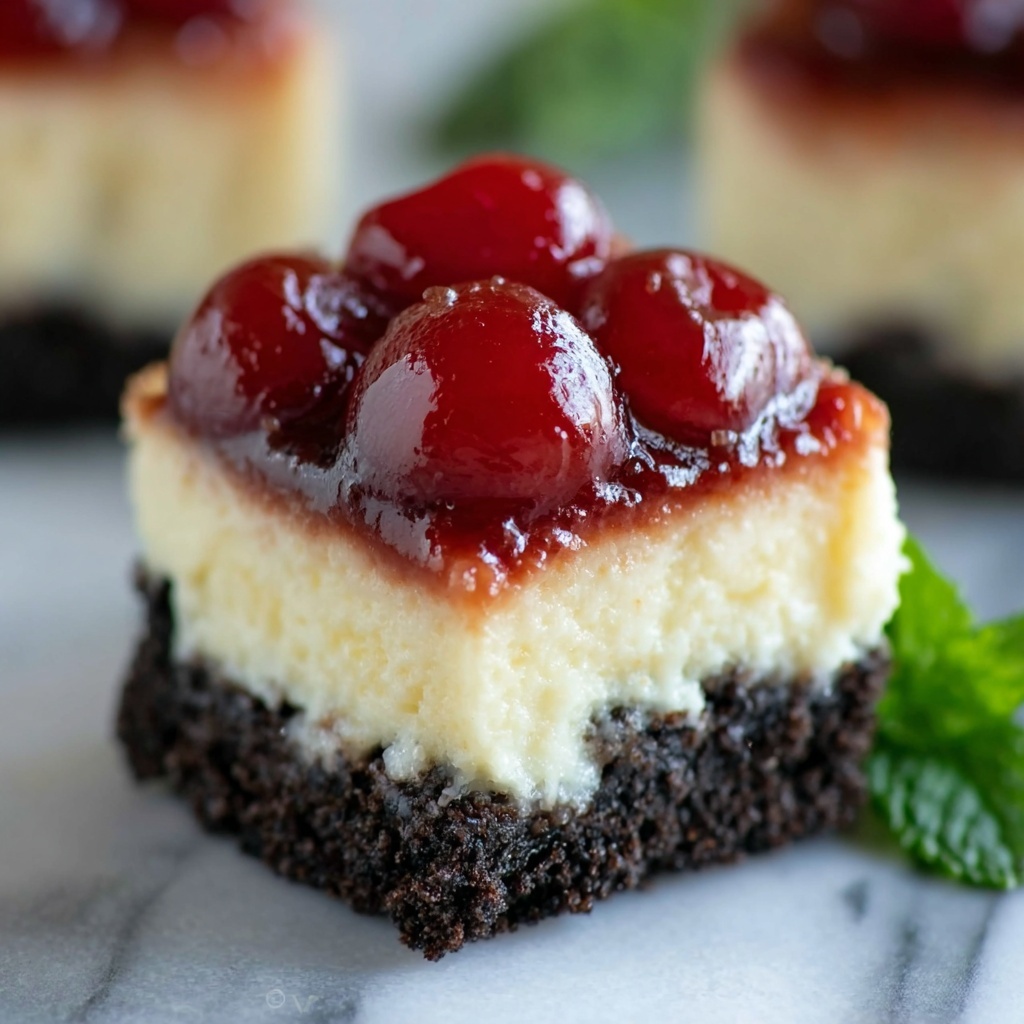
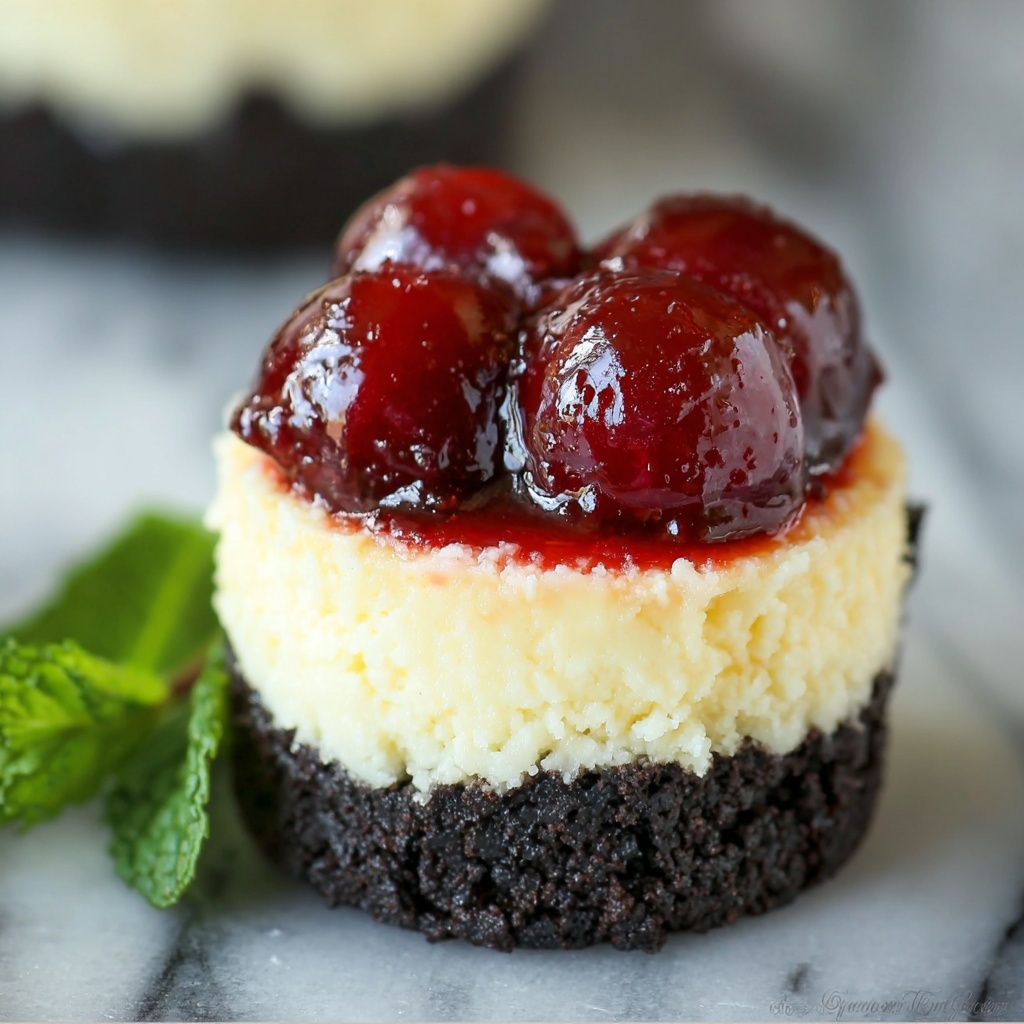
If you’re looking for a dessert that’s as charming as it is delicious, you’ve gotta try the Mini Cherry Cheesecakes with Oreo Crust Recipe. Imagine creamy, dreamy cheesecake nestled on a crunchy, chocolatey Oreo crust, topped with bright, sweet cherry pie filling—you get a perfect bite every time. These mini treats are not only visually adorable but pack a punch of flavor that will wow any crowd. Whether you’re making them for a party or a cozy night in, this recipe is sure to become a new favorite!
Ingredients You’ll Need
Getting the ingredients right is half the fun and key to achieving that perfect balance of textures and flavors. Each component plays its part in making these mini cheesecake bites irresistibly delicious.
- 10 OREO cookies: The secret to that rich, chocolatey crust that adds crunch and depth.
- 2 tablespoons butter (melted): Helps bind the crushed Oreos into a sturdy base with a touch of buttery richness.
- 8 ounces cream cheese (softened): The creamy heart of every cheesecake, providing the lush, velvety texture.
- 2 tablespoons heavy cream: Adds smoothness to the filling and keeps it light yet rich.
- 1 egg: Binds all the filling ingredients together and gives it that perfect set.
- 1/4 cup sugar: Sweetens the filling just enough to balance the tang of the cream cheese.
- 1 teaspoon vanilla extract: Infuses the filling with warm, comforting aromas.
- 1 cup cherry pie filling: The jewel on top—sweet, tart cherries that brighten every bite with vivid flavor and color.
How to Make Mini Cherry Cheesecakes with Oreo Crust Recipe
Step 1: Preheat and Prepare
Start by setting your oven to 325 degrees Fahrenheit so it’s perfectly heated when the mini cheesecakes are ready to bake. This temperature will gently cook the cheesecakes ensuring they stay creamy inside without cracking on top.
Step 2: Crush the Oreos for the Crust
Put those 10 Oreo cookies into a sturdy zip-top bag and crush them using a rolling pin until finely crumbed. This simple step transforms the cookies into the perfect base. Mix in the melted butter to create crumbs that stick together beautifully when pressed down.
Step 3: Make the Creamy Cheesecake Filling
Use an electric mixer to beat the softened cream cheese until super smooth—no lumps allowed here! Add in the heavy cream for silky texture and blend until combined.
Step 4: Sweeten and Flavor
Next, add the egg, sugar, and vanilla extract to the cream cheese mixture. Keep mixing until the filling is smooth and creamy. This step brings life to the cheesecake by balancing sweetness and richness perfectly.
Step 5: Assemble the Crust Bases
Carefully spoon the Oreo crust mixture into each cup of your mini cheesecake pan. Press lightly to form a flat, even base that will hold all that luscious filling.
Step 6: Add the Cheesecake Mixture
Dollop the cream cheese filling on top of each crust, making sure to distribute it evenly among all 12 cups. This ensures every mini cheesecake has a consistent texture and flavor balance.
Step 7: Bake to Perfection
Bake the assembled cheesecakes for 25 minutes until edges are set but centers still have a slight jiggle. Remove them from the oven and let cool for about 5 minutes, then gently run a knife around each one to loosen them from the pan.
Step 8: Chill Thoroughly
Transfer the pan to the refrigerator and chill the cheesecakes for at least one hour. This step is crucial as it allows the filling to firm up and develop that classic cheesecake texture.
Step 9: Unmold and Top
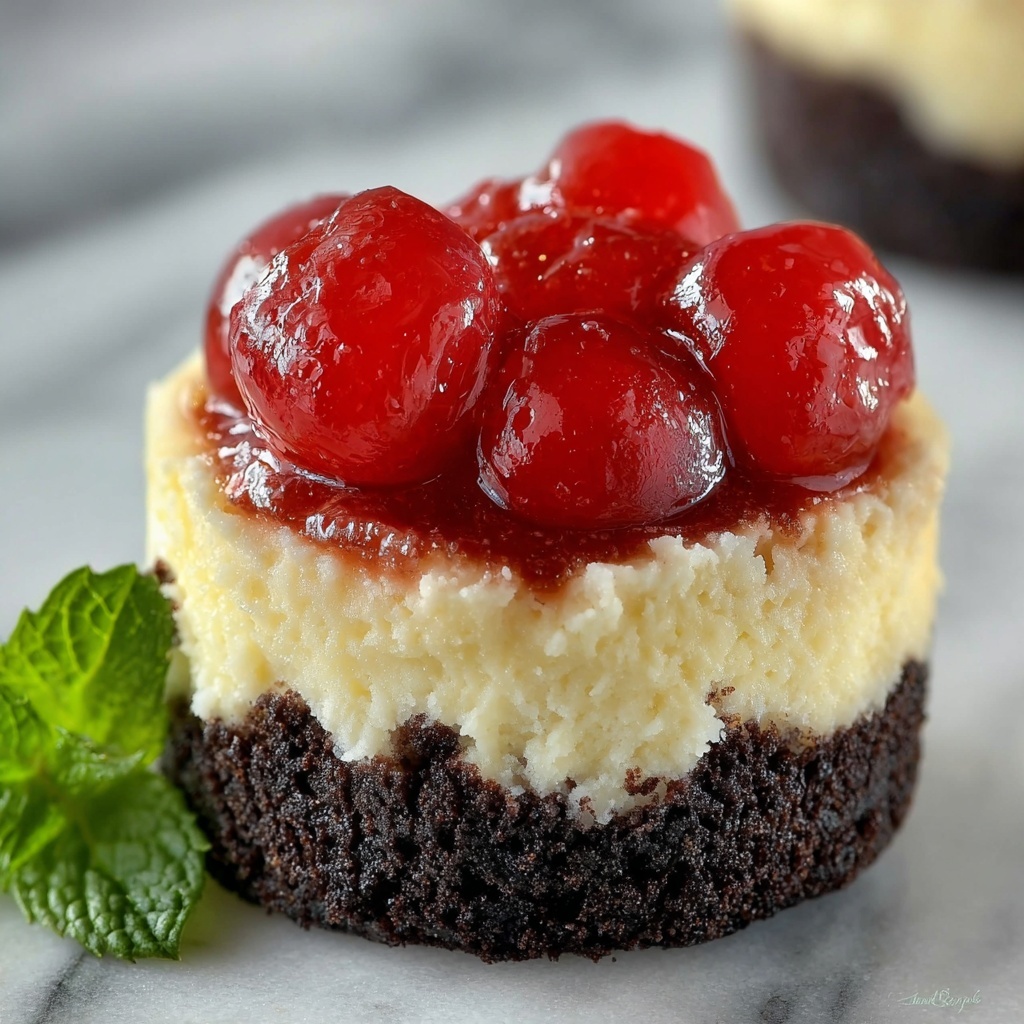
Once chilled, carefully pop each mini cheesecake out of the pan by pressing up from the bottom. Top each cake with a generous spoonful of cherry pie filling—the vibrant cherries add a beautiful finishing touch.
Step 10: Serve or Store
Your Mini Cherry Cheesecakes with Oreo Crust Recipe are now ready to be enjoyed! Serve immediately for the freshest bite or keep them chilled until you’re ready to impress your guests.
How to Serve Mini Cherry Cheesecakes with Oreo Crust Recipe
Garnishes
While the cherries on top are naturally stunning, you can elevate these mini cheesecakes by adding a sprig of fresh mint or a light dusting of powdered sugar. A few white chocolate shavings or a drizzle of dark chocolate sauce can also make these treats look extra special and taste divine.
Side Dishes
These mini delights pair wonderfully with vibrant accompaniments like a fresh berry salad or a dollop of whipped cream. For a refreshing contrast, try serving alongside a citrus sorbet or a crisp glass of sparkling rosé to balance the rich cream cheese and sweet cherries.
Creative Ways to Present
Bring some pizzazz to your dessert table by arranging the mini cheesecakes on a tiered stand or elegant platter. Wrap each one with a decorative cupcake liner for easy handling, especially at parties. You can also place them in clear mini cups for a trendy layered parfait look, adding crushed Oreos and cherries between layers.
Make Ahead and Storage
Storing Leftovers
These cheesecakes store beautifully in an airtight container in the refrigerator for up to 3 days. Keeping them chilled is key to maintaining their creamy texture and fresh flavor.
Freezing
If you want to enjoy these treats later, you can freeze them for up to 2 months. Just place them on a tray until firm, then transfer to a freezer-safe container. Thaw overnight in the refrigerator before serving for best results.
Reheating
Generally, mini cheesecakes are best enjoyed cold or at room temperature, so reheating isn’t recommended. If you prefer them slightly warmer, leave them to sit at room temperature for about 20 minutes to soften up before serving.
FAQs
Can I use a different cookie for the crust?
Absolutely! While Oreos give a fantastic chocolate crunch, you can substitute with graham crackers, chocolate wafers, or any cookie crumbs you love. Just make sure to adjust the butter amount to get the right crust texture.
Is it possible to make these dairy-free?
Yes, you can swap the cream cheese for a dairy-free alternative and use vegan butter for the crust. Keep in mind this might slightly change the texture, but the flavor will still be delicious!
Can I make these mini cheesecakes without a special pan?
If you don’t have a mini cheesecake pan, mini muffin tins work well too. Just line them with cupcake liners to make removal easier and adjust baking time slightly based on their depth.
What if I don’t have cherry pie filling?
No worries! Fresh or frozen cherries cooked down with a little sugar until syrupy work just as beautifully. You can also use other fruit fillings like blueberry or strawberry for a different flavor twist.
How do I prevent cracks in the cheesecakes?
Mix the batter until smooth but don’t overbeat, and bake at a moderate temperature like 325F. Cooling gradually and chilling the cheesecakes before removing helps prevent cracks as well.
Final Thoughts
Making these Mini Cherry Cheesecakes with Oreo Crust Recipe is such a joyful experience from start to finish, and the rewards are absolutely worth it. Whether you’re baking for family, friends, or just treating yourself, these little gems bring so much happiness in every bite. Give this recipe a try—you might just find yourself making them again and again!
Print
Mini Cherry Cheesecakes with Oreo Crust Recipe
- Prep Time: 75 minutes
- Cook Time: 25 minutes
- Total Time: 1 hour 40 minutes
- Yield: 12 mini cheesecakes
- Category: Dessert
- Method: Baking
- Cuisine: American
Description
These Mini Cherry Cheesecakes are a delightful and easy-to-make dessert featuring a crunchy Oreo crust topped with a rich, creamy cheesecake filling and finished with sweet cherry pie filling. Perfect for parties or a special treat, they bake in just 25 minutes and chill to creamy perfection.
Ingredients
Crust
- 10 OREO cookies
- 2 tablespoons butter (melted)
Cheesecake Filling
- 8 ounces cream cheese (softened)
- 2 tablespoons heavy cream
- 1 egg
- 1/4 cup sugar
- 1 teaspoon vanilla extract
Topping
- 1 cup cherry pie filling
Instructions
- Preheat Oven: Preheat your oven to 325°F (163°C) to prepare for baking the mini cheesecakes.
- Prepare Crust: Place the OREO cookies into a gallon-size zip-top bag and crush them finely using a rolling pin. Transfer the crushed cookies into a small bowl, add the melted butter, and mix thoroughly to combine. Set this crust mixture aside.
- Mix Cream Cheese: In a large mixing bowl, beat the softened cream cheese with an electric mixer until it is smooth and creamy. Then add the heavy cream and mix well to incorporate.
- Add Remaining Filling Ingredients: To the cream cheese mixture, add the egg, sugar, and vanilla extract. Continue mixing with the electric mixer until the mixture is smooth and fully combined.
- Assemble Crusts: Scoop the Oreo crust mixture evenly into the bottoms of 12 cups of a mini cheesecake pan. Gently press down on each to flatten and create the crust base.
- Add Cheesecake Filling: Evenly scoop the cream cheese filling over each Oreo crust in the mini cheesecake pan, filling each cup properly.
- Bake: Bake the mini cheesecakes in the preheated oven at 325°F for 25 minutes. After baking, allow them to cool at room temperature for 5 minutes. Then run a knife around the edges to loosen the cheesecakes from the pan.
- Chill: Place the cheesecake pan in the refrigerator and chill for 1 hour to help the cheesecakes set properly.
- Remove and Top: After chilling, press up on the bottoms of each cheesecake cup to carefully remove the mini cheesecakes from the pan. Top each with a generous spoonful of cherry pie filling.
- Serve: Serve the mini cherry cheesecakes immediately or keep refrigerated until ready to serve for optimal freshness.
Notes
- Ensure the cream cheese is softened to room temperature for a smoother filling.
- Press the crust gently but firmly to help it hold together during baking.
- For easier removal, you can line the cheesecake pan with silicone liners designed for mini cheesecakes.
- These cheesecakes are best served within 24 hours of preparation for freshness.
- You can substitute cherry pie filling with other fruit toppings like blueberry or strawberry for variety.