If you have ever wanted to master the art of the Perfect Hard Boiled Eggs Recipe, you are in for a real treat! This recipe transforms simple eggs into beautifully cooked, easy-to-peel bites of creamy goodness every single time. Not only is it foolproof, but it also offers a playful way to add vibrant, lasting color to your eggs, making them both a delicious snack and a charming centerpiece for any occasion. Trust me, once you try this method, you’ll never look back.
Ingredients You’ll Need
The magic of this Perfect Hard Boiled Eggs Recipe lies in its simplicity—just a few key ingredients that work perfectly together to ensure flawless results, fun coloring, and a glossy finish.
- Large eggs (1 dozen): Opt for eggs that are 7 to 10 days old to get the best peel every time.
- Food coloring gel: Adds vibrant, rich colors that won’t fade quickly or run when the eggs dry.
- Vinegar: Helps the color adhere to the eggs and slightly softens the shell for easy peeling.
- Canola oil: A little oil brushed on the eggs after coloring gives them a beautiful, shiny finish.
- Water: Used both to boil the eggs and mix with the coloring agents.
How to Make Perfect Hard Boiled Eggs Recipe
Step 1: Prepare the eggs in the pan
Begin by arranging your eggs in a single layer at the bottom of a large pan. This is essential to prevent cracking from overcrowding or bumping during cooking. Add cold water until it covers the eggs by about one inch, ensuring even heat exposure.
Step 2: Bring water to a boil
Place the pan over high heat and bring the water to a rolling boil. This initial high heat jump-starts the cooking process and sets you up for perfectly cooked whites and yolks.
Step 3: Simmer briefly
As soon as the water boils, cover the pot with a lid and reduce the heat to a low simmer for exactly one minute. This brief simmer helps avoid rubbery whites while sealing in the yolks’ creamy texture.
Step 4: Remove from heat and rest
Take the pan off the heat entirely and let the eggs rest in the hot water for 12 minutes. This gentle, residual heat cooks the eggs just right without overdoing them or developing a green ring around the yolk.
Step 5: Chill the eggs quickly
Immediately transfer your eggs into an ice water bath to stop any further cooking. Let them cool for at least five minutes to make peeling easier and to lock in their perfect texture.
Step 6: Peel or store the eggs
Once chilled, eggs can be peeled right away or dried thoroughly and refrigerated for later use. Remember, a dry surface is crucial if you plan to color your eggs later!
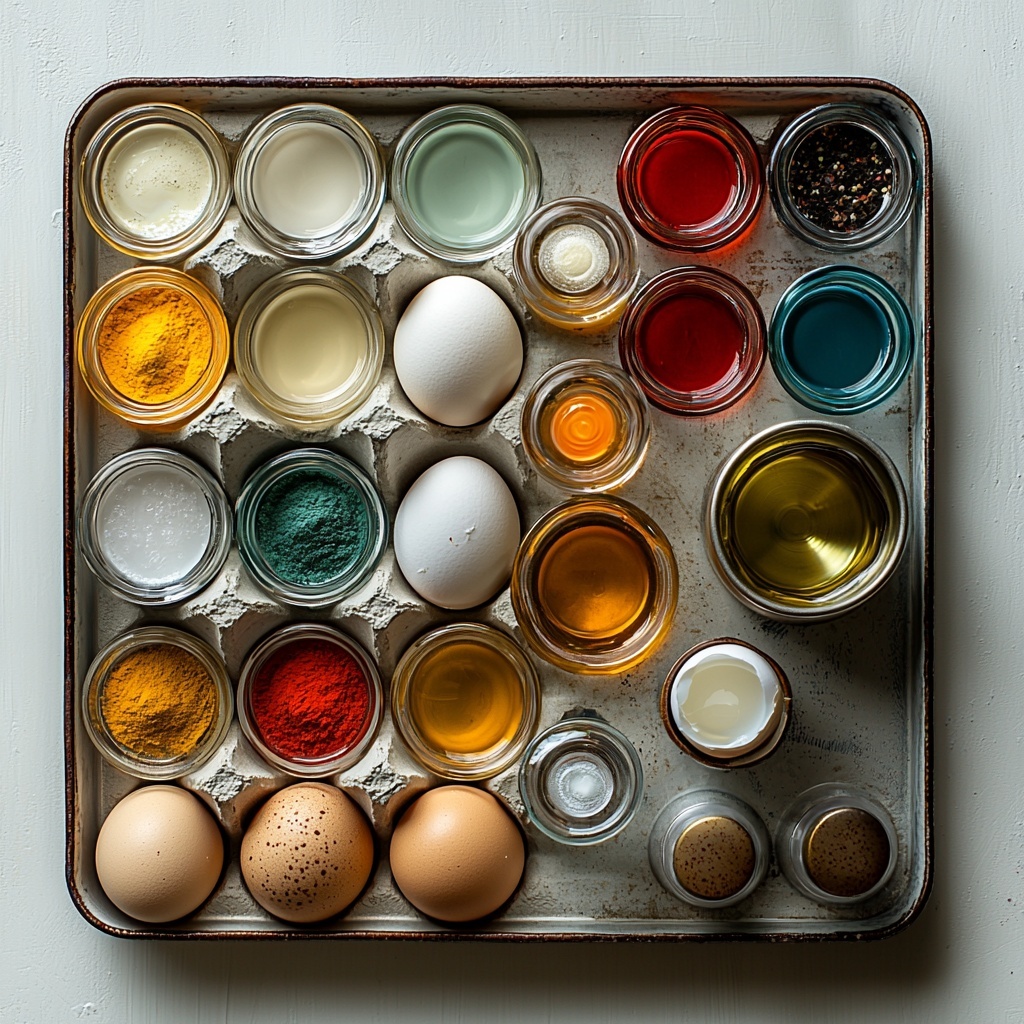
Step 7: Mix the coloring solution
In a deep bowl, combine 3 to 4 drops of food coloring gel with 2 tablespoons of vinegar and 1 cup of warm water. This mixture ensures vibrant hues that stick well to the shell.
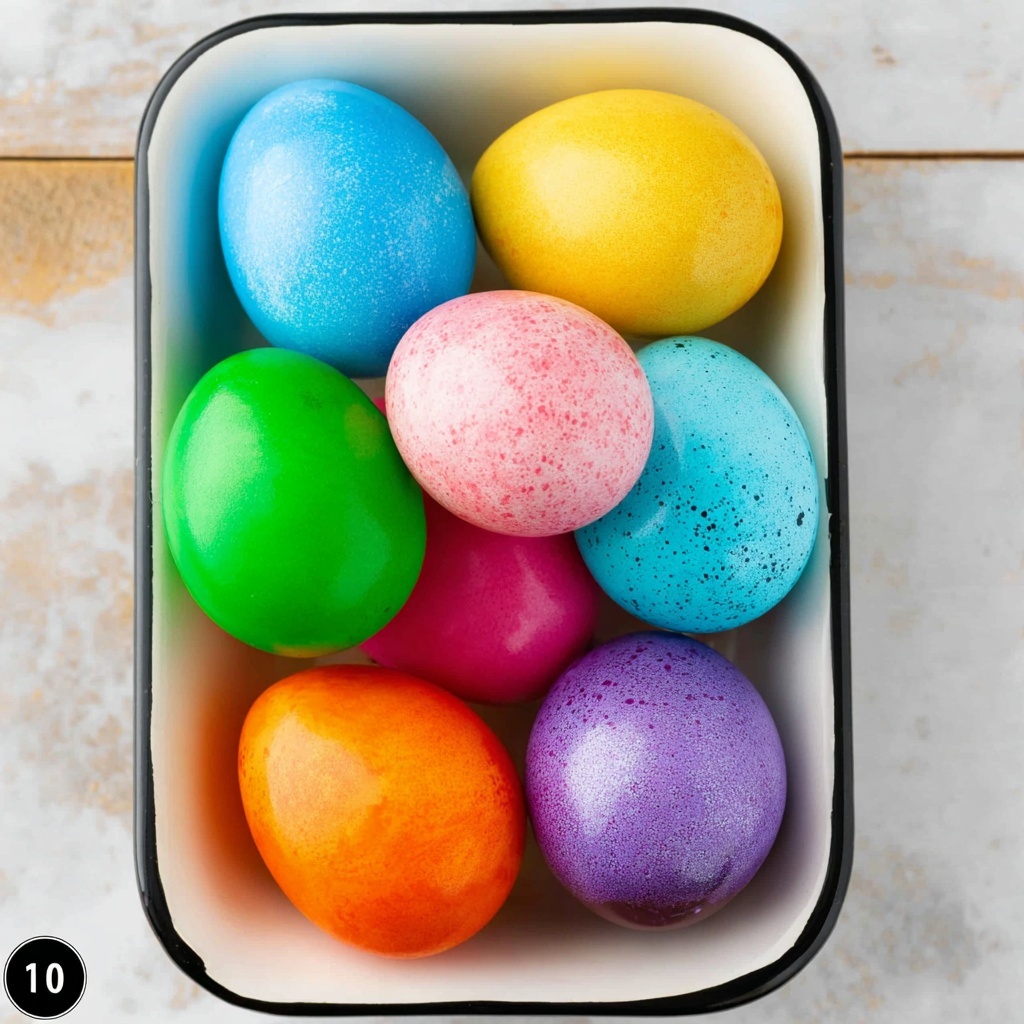
Step 8: Color the eggs
Submerge your eggs into the coloring mixture until each reaches your desired intensity. Then place them on a drying rack, allowing the color to fully set without smudging.
Step 9: Add a glossy finish
After the eggs are completely dry, rub a tiny amount of canola oil onto each shell. This step gives the eggs a sleek, shiny appearance that looks and feels extra special.
How to Serve Perfect Hard Boiled Eggs Recipe
Garnishes
Nothing beats a sprinkle of flaky sea salt or a dash of paprika on halved hard boiled eggs to elevate their flavor. Fresh herbs, like chives or dill, add a fragrant, green burst that pairs beautifully with the creamy yolks.
Side Dishes
Serve your perfect hard boiled eggs alongside crisp mixed greens or as part of a vibrant brunch platter including avocado toast, smoked salmon, and roasted tomatoes. Their mild flavor makes them a versatile companion to many fresh sides.
Creative Ways to Present
Go beyond the classic peel-and-eat by using your colored eggs in deviled egg recipes or slicing them to garnish salads and grain bowls. They also make charming, colorful additions to spring picnic spreads or holiday celebrations.
Make Ahead and Storage
Storing Leftovers
Perfect hard boiled eggs can be stored peeled or unpeeled in an airtight container in the refrigerator. They maintain their best quality for up to 5 days, making them a convenient protein-packed snack throughout the week.
Freezing
Freezing hard boiled eggs is generally not recommended because the texture tends to become watery and rubbery after thawing. It is best to enjoy eggs fresh or refrigerated for short-term use.
Reheating
Since hard boiled eggs are delicious cold or at room temperature, reheating is usually unnecessary. However, if you prefer warm eggs, gently warm peeled eggs in hot water for a few minutes—but don’t overheat or the yolks will dry out.
FAQs
Why use eggs that are 7-10 days old?
Eggs that aren’t too fresh peel more easily after boiling. Older eggs develop a slight air pocket that loosens the membrane inside the shell, making peeling a breeze and helping you nail the Perfect Hard Boiled Eggs Recipe.
Can I use this recipe for colored Easter eggs?
Absolutely! The use of gel food coloring and vinegar makes this method ideal for creating brightly colored eggs that are perfect for Easter celebrations or any fun event requiring festive eggs.
How can I avoid the green ring around the yolk?
The key is not to overcook the eggs. Following the timing in this Perfect Hard Boiled Eggs Recipe—boiling, simmering briefly, and then letting them rest off the heat—prevents that sulfurous green ring from forming.
Is it necessary to use an ice bath?
Yes! Cooling the eggs quickly in ice water stops the cooking process instantly, preserving the ideal texture and helping with peeling. It also makes handling the eggs safer and less hot.
What is the purpose of rubbing canola oil on the eggs?
Applying canola oil after coloring adds a glossy sheen that makes colors pop and gives your eggs a professional, polished look. It also helps seal the color, so it lasts longer without smudging.
Final Thoughts
Trying the Perfect Hard Boiled Eggs Recipe is like unlocking a secret that turns a humble ingredient into a versatile, stunning, and delicious staple. Whether you’re preparing a quick snack or decorating for a holiday, this method guarantees success every time. Give it a go—you’ll be amazed at how such a simple recipe can brighten up your kitchen and your meals!
Print
Perfect Hard Boiled Eggs Recipe
- Prep Time: 5 minutes
- Cook Time: 13 minutes
- Total Time: 18 minutes
- Yield: 12 servings (1 egg per serving)
- Category: Breakfast, Snack
- Method: Boiling
- Cuisine: American
- Diet: Low Fat
Description
Master the art of perfect hard boiled eggs with this easy step-by-step recipe. Learn the best technique to achieve tender whites and creamy yolks, plus tips for vibrant colored eggs using food coloring gel. Perfect for snacks, salads, or holiday decorating.
Ingredients
Eggs
- 1 dozen large eggs (7–10 days old for best results)
Coloring
- 3–4 drops food coloring gel
- 2 tablespoons vinegar
- 1 cup warm water
Finishing
- Canola oil (for shining eggs after coloring)
Instructions
- Prepare Eggs for Boiling: Place the eggs in a single layer at the bottom of a large pan and cover them with cold water so that the water is about 1 inch above the eggs.
- Bring to Boil: Heat the pot on medium-high until the water reaches a rolling boil.
- Simmer for 1 Minute: Cover the pot with a lid, reduce the heat to low to maintain a simmer, and cook the eggs gently for 1 minute.
- Turn Off Heat and Rest: Remove the pot from heat and let the eggs sit covered for 12 minutes to finish cooking through residual heat.
- Ice Water Bath: Immediately transfer the eggs to a bowl filled with cold ice water to stop the cooking process. Let them chill for at least 5 minutes.
- Peel or Store: Remove eggs from the ice bath, peel if desired, or store in the refrigerator. Ensure eggs are dry before coloring or eating.
- Mix Coloring Solution: In a deep bowl, combine 3-4 drops of food coloring gel with 2 tablespoons of vinegar and 1 cup of warm water to create the dye bath.
- Dye the Eggs: Submerge the peeled or unpeeled eggs into the coloring solution. Leave them until the desired color intensity is achieved.
- Dry and Set Color: Remove eggs from the dye and place on a drying rack to let the color set and dry completely.
- Shine the Eggs: Once dry, lightly rub the eggs with canola oil to give a glossy, bright finish.
- Storage: Store the colored eggs in an airtight container in the refrigerator for up to 5 days.
Notes
- Use eggs that are 7-10 days old for easier peeling.
- Make sure to immediately cool the eggs in ice water to avoid overcooking and greenish yolks.
- If you prefer no coloring, omit the food coloring and vinegar steps.
- Color intensity depends on soaking time; longer soak results in deeper color.
- Store hard boiled eggs refrigerated and consume within 5 days for best quality.