If you’ve ever wished that classic meringues had a burst of fun and color plus a hint of fruity zest, then this Rainbow Sherbet Meringues Recipe is about to become your new obsession. These airy, crisp little clouds of sweetness bring a vibrant sherbet-inspired palette right to your palate, making every bite feel like a party. Light as air yet packed with a mellow citrus note and a playful swirl of colors, they are the perfect Gluten-Free, Dairy-Free treat to brighten any occasion.

Ingredients You’ll Need
Creating these magical Rainbow Sherbet Meringues needs just a handful of kitchen staples — each playing a vital role in achieving that perfect texture, delightful flavor, and irresistible look.
- 4 large egg whites: Make sure they’re at room temperature for the best volume and stiffness when whipped.
- 1 cup granulated sugar: This sweetens and stabilizes the meringue’s airy structure.
- 1/2 teaspoon cream of tartar: Essential for helping the egg whites maintain their peaks and preventing collapse.
- 1 teaspoon vanilla extract: Adds a warm, comforting hint that complements the fruity sherbet notes.
- Gel food coloring in pink, orange, yellow, green, and blue: The star players for that classic rainbow sherbet vibe, vibrant without watering down the meringue.
- 1/4 teaspoon lemon zest (optional): Gently brightens the meringue with a subtle citrus zing for added depth.
How to Make Rainbow Sherbet Meringues Recipe
Step 1: Preparing for Perfection
Preheat your oven to a low 225°F (110°C) and line two baking sheets with parchment paper. This gentle temperature is key to drying out your meringues perfectly without browning them, while the parchment prevents sticking and makes cleanup a breeze.
Step 2: Whipping the Egg Whites
In a large, impeccably clean bowl, start beating your egg whites on medium speed until they become foamy and bubbly. Then, add the cream of tartar, which acts like a magical stabilizer, helping the egg whites hold onto those soft, billowy peaks we all love.
Step 3: Sweetening and Building Volume
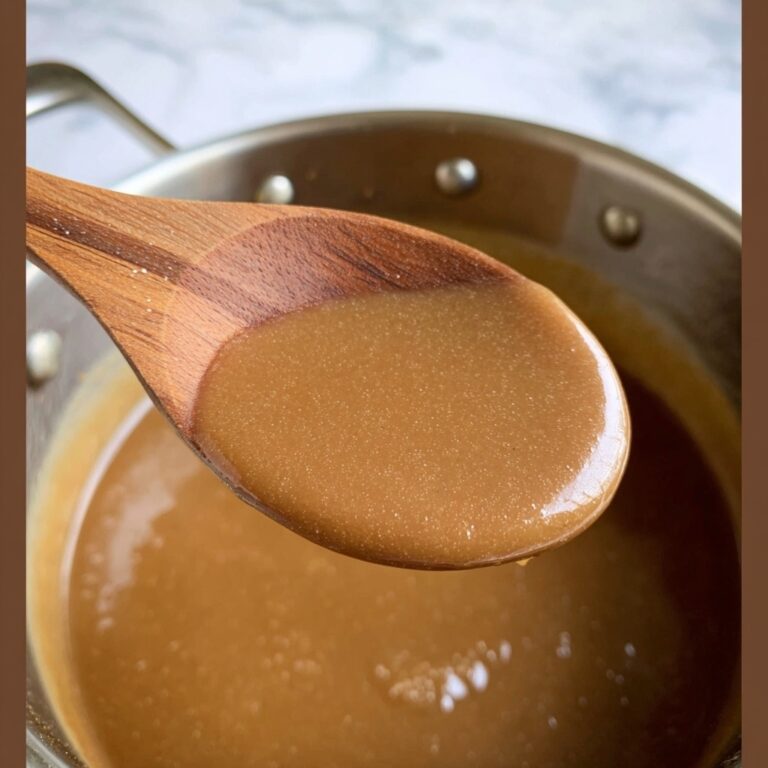
Slowly add your sugar, one tablespoon at a time, while cranking the mixer to high speed. This gradual approach ensures the sugar dissolves completely, giving you a glossy, stiff meringue that holds its shape beautifully. The shine on your meringue is an indicator that you’re on the right track!
Step 4: Flavor and Color Infusion
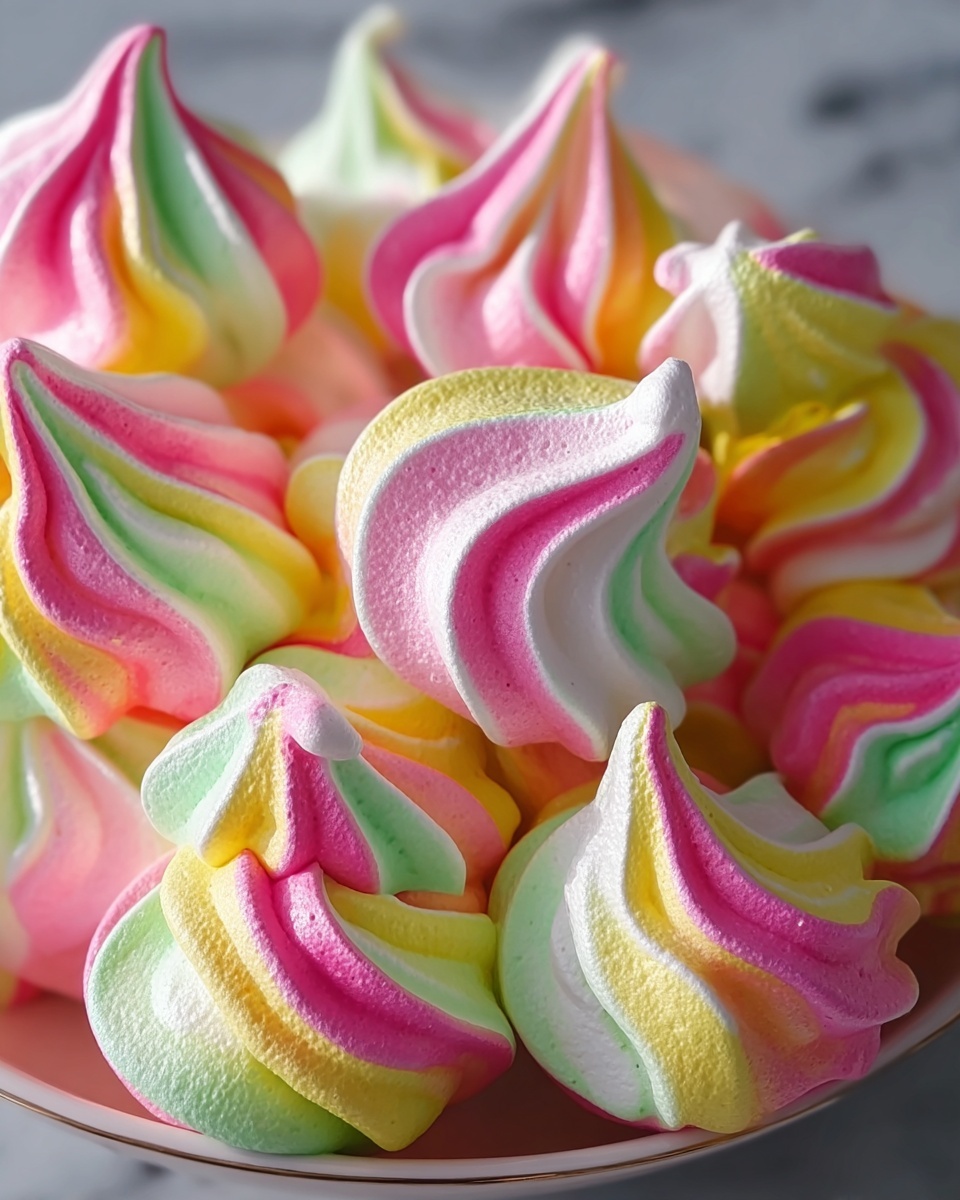
Stir in the vanilla extract and lemon zest if you’re going for that extra citrusy sherbet flair. Divide the meringue into separate bowls and tint each portion with your gel food colors — the key to rainbow sherbet magic is in the delicate swirls of color, so remember to add just enough to shade without overwhelming.
Step 5: Piping the Rainbow
Load a piping bag fitted with a large star or round tip by spooning in alternating colors carefully to create beautiful swirls. Pipe small mounds or charming kisses onto your lined baking sheets, imagining how bright and cheerful they’ll look coming out of the oven.
Step 6: Baking and Cooling
Bake for a full hour, then turn off the oven and leave your meringues inside with the door closed for another hour. This slow drying process ensures they crisp up perfectly on the outside without losing their delicate texture inside.
How to Serve Rainbow Sherbet Meringues Recipe

Garnishes
Top your meringues with a light dusting of powdered sugar or a sprinkle of finely chopped candied citrus peel to enhance their sherbet-inspired charm. Fresh mint leaves can also add a refreshing contrast and a pop of green that complements the rainbow palette beautifully.
Side Dishes
These meringues pair wonderfully with a scoop of vanilla bean ice cream or a dollop of whipped coconut cream for a lactose-free indulgence. Fresh berries add a juicy burst that balances the sweetness perfectly, creating a delightful dessert ensemble.
Creative Ways to Present
For parties or special occasions, arrange a cascade of Rainbow Sherbet Meringues Recipe meringues on a tiered cake stand to highlight their colors. You can also sandwich two meringues around a layer of lemon curd or fruit preserves for an elegant twist everyone will remember.
Make Ahead and Storage
Storing Leftovers
Keep any uneaten meringues in an airtight container at room temperature where they can stay fresh and crisp for up to a week. Avoid humid environments as moisture will soften their delicate texture.
Freezing
Meringues freeze quite well! Place them in a single layer on a baking sheet until frozen, then transfer to a freezer-safe container or bag. When you want to enjoy them, just thaw at room temperature — no reheating required.
Reheating
Because meringues are best enjoyed crisp and cool, reheating isn’t usually necessary. However, if you find they’ve softened, a quick 5-10 minute stint in a low oven at 200°F (95°C) can help restore some crispness without browning.
FAQs
Can I use regular food coloring instead of gel?
Gel food coloring is recommended because it adds vibrant colors without loosening the meringue. Regular liquid food coloring can add extra moisture, which may affect the texture and baking results.
Why do meringues sometimes turn out sticky?
Sticky meringues often mean they didn’t dry out fully or the environment was too humid. Make sure to bake at a low temperature and allow them to cool completely in the oven with the door closed to dry thoroughly.
Can I add flavors other than vanilla?
Absolutely! While vanilla complements the sherbet theme beautifully, feel free to experiment with orange or raspberry extracts to highlight fruity notes reminiscent of real sherbet.
How do I achieve the rainbow swirl effect without mixing the colors?
Gently spoon colored meringues side by side into the piping bag without fully blending them. This technique lets the colors swirl and create that beautiful tie-dye sherbet appearance when piped.
Are Rainbow Sherbet Meringues suitable for special diets?
Yes! They are naturally gluten-free, dairy-free, and vegetarian, making them perfect for many dietary needs while still being a delicious indulgence.
Final Thoughts
I can’t recommend enough giving the Rainbow Sherbet Meringues Recipe a whirl the next time you want a dessert that’s as joyful to make as it is to eat. These colorful, delicate treats capture the carefree spirit of summer and the nostalgia of sherbet in a way that’s truly unforgettable. Once you try them, you’ll want to share the recipe with everyone you know because good things like this deserve to spread happiness far and wide!
Print
Rainbow Sherbet Meringues Recipe
- Prep Time: 20 minutes
- Cook Time: 1 hour
- Total Time: 2 hours
- Yield: 36 meringues
- Category: Dessert
- Method: Baking
- Cuisine: American
- Diet: Gluten Free
Description
These Rainbow Sherbet Meringues are light, airy, and beautifully colorful treats that melt in your mouth. Perfectly glossy and sweet with a subtle hint of citrus, they make a whimsical dessert or party treat that is gluten-free, dairy-free, and vegetarian. The delicate swirls of pink, orange, yellow, green, and blue create a sherbet-inspired look that’s as fun to make as it is to eat.
Ingredients
Egg Mixture
- 4 large egg whites (room temperature)
- 1 cup granulated sugar
- 1/2 teaspoon cream of tartar
- 1 teaspoon vanilla extract
- 1/4 teaspoon lemon zest (optional for a citrus hint)
Coloring
- Gel food coloring in pink, orange, yellow, green, and blue
Instructions
- Preheat and prepare baking sheets: Preheat your oven to 225°F (110°C) and line two baking sheets with parchment paper to prevent sticking and ensure easy removal of the meringues.
- Beat egg whites: In a large clean mixing bowl, beat the egg whites on medium speed until they become foamy and start to form soft peaks.
- Add cream of tartar and sugar: Add the cream of tartar to stabilize the egg whites. Gradually add the sugar one tablespoon at a time, continuing to beat on high speed until the mixture is glossy and firm peaks form.
- Flavor the meringue: Beat in the vanilla extract and the optional lemon zest to add a fresh citrus aroma and depth of flavor to your meringue base.
- Divide and color the meringue: Separate the meringue evenly into several bowls. Tint each with a small amount of gel food coloring—pink, orange, yellow, green, and blue—to create vibrant sherbet colors.
- Prepare piping bag: Fit a piping bag with a large star or round tip. Spoon alternating colors of the colored meringue gently into the bag to create an attractive swirl effect when piped.
- Pipe meringues: Pipe small mounds or kisses onto the prepared baking sheets, spacing them slightly apart to allow for expansion during baking.
- Bake meringues: Bake in the preheated oven for 1 hour to dry and set the meringues without browning.
- Cool in oven: After baking, turn off the oven and leave the meringues inside with the door closed for another hour. This additional drying time inside the warm oven ensures a crisp texture.
- Store properly: Once cooled completely, transfer the meringues to an airtight container and store them at room temperature to maintain their crispness until ready to serve.
Notes
- Avoid making meringues on humid days to prevent them from becoming sticky or chewy.
- For a sherbet-inspired look, lightly swirl the colors instead of mixing them fully to maintain distinct vibrant shades.
- Add a hint of orange or raspberry extract to the meringue for an enhanced fruity flavor that complements the sherbet theme.